Dragon Warrior II/Rhone
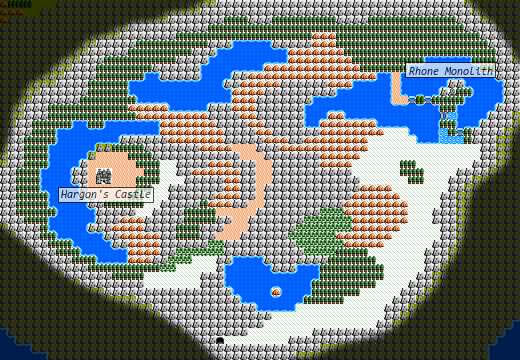
The death land of Rhone[edit]
Your party has finally arrived in the frozen tundra known only as Rhone. This will be the stage of your final strike against Hargon. But don't expect to march right up to Hargon's Castle, bang on the door, and challenge him to a fight. You're going to need to spend quite a bit of time in Rhone training and honing your skills. Although you may have been strong enough to make it through the cave that leads to Rhone, embarking on the journey to Hargon's castle will take considerable more strength and skill than you may possess. As a result, you will need to find a safe place to camp, and dedicate time to increasing the level of your party.
Fortunately for you, an excellent place exists for just such a purpose; the Rhone Monolith. In there, you will find two people. One is a monk who not only records your journey to a save file, he automatically restores your health and magic points for you completely! The other person informs you that the Travelers Gate at the bottom of the monolith is a one way journey that will lead you back to the rest of the world. Only make this journey if you are sure you forgot to collect something important, as you will have to traverse the Cave to Rhone in order to return.
Stay very close to this monolith and start fighting the monsters that you encounter here. Between the Blizzards, Giants, and Batboons, you will have quite a fight on your hands, but the good news is that you will typically be rewarded close to a thousand experience points, if not more, for each successful battle. As long as you don't stray too far from the monolith, you can easily return and have all of your hit points restored between battles. Keep at it, and eventually you will get stronger and be capable of remaining outside of the monolith for longer and longer periods.
You'll have to watch out for the very powerful Bullwongs, as they can cast Explodet and do tremendous damage to your party. The Gold Batboons can cast Firebane, and the seemingly simple Blizzards are capable of casting Defeat, which has the small chance of instantly killing one or more of your party members. However, Blizzards also seem highly susceptible to the same spell when it is cast by the Prince of Cannock. If you happen to find the area near the monolith too difficult, try traveling back south, closer to the mouth of the cave.
When you have gained a substantial amount of the levels (most players recommend that the Prince of Midenhall be as close to level 30 as possible), you can begin the trek to Hargon's Castle. To reach the castle, you must journey to the very north of Rhone, and then to the west. Eventually the trail will begin to veer south a bit, and you will reach a fork in the road. You can take either the west route or the east route, but the west route is generally a bit safer since it doesn't have you passing through any hills which increase the likelihood of encounters. When you reach the southernmost portion of either trail, you will double back to the north to enter the doors of Hargon's Castle.
Hargon's Castle[edit]
After you successfully make the journey to Hargon's Castle, you may be very surprised by what you find inside... it looks quite a lot like the kingdom of Mindenhall! Everything appears the same, even the Prince of Midenhall's father, the king stands by the staircase. But looks can certainly be deceiving. If you notice, the stairs and the Travelers Gate don't work. Clearly this place is an illusion. How how can the spell be broken?
If you remember what many villagers have told you, the magic of Rubiss can protect you from illusions. If you have the Charm of Rubiss, you can use it now to break the spell cast over the castle and reveal its true form. Of course, you can only obtain the Charm if you have successfully collected all five crests. See the crests page for more information.
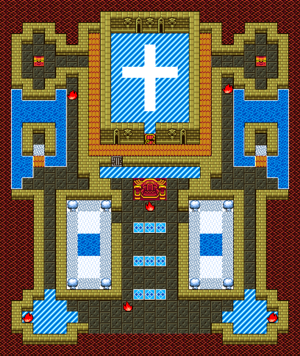
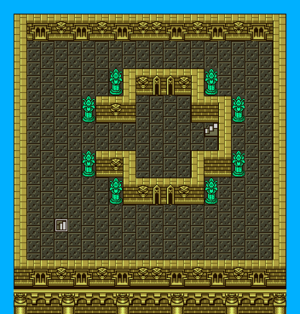
Breaking the spell is only half the battle. Just as with the Dragonlord's castle in the first Dragon Warrior, Hargon's Castle is no cinch to break into. With the illusion broken, you must now figure out how to navigate your way to the next level of the castle. The way in is not so obvious. If you take the time to explore some of the regions to the left and the right, you will find two alcoves on either side. You'll have to cast Stepguard to visit them safely. When you step inside the left alcove, the way to the top of the castle will be revealed to you: there is a prison door all the way to the left above the throne. Head over, cast Stepguard, and unlock the door. Cast Stepguard again, and proceed inside. There are two treasure chests to the left and right, but both of them contain cursed relics and are not worth the time to examine. Instead, head for the center of the hallway, and open the door above with the gold key. Finally, you will have access to the center chamber which is largely composed of deadly barrier tiles, so cast Stepguard one final time. Now that you've made it this far, it is not necessarily clear how to proceed, but you have an item in your possession that once helped you open a hidden pathway. Perhaps it will help once more.
The center of the room can look different depending on the version of the game you are playing. In some versions, it appears as a cross, while in other versions it may appear as squares. Regardless of how it looks, stand in the center and use an item which you worked very hard to obtain, the Eye of Malroth.

Once you gain access to the second floor, you may be surprised to find that the layout inside is not all that complicated. A few chambers are sectioned off, but the way to proceed should be fairly clear, as there aren't many choices. The monsters that you face are some of the toughest available, including Berserkers, Mace Masters, Green Dragons, and even an occasional Metal Babble if you're lucky. Try not to get embroiled in too many fights, as your magic and health are a precious commodity in this castle, and you won't want to have to make more return trips than necessary. You're going to need to preserve as much power as you possibly can because Hargon isn't the only strong opponent who awaits you.
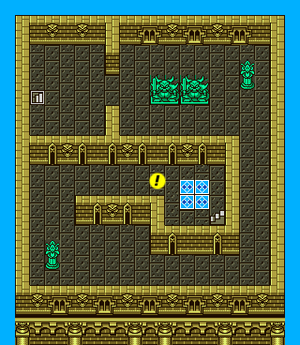

As soon as you reach floor four, you may notice a strange absence of enemies. However, as soon as you approach the stairwell that will take you to the fifth floor, you will encounter your first forced encounter with the boss monster known as Atlus. Atlus appears as a red Giant, and he is without a doubt one of the physically strongest foes you have yet to encounter. There's not a lot of strategy that applies to fighting him. He will frequently make two devastating attacks on the same player, so make sure that you have the Princess of Moonbrooke cast Healall on the unfortunate victim to keep them from dying. Once you defeat Atlus, you can proceed to the next floor.
Note: When playing the game, you can cast Outside and Return to heal and save your game, and if you return to the castle without resetting the game, or turning your console off, the bosses will remain defeated. The will, however, return to their previous locations if the game is reset in any way.
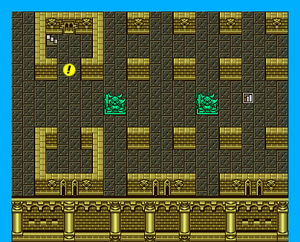

The fifth floor is another strange collect of chambers. Not only must you figure out how to access each one, you'll have to discover which one contains the staircase to the sixth floor. (On the original NES version, you must approach the upper left chamber from the left side.) When you find the correct chamber and approach the stairs, you will be ambushed by the second boss monster, Bazuzu. Bazuzu looks like a purple version of the Batboons, and he is substantially more deadly than a Gold Batboon. He knows a dazzling array of spells from Explodet to Defeat, as well as a natural fire breathing ability. Keeping up with the damage dealt by Bazuzu is much more difficult than during the fight with Atlus and you may need to involve the Prince of Cannock to keep up with the healing.
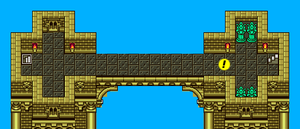
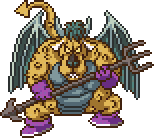
With Bazuzu defeated, you are free to climb to the sixth floor, which has a rather simple layout along with the third and final boss monster, Zarlox (Belial), a super version of the Bullwong arch demons. Zarlox (Belial) is like Atlus and Bazuzu combined; a representation of fierce physical strength combined with unsurpassed magical ability. On top of everything, Zarlox is capable of casting Healall and will do so at seemingly unfortunate moments during the fight. It will take a great deal of patience, as well as a bit of luck when it comes to timing and healing, in order to defeat Zarlox, and gain the ability to climb up to the seventh and final floor, where you will encounter Hargon.
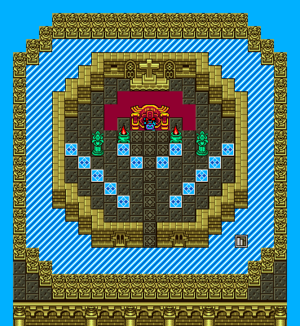

It should not come as much of a surprised that Hargon has trapped his throne room with the dangerous barrier tiles, but one quick cast of Stepguard will easily solve that problem. After you've healed all of your wounds from the Zarlox fight (and used any Wizard Rings to restore lost magic points if you have them,) feel free to march right up to Hargon and challenge him. After working this hard to reach him, it's now or never. Hargon will question your brazen audacity and ask you if you know who he is. Regardless of your response, you will enter into battle with Hargon. The usual strategies apply, attack with the Princes, and use the Princess to heal wounds whenever necessary. Hargon isn't particularly difficult to fight, he simply uses Healall quite a bit. He's rather resistant to magic, but he is surprisingly vulnerable to magical items such as the Staff of Thunder, so use them on him whenever you have a chance to attack with more than just the Prince of Midenhall.

Once Hargon is defeated, you will of course learn that Hargon wasn't the one in charge after all. One stronger than he has been pulling the strings. After Hargon disappears, make sure that you heal up as much as possible before you attempt to travel back to the stairwell. You can make the attempt, only to be stopped by a ring of flame. All of a sudden, Malroth will appear to challenge you. Malroth is everything you'd expect him to be as the final boss in the game; exceedingly strong, with access to the most damaging spells. The fight against Malroth will be quite similar to the fight against Hargon, only longer. It would be a good idea to cast Defense whenever a turn occurs when healing isn't necessary (which is rare.) It won't always work, but it can be helpful to allow the Prince of Cannock to do greater damage than normal. If you are able to defeat Malroth, you will have saved the world. You can then travel to the Castle of Midenhall, where your adventure started, for a king's welcome home, and view the ending of the game. Congratulations!
