Half-Life 2/Route Kanal
Welcome to Route Kanal, the third level of Half Life 2.
“Outbreak, outbreak, outbreak!”[edit]
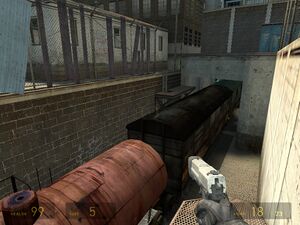
The first proper level, Route Kanal is the first real test of a player’s skill. On the wall in front of you is a health terminal. Recharge; you should be at full health. Continue down the corridor, where you see a couple of CPs administering justice to a couple of civilians. Sprint up to them and lay into them with your crowbar, giving you the pistol. Pick it up and run back to the health point if need be. Continue past the citizens and up the stairs where you meet another cop going the other way. Shoot or hit him. Obviously you should go for headshots, which is much easier thanks to the bright white helmets they wear.
Carry on up the stairs killing another cop and you come out overlooking the train tracks. No way across apparently, until you see a train coming in the distance. Stand where you are and wait for the train to go past. Don’t jump on until it stops moving (you just get dragged down the tracks and slam into a forcefield, killing you.) It grinds to a halt and you can jump across on the last car (a red cylinder) just as some more cops come up on the side you just came from. Kill them, remember to use the explosive barrels to your advantage. Two shots sets them on fire and they explode approximately 5 seconds later, with a third shot blowing up the barrel instantly. Crowbar your way into the ruined building, looking in the gaps in the floor for some ammo boxes and health. Exit out the door to the right of where you came in and continue through the room. Back out in the open, two CPs target you from above, this time standing next to a cart filled with explosive barrels. Obvious surely.
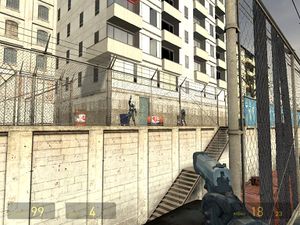
Next is a damaged fence you can jump up and over and drop back down to face more CPs on the opposite side. Use the iron sheets pinned to the wall for cover. With the cops dispatched continue right towards some shipping containers (red and blue). There is a crawl space in one of them which you crouch through and drop down to the tracks. The bright yellow Black Mesa logo makes it clear where it is. This yellow lambda badge is the call-sign of the resistance. It crops up throughout the game and is an indication of a hidden way forward or a weapons/health cache.
Go through the crawl way and back into the open where yet more cops assault you at range. With them dispatched, drop down to the tracks. A forcefield in the distance blocks the direct route so turn right and almost immediately you see a CP at the top of some stairs waiting to roll an explosive barrel at you. Blow it up before he can do this and run up the stairs with two or three more cops to kill. Continue around as far as you can go, up some stairs across a walkway and down again, coming out the other side of the forcefield. This time 3 cops come at you from both behind and in front, but there is plenty of health and ammo scattered around. Kill those coming up behind you first and with them dispatched the other CPs should be in range for accurate shots. Now you need to head towards the canal. Good job you’ve got the hazard suit as you need to jump into the polluted river.
“The main station’s just ahead!”[edit]
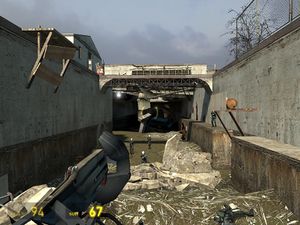
Swim up the river until you come to a large red train car blocking your way. Hidden on the left is a ladder leading up to the roof where you can drop in on the citizen and Vortigaunt. Listen to them and get a quick energy boost before going through the door they show you. Avoid the fire and crowbar down the blocking, also being mindful of the barnacle above. You can shoot it, but it is easier (and doesn’t waste ammo) to get out the crowbar and deliberately get caught on its tongue. Swing the weapon above you when in range, resulting in an instant kill. Or simply run round it. You come upon a battle between rebels and the CPs. Don’t stay out in the open too long, as the cops have a mounted gun in place that will cut you to shreds. Make a sharp right as soon as you come into the main arena and climb into the sewers where you saw a rebel being killed by a CP. Run up the tunnel and you come up in a room filled with health and ammo. Climb the ladder to come up behind the mounted gun and dispatch the cops.
You’ll need the mounted gun as another wave of officers arrives and this is the best way to deal with them. Again plenty of explosive barrels are around so put them to good use. There is a single barrel on a ledge to your right which you have to blow up to create a bridge to continue down. You can tell when to leave when an APC zooms up the side and starts launching rockets. Run down the side path to the right of the gun forwards over the pile of rubble into another open space. Look out for the lambda symbol on the left and find the supplies by jumping over the red car next to it. Take a sharp left past a citizen crouching in a pipe. You find yourself in a series of large vertical cylindrical rooms. The first room has a couple of cops standing overhead on a grate. You might dispatch one of them if you’re very quick but they’ll probably just get away. In the second room, you’ll find water on the floor. Drop down and watch the cops from earlier throw a couple of barrels down. Even if you shoot them, you can’t blow them. Wait until a burning one appears then dive under water. Stay there until the explosions have finished then surface and kill the CPs. Continue forward until you come out into a new arena. Some cops decide the best way to attack is to stand on a rickety bridge with explosive barrels under it.
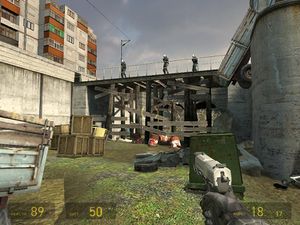
Blow these up to kill them all. The next room has a floor covered in some kind of grease meaning that you keep sliding even after you stop pressing forward. This is made more difficult by the barnacles hanging on the roof. The best thing to do is to use the explosive barrel nearby. Throw it down to the slope towards the barnacles. When one of them latches onto it shoot it twice, setting it on fire. When it explodes, the blast should kill most if not all the barnacles. Travel down the slope towards a deep area of water. A large wooden board is in front of you and you’ll need that as 4 or 5 CPs can be found overhead shooting down onto you. Hide behind the panel, swim down, around it and up shoot a cop or two and then back under and behind the ramp to reload and recharge. When all the CPs you can see are dead, head towards the ladder on the far wall and use the platforms as stepping stones up to the sewer entrance. More cops will probably appear and drop explosive barrels down on you. If you’re getting cut to pieces, dive under water - harder to be hit. Get round the platforms up to a tunnel into an underground room.
Meet the Helicopter[edit]
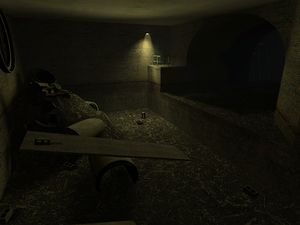
In the new area you have a seesaw as the only path forward, but the wrong end is pointing up. You need to weigh down the other. To do so, pick up the bricks scattered around the area and put them on the end of the seesaw you wish to push down. Put them as far from the middle as you can - this increases their overall force (force = mass x acceleration). You’ll probably need pretty much all the bricks, and they’re scattered everywhere. Eventually you will be able to climb to the top but don’t rush out blindly. A helicopter hovers down. Stay in the shadows to avoid it. This hunter-chopper will be following you for the rest of this and the next level. When it is gone make a left then a left again. The copter will be following you and shooting. Past the ruined gate, shoot the barnacle, don’t get caught by it (it leaves you in the open and defenceless) and move the barrels out of the way and get through the door.
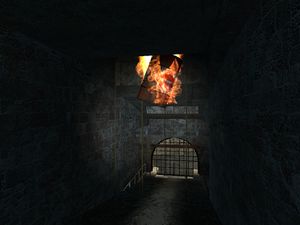
Opposite you is a ladder. Climb down it and pick up the health and ammo at the bottom. Return up, and move up the slope, turning left at the top. There is a pool of water with a low ceiling with a dead body, explosive barrel and health at the back of the room. Return back and walk to the right of the upper level.
Here you see a greased slope with a collection of barnacles. Throw the explosive barrel down the slope and shoot it twice when the barnacles pick it up. Follow it down the slope and jump over the railings to the next room, which has exactly the same setup. Repeat. Open the door and run to the left, where the helicopter can shoot at you for the first time.
“Thank God you’re not the guy they’re looking for…”[edit]

Move forward down the corridor being wary of a couple of explosive barrels, until you come up to a secret depot for the railroad. Before you can carry on, the area is invaded by manhacks. Copy the citizen and use your crowbar and lay into the ‘hacks (making baseball/cricket noises optional, but encouraged). Later in the game, the gravity gun or shotgun become more useful. With the robots fought off, look to the left of the door you came through and climb the ladder, searching the two overhead areas for both health and ammo.
Move down the corridor the manhacks came from to find a door with manhacks the other side. You can either shoot them or open the door and use the crowbar. Beware that there is a gap at the top through which they can fly. With them dispatched, carry on down the hall. At a corner beware of manhacks moving through a series of explosive barrels. When you see them, sprint the other way and wait for the explosions to clear them. Further on there are two doorways. The second one is a room with some health and ammo, the first the way forward. Here you are in a walkway with two cops overlooking your position. Kill them, then turn round to fight some manhacks attacking from above. With these dispatched move forward. Don’t drop to the ground, instead jump on the large pipe by the red light. Destroy the grill in front of you and crouch through the air vent, watching out for a manhack ahead to reach a secret room with ammo and health. Go back through the air vent and you’ll see a cop standing next to an explosive barrel. Dispatch him and drop to the floor of the tunnel where three CPs will drop down on ziplines in front of you. These are the first enemies you’ll meet with SMGs.
Keep using the pistol to save the currently rare SMG ammo. With all the cops gone, look to the base of the big rusty pipe. Beside it, through a low tunnel is some health and ammo. Turn around, exit the low tunnel and carry on forward until you come to a pool of water with a large rotating wheel in the middle. Jump in and swim through the door underwater on the left. There is an air hole halfway along. You come out near a large pipe. Follow it past the scanner that flies at you around to the left where three more CPs are waiting, along with manhacks. Kill them all, collect the small case of ammo and suit power, go back up the stairs with the barnacle over them and jump on the pipe. Go back the way you came, towards the jets of steam, avoiding these and the barnacles (getting caught on the tongue immobilises you in the steam). When you can go no further look on the right hand wall for a lambda logo near some rotten looking planks on the wall and destroy these and drop down into the gap with another small swimming space.
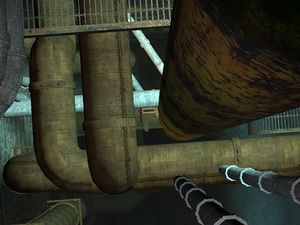
Swimming through here brings you out just in front of a combine ambush, where two cops man an explosive-barrel-filled trailer. If the barrels are too close jump back into the water to escape from most of the damage. There are three more CPs around the corner and a swarm of manhacks the other side of the door. With these dispatched, destroy the air vent cover and crawl inside. Move down this until it seems you can go no further then destroy the floor. You drop into a room with explosive barrels and manhacks. Move near the ladder and shoot one of the barrels twice. Drop down the ladder into the water below and wait for the explosions to end. Remain in the water to kill the rest of the manhacks as they move slower in liquids. Climb to the top of the ladder and jump to the central pipe and across to the opposite side. In the next room you have to reach the red turn valve half way down by jumping from pipe to pipe.
From the location on the screenshot, fall down to the two large orange pipes then the bright white double pipe. From here you can jump to the valve, turning it to release the water. Return to the room where you fought the manhacks, go down the ladder and through the now accessible drain. At the bottom of the next room are a series of boxes and wooden wheels trapped at the floor with planks. Use the crowbar to destroy the planks and let them float to the surface. Use “use” to reposition them and make a bridge.
Your ride, sir...[edit]
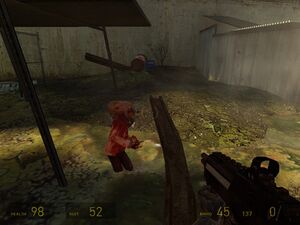
Exit the room, climb the ladder, walk across the plank and drop down on the other side of the fence. You will be assaulted by more CPs and manhacks. Move towards them, climbing to the ledge on the left. Go to the end of the passage for some health and ammo hidden behind some barrels and barnacles. In the main room climb the ladder. With the first lambda logo to your right, follow the makeshift walkway until you reach the second lambda logo.
Drop down and move out into the open, avoiding the poisonous radioactive liquid. Go up the planks on the left and walk across the pipes for a dead rebel and another lambda logo. Drop back to safe ground and move towards the rebel, looking out for the crate of SMG ammo that never runs out. Go towards where the headcrabs came from and watch as shells come down. Each headcrab rocket has 3 crabs in them so there will be that many in the vicinity. Carry on round, killing the crabs as you go. Any zombies you see lying down may not be dead but simply resting. They also have the habit of rising up from toxic sludge.

When you reach the electrified shipping crate, lure the headcrabs in and wait for them to touch the walls. Eventually you reach an open area. Turn left and follow the wooden walkway to reach the airboat dock.
Climb in the vehicle and travel down the river following the bend. The gate can be cleared by stopping the airboat to the right. Move round to the pile of boxes being aware of the headcrab lurking behind them. You must turn the crank until it stops to lock it in place. Climb back in the boat and continue on to Water Hazard.