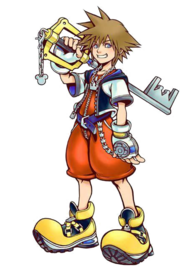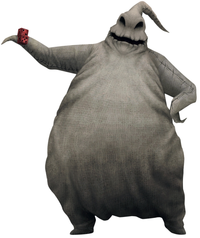
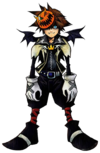
Halloween Town is a world based on Tim Burton's classic stop-motion film The Nightmare Before Christmas. Similar to Atlantica, Sora's, Donald's, and Goofy's appearances change based on the environment - Sora becomes a vampire, Donald becomes a mummy, and Goofy becomes Frankenstein's Creature.
Making a Heart[edit]
From where you begin, go forward to Guillotine Square. Pass the Heartless positioned in front of you and jump up a level. Go around to your right for a cutscene, where you'll be able to see Jack Skellington, who says he's going to talk to the doctor. Keep going to come across a door marked Lab Entryway. Go up the stairs to enter the Research Lab. After a cutscene, you'll see that Jack Skellington wants to make a heart for the Heartless so he can make them dance. Sora, seeing no harm in this, decides to help. After the heart fails, the doctor suggests finding Sally, who has memory. After the cutscene, you will get your next mission (find Sally) and also a new optional party member, Jack himself.
You can now leave the Lab and go back to Guillotine Square to begin your next mission, but not before you're stopped by the Mayor for a cutscene.
Necessary Ingredients[edit]

Predictably enough, the Heartless have gotten out of control. Instead of ignoring them, you'll now have to fight them. Your next destination will be up a set of stairs leading to a gate. The gate should be labeled Graveyard. Here, after taking care of the Heartless, you'll find both Zero (Jack's loyal pet ghost-dog) and Sally, the person you were in search of. After this cutscene, you'll get what you needed (Forget-Me-Not). Now go back to the lab and talk to the doctor. After taking Forget-Me-Not, he'll tell you that one more ingredient is needed - Surprise - and that the Mayor should know where it is. Now leave the lab and go back to the Graveyard. Jump on top of the coffin at the end of the Graveyard and Examine (![]() and
and ![]() ). This will take you to a new location, where you'll find the Mayor. Now will be a small mini-game-esque sequence in which you'll have to Examine the tombstones in the order the ghosts appear. Now he'll tell you to look at the pumpkin, which is a large orange platform across from him. Atop it will be a treasure chest. Open it to obtain Jack-in-the-Box. Now go back to the coffin you came from (it's hiding behind the pumpkin) and Examine it to go back to the Graveyard you were in before. Go back to the Research Lab and talk to the doctor once again. A cutscene will follow where Lock, Shock, and Barrel steal the heart for their boss, Oogie Boogie. Your next task will be to get it back.
). This will take you to a new location, where you'll find the Mayor. Now will be a small mini-game-esque sequence in which you'll have to Examine the tombstones in the order the ghosts appear. Now he'll tell you to look at the pumpkin, which is a large orange platform across from him. Atop it will be a treasure chest. Open it to obtain Jack-in-the-Box. Now go back to the coffin you came from (it's hiding behind the pumpkin) and Examine it to go back to the Graveyard you were in before. Go back to the Research Lab and talk to the doctor once again. A cutscene will follow where Lock, Shock, and Barrel steal the heart for their boss, Oogie Boogie. Your next task will be to get it back.
The Stolen Heart[edit]
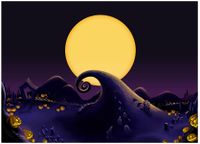
Leave the Lab to return to Guillotine Square for a cutscene. Jack summons Zero to lead the party to the culprits. He'll lead you back to the Graveyard. Here, a cutscene will be shown featuring Lock, Shock, and Barrel getting away by crossing Moonlight Hill, an iconic location from the movie. Once again, go to the coffin in the back and Examine it to end up in the same location as before. Examine the statue to open a new passage to a new location. Examine the hill for a scene in which the party walks across it. Simply cross the stone bridge here to be taken to Oogie's Manor.
The bridge that leads to Oogie's Manor seems to be worn and torn apart. Be careful not to fall off, because there's a climb up. This applies for the rest of the Manor - the farther you get through the mansion, the higher the climb will be. Fight the Heartless in front of the door to gain the option to Examine it. Lock on to the elevator in the room with ![]() and shoot Fire at it to get it to start moving. Take a ride on the elevator to get to a higher level. Follow the path of the bridge upward and then jump up the stairs. Here will be a large stone circular platform. Go to the right of it, follow the path and climb up the next set of stairs. At the end of this bridge will be the Evil Playroom.
and shoot Fire at it to get it to start moving. Take a ride on the elevator to get to a higher level. Follow the path of the bridge upward and then jump up the stairs. Here will be a large stone circular platform. Go to the right of it, follow the path and climb up the next set of stairs. At the end of this bridge will be the Evil Playroom.
- HP: 150, 120, 180
- EXP: 180, 120, 240
The trio is fairly easy to defeat; begin by taking out Lock and his annoying slingshot attack. He will leap very high to avoid you. Then change your Lock on to Shock; be careful when she goes into her spinning attack. Jump, dodge, or guard to get out of the way, then blast her with Fire or Blizzard magic to slow her down. When you finish with those two, begin attacking Barrel, as he has the most HP; it may take a few extra hits. Barrel's special move is a cannonball sprint; it is possible to stop him but good timing is crucial. It is a good idea to have a Potion or two at the ready, or Cure magic on your shortcut menu as having multiple enemies can make your Guard ability more or less worthless. Make sure you defeat them in that order or you won't receive as many Experience points. It is suggested to try to corner most of the enemies.
After the battle, hit the switch in the Playroom, return to the manor and proceed to the final boss battle: the battle with Oogie Boogie.
Oogie Boogie[edit]
From the bottom of the mansion jump to the platform on the left.(if you're looking at the doorway). Examine the doorway on the platform it will take you down to a new level to reach a green door with Oogie's face on it. This is the entrance to the Torture Chamber. A cutscene will show Jack demanding Oogie give the heart back, and Oogie swallows it, thus gaining full control of the Heartless.
- HP: 450
- EXP: 2500
The fight takes place in the Torture Chamber, a circular room with two levels, a higher level and a revolving platform (somewhat like a wheel) beneath it, in a pit, with all sorts of traps. Oogie begins by sending the player into the pit and begins throwing exploding dice as well as summoning Gargoyle Heartless although he can summon very few. Periodically, he will throw seemingly harmless dice (they too are explosive, but are not enveloped in flames like the rest) - Sora must hit these dice back to damage Oogie, which is worth 24 experience points.
When the wheel turns, Oogie will send out many traps - blades fixed on supporting structures, a frisbee-like blade - and a row of slot machines with cowboy heads to shoot Sora and company.
Oogie's attacks depend on what number he rolls:
- 1 × 3: A circular saw appears and spins throughout the area. Avoid them by Dodge Roll or jumping.
- 2 × 3: 2 Gargoyles appear.
- 3 × 3: 2 Wight Knights appear.
- 4 × 3: 3 Hanging scythes appear and rotate. Dodge them by jumping or running.
- 5 × 3: 2 Search Ghosts appear.
- 6 × 3: Oogie Boogie recovers HP.
When he stops attacking and a circle of switches that are in the middle of the pit begins to glow, Oogie will start running around the higher level so the player must carefully time which switch to hit. When a switch is activated, two gates will emerge from the floor and trap both Sora and Oogie as well as causing the section of the pit that Sora activated to raise making it possible to attack Oogie. You will need High Jump to reach him. If the platform rises, Sora and company will not be able to jump over the fences. After doing enough damage Oogie will force Sora back into the pit and the cycle repeats itself. Sora cannot influcence when the switches activate in any way.
Oogie will occasionally attack with a slapping attack when Sora is close enough to inflict very minor damage. Sometimes Oogie will just stand in one spot, while purple smoke forms around him. When he does this he is healing some of his HP
Sora can use the Thunder spell even while he is in the pit to damage Oogie Boogie, though it is not a very efficient method of damaging him. Just be sure to heal when necessary.
After the battle, Oogie Boogie seems to be dead - only for the party to rush outside and find that Oogie Boogie has become his mansion, and that he has been overtaken by darkness.
- HP: 90
- EXP: 2500
This is one of the only boss battles where you can enter and exit the arena at will in Kingdom Hearts. There are two possible exits; one on the Bridge, and one at the creek on the left side, once Sora jumps down.
When traveling on the manor, always be ready to use Guard because there are swinging objects that may push you off. No matter where you are on him, the boss always looks around and finds a chance to attack Sora, and it may be difficult to see the globs in the darkness of Halloween Town, so be prudent. To avoid overlooking the globs, consistently Lock On to something because the locking system will find the nearest target. When attacking the globs, watch out for the two lanterns that are swinging around, as they will throw balls of fire at you. You can also destroy the lanterns for more experience points; dodge the flames until it swings over the platform that you are on, then hit a few times or use Blizzard magic, but try not to fall off the platform. You could also try summoning Dumbo if the summon is available.
After the battle, Sora will lock the world and, after another short cutscene, you'll be free to leave Halloween Town and move on to the next world.
