Level 6-1[edit]
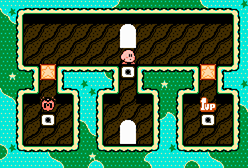
Premise: to collect more easily everything in this level, it is advisable to enter it already in possession of the Hammer skill. You can get it from Bonkers, in the Arena of the previous world. You start the level underwater, proceed avoiding the Gordos. You will notice a door: entering it, you can fight Shelatoss and acquire the Throw ability. The battle is not very easy, due to the water on the ground, however, if you already have the Hammer with you, it will not be necessary to enter. As you proceed, you'll come out of the water and notice a 1-Up behind three bricks. You can destroy them using the Hammer or by throwing the enemy in front of them with the Throw skill. Then enter the door above. On the next screen there are many precipices (be careful not to fall) and several pairs of enemies with special abilities, which by moving carefully you can suck up together. In the center of this area is a door. By entering, you can easily get a 1-Up and a Maxim Tomato. To reach the door below though, you need to remove a white block. If you already have the Hammer, this will be very simple. If, on the other hand, you don't have it, you have to suck up a couple of enemies who are outside, to start the slot machine and hope to obtain a skill like Hammer or Stone. Try until you succeed. Once the block is removed, enter the door below and push the switch to make a Museum appear on the world map, where you can acquire the Wheel ability. Go back outside and go to the door on the right. The last area is very linear and does not present great difficulties. At the bottom you will find the exit door.
Level 6-2[edit]
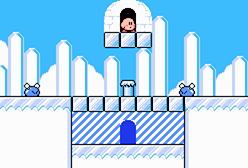
Proceed to the right, being careful not to fall in the precipices. You'll come to a bomb block that you need to detonate to clear your way. If you want to get the Pep Drink at the top though, detonate it using a slide. Also be careful not to fall into the gap. After you get it, fly up to the dark square above, which is actually a disguised door and enter it. You can get a 1-Up and acquire the Stone ability: do it and make sure you don't miss it. Enter the door to go back and proceed to the right. A couple of Scarfies will sneak up on you before the next door, take them out from a distance with air pellets. In the next area you have to follow a path through the clouds. Watch out for a Bomber a little further up: use the Stone ability to become invulnerable before it explodes. Then make your way to the door in the center of this area and enter. If you still have the Stone ability, you can crush the pole in the center and enter the door at the bottom. Thus you will find a switch that, once pressed, will make an Arena appear on the world map, where you can face Fire Lion. Then enter either of the two doors to go back. Proceed through the clouds until you reach the next door. In the next area, you have to descend progressively. You'll meet a lot of boring Scarfies along the way. Maybe acquire the Fireball skill early on to take them out easily. Be careful on the bottom: here you will meet one of the very rare enemies from which you can acquire the UFO ability. It will disappear soon, so if you want to acquire the skill you need to be quick. You'll also find an enemy walking on a Maxim Tomato - take him out to get it. Then enter the door. The last area is very linear, but at some point you will meet another Bomber. Take it out (or inhale it) before it explodes. At the bottom is the exit door.
Level 6-3[edit]
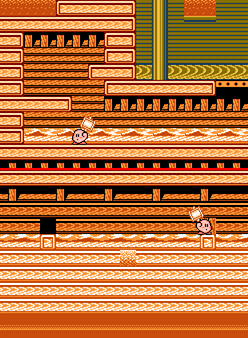
This level has one of the hardest switches in the game to reach. The first area is quite simple and straightforward. You can find a Pep Drink going down a ladder. Reach the door and enter. You have now to face Bonkers. After defeating him, remember to acquire his Hammer. Climb the ladder and use the hammer to destroy the crate to the right, clearing the way. Go down and proceed to the left. Hit the bomb block to flood the floor. There's a Pep Drink above, guarded by an enemy throwing cutters. After you get it, go to where the bomb block was and press ![]() . You will then enter a hidden flooded room. There is a 1-Up, but it will fall straight off the screen and is basically impossible to get it. Kill the enemy with the sword to the right, then go to where it was and press UP. Drop the Hammer, grab the Maxim Tomato, and quickly acquire the Laser ability from the enemy here. Then go back, entering the square below. Now enter the passage opposite the one where the enemy with the sword is. Ignore the fire-breathing enemy (let it die by falling into the water) and use the laser to light the fuse. To do this, simply shoot to the right from the platform in the center, the laser will rebound and light the fuse. Then quickly jump into the cannon before it fires. You will thus finally arrive at the switch; pressing it will bring up a Crane Fever minigame on the world map. Then enter the door. Go down and proceed to the left. Entering the two doors, you can get a 1-Up. At the top left there is also a Pep Drink. Note: If you followed the conventional route after defeating Bonkers, you would have arrived directly here. Once you've got everything, go to the door at the top of the ladder, in front of the sail, which you've probably already noticed. In the next area, you simply have to climb to the top right while avoiding the enemies. You will find a Warp Star, which will lead you to the last short area. Proceed to the right. Some Scarfies along the way will annoy you - take them out from a distance or avoid them. Proceed until you reach the exit door.
. You will then enter a hidden flooded room. There is a 1-Up, but it will fall straight off the screen and is basically impossible to get it. Kill the enemy with the sword to the right, then go to where it was and press UP. Drop the Hammer, grab the Maxim Tomato, and quickly acquire the Laser ability from the enemy here. Then go back, entering the square below. Now enter the passage opposite the one where the enemy with the sword is. Ignore the fire-breathing enemy (let it die by falling into the water) and use the laser to light the fuse. To do this, simply shoot to the right from the platform in the center, the laser will rebound and light the fuse. Then quickly jump into the cannon before it fires. You will thus finally arrive at the switch; pressing it will bring up a Crane Fever minigame on the world map. Then enter the door. Go down and proceed to the left. Entering the two doors, you can get a 1-Up. At the top left there is also a Pep Drink. Note: If you followed the conventional route after defeating Bonkers, you would have arrived directly here. Once you've got everything, go to the door at the top of the ladder, in front of the sail, which you've probably already noticed. In the next area, you simply have to climb to the top right while avoiding the enemies. You will find a Warp Star, which will lead you to the last short area. Proceed to the right. Some Scarfies along the way will annoy you - take them out from a distance or avoid them. Proceed until you reach the exit door.
Level 6-4[edit]
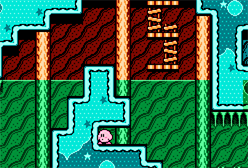
If you want to get three extra lives, you should start the level with a skill that allows you to strike downwards (Beam is fine). On the first screen you can choose between two paths, an upper one and a lower one, but they both lead to the same point and there are no items to collect. The second area is a bit labyrinthine. First, destroy the bomb block in front of you with a slide. Go down the shaft and hit the lower detonator as well. Head back up and drop into the next gap on the right. If you have the mentioned ability, you can reach another bomb block and go further down, where you will find three 1-Ups. If you need to restore energy, go back up and go to the right to find a Pep Drink, otherwise proceed directly to the right. Follow the path and detonate another bomb block to fall into the water. Head left and climb up to find another 1-Up. Go back into the water and go all the way to the right, paying attention to the spikes. In the water below the ladders, you'll notice a suspicious recess to the left. Go to that point and press ![]() , to reach a really well hidden switch. When pressed, an Egg Catcher minigame will appear on the world map. Go back and up the ladders. To the left you will find a Pep Drink. Further up, you'll need to detonate a bomb block to clear the way. Watch out for the Bomber nearby, don't get too close or you'll get hurt when it explodes. Continue up and reach the door. Go inside, take out the two enemies and enter the next door. Now you have to fly through a vertical tunnel, avoiding the coconuts that might fall on your head. It is not easy, you will have to change position at the right time. Go through the door at the top. In the last area you will find many more coconuts, but you can easily inhale them and use them to attack enemies. At the bottom is the exit door.
, to reach a really well hidden switch. When pressed, an Egg Catcher minigame will appear on the world map. Go back and up the ladders. To the left you will find a Pep Drink. Further up, you'll need to detonate a bomb block to clear the way. Watch out for the Bomber nearby, don't get too close or you'll get hurt when it explodes. Continue up and reach the door. Go inside, take out the two enemies and enter the next door. Now you have to fly through a vertical tunnel, avoiding the coconuts that might fall on your head. It is not easy, you will have to change position at the right time. Go through the door at the top. In the last area you will find many more coconuts, but you can easily inhale them and use them to attack enemies. At the bottom is the exit door.
Level 6-5[edit]
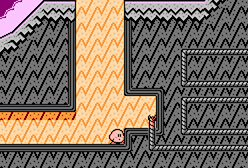
Another level with a hard to reach switch. To find it, it is practically essential to enter the level in possession of the Fireball skill (you can acquire it from Fire Lion in the Arena of this world) and be very careful not to lose it. The first screen is short and easy, you will only find some frozen enemies. In the second area instead, you have to face a long climb, during which you will be targeted by many enemies, including a Bomber. It is therefore difficult not to get hit, if you are using Fireball. Try to fly as much as possible and use air pellets. Above, beyond the door, is a Maxim Tomato to restore energy. Then enter the door. The next area is short and easy. It is a water path. Just be careful not to get hit, or you'll lose your skill. You will then come to an area with gray ground, where you will find several enemies. Hit the detonator on the ground to clear a cavity. Go down and on the left you can find a 1-Up. Avoid lighting the fuse on the right for now. Head back up, continue to the right and hit the next bomb block to clear your way to the cannon. At this point, go back to the previous cavity and use the Fireball ability to light the fuse. Quickly fly out of there, being careful not to get hit by enemies, then use your special ability to quickly move to the right. In this way, you will be able to reach the cannon before it fires and be catapulted into the sky, where you will find the switch. When pressed, a Quick Draw minigame will appear on the world map. Then enter the door to go back. The exit door is immediately on the right.
Note: If you want, you can also acquire the Fire skill from the first enemy you meet in the area with the cannon and light the fuse with it. This will make it easier to go through the level, not having to fear losing your skill, but if you don’t have Fireball it's extremely difficult to reach the cannon before it fires.
Level 6-6[edit]
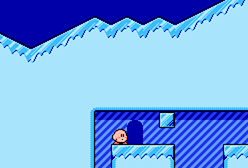
Also in this level you must have the Fireball skill to reach a switch, but this time everything will be easier. Proceed to the right on the frozen surface. Some fast enemies will come your way. When you come to a chasm, carefully drop down and proceed to the left. You'll notice two blocks of ice blocking your way, over a gap. If you have the Fireball skill you can crash into them to destroy them and reach the door behind. You will then find a switch that, when pressed, will make the Warp Star Station appear on the world map. Then go back and reach the door at the top right. In the next area you will immediately meet an UFO, from which you can acquire this useful skill (note: if you didn't have Fireball at the beginning of the level, you can now go back and use your spaceship's most powerful attack to destroy the ice blocks and reach the switch). Proceed right. Along the way you will meet many Scarfies, but thanks to the UFO ability you can defeat them very easily. But beware of the other UFOs, which will come towards you at great speed. At the bottom is a Maxim Tomato on a pillar, to restore energies. Then enter the door. Hit the bomb block to clear your way. You can now choose between two doors.
- If you choose the lower one, you have to fight two Mr Frostys together. After defeating them, you have to go through a long, partially flooded, but very linear area. Reach the door at the end and enter it to go back outside. Enter the next door.
- If you choose the upper door (recommended), you will face two Poppy Bros Sr.. After defeating one of the enemies, you can acquire the Crash ability and eliminate the other in an instant, acquiring then the same ability again. After the fight you'll enter in a room where Meta Knight will throw a Candy at you. Grab it to become invincible and enter the door. Thanks to your invincibility, you can cross to the next area in no time. Just be careful not to fall into the gaps. At the bottom, there is a 1-Up, but to get it you must still have Fireball or UFO. Then enter the door.
However, both paths lead to the same destination. Here, Meta Knight will have you fight his minions for the last time in the game. Defeat them to complete the level.
Boss – Meta Knight[edit]
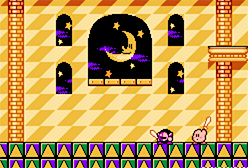
Finally, Meta Knight will face you personally. There is not much to say about this fight, as there is only one way to defeat the boss and that is to use the Sword. At the beginning, you will find a sword in the center of the room, with the inscription "Get It". Grab the sword and the fight will begin. Typically, Meta Knight attacks you by leaping towards you and swinging his sword, sometimes even grabbing onto the wall and then dropping. Try to hit the boss repeatedly when he stands still for a few moments after attacking you. Each time you hit him, the screen will flash and in this brief instant Meta Knight is invulnerable. Hit him 12 times with your sword to defeat him. Now there is only one piece of the Star Rod left to find.