The Legend of Zelda: A Link to the Past/Dark Palace
The palace in this region was said to have been the residence of the King of the Golden Land. After Ganon took over, the Hylian King moved out and the Helmasaur King moved in. With no upkeep, the garden maze has become overgrown and the halls of the palace have deteriorated.
Points of interest[edit]
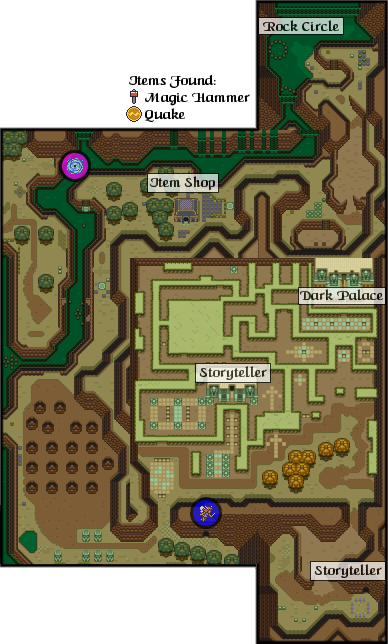
The area near the Dark Palace features many points of interest. In the north is a circle of rocks home to a grumpy fish who likes his privacy. On the river shore is an opening where adventurers grapple across the water. There are also two caves, inhabited by a storyteller and a Faerie respectively.
Rock Circle[edit]
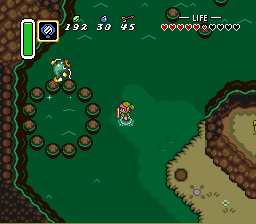
There is a curious rock circle surrounding calm waters in the river that flow north of the Dark Palace. A sign on the land near this formation reads "Curses to anyone who throws something into my circle of stones." If you are curious, throw the sign into the rock circle; a troubled fish will appear from below and give you the ![]() Quake Medallion, asking to be left in peace.
Quake Medallion, asking to be left in peace.
Item Shop[edit]
The shop to the north of the Dark Palace shares the same space with a Magic Shop in the Light World. While the Magic Shop offers three different kinds of Magic Potions, this shop sells only one kind of Potion plus a small Shield and clusters of Bombs. The Potion and Bombs are more expensive than those same items at specialty shops and the Shield is of inferior quality. Several shops of this kind, all offering the same inferior wares for the same inflated price, are scattered throughout the Dark World.
Storytellers[edit]
Two hermit-like storytellers inhabit the area surrounding the Dark Palace. One of them lives in a structure near the palace. He warns visitors of Ganon's power and explains the legend of the Triforce. Another hermit, hiding in a cave south of the palace, tells a story about the circle of rocks in the north.
Faerie Fountain[edit]
A friendly Faerie offers visitors a chance to rejuvenate in a cave just south of the Dark Palace garden. It is a saving grace for many warriors who are wounded on their way through the palace grounds. With their energy restored to normal, these brave adventurers can continue their journey across the land.
Dark Palace Grounds[edit]
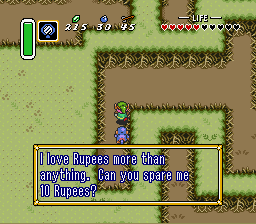
The overgrown garden maze of the Dark Palace befuddles many explorers who attempt in vain to reach the palace entrance. Those who make their way through the foliage say that the trick is to look for openings in the thorn bushes and to try various paths. A monkey named KiKi is said to live in a particularly thick section of brush. Adventurers who make friends with KiKi and give him the Rupees that he asks for are helped when they attempt to enter the palace. KiKi is a very shy monkey who runs when he senses danger.
The Dark Palace[edit]
The struggle to reach the Dark Palace[edit]
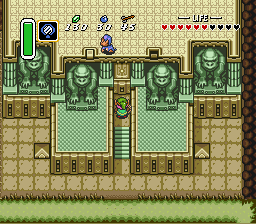
The Dark Palace, your first goal in the Dark World, is surrounded by a baffling maze of thorny bushes. Foremost you will need 110 rupees in total to gain entrance into the Dark Palace. The first part is easy; just follow the arrows. After that, it gets tricky. Look for small holes in the canopy of thorns that indicate a path. In the large central maze, enter from the top, and go down, left, down, right, up, and right. The monkey will guide you to the final stage for a price. The only way to open the Dark Palace entrance is to flip the switch on the roof.
Inside the Dark Palace[edit]
The passages inside the Dark Palace can confuse explorers even more than the maze on the grounds. Many adventurers get confused by the switches which open doors and move blocks up and down. In a room on the first floor, there is a Crystal Switch which can only be triggered by an Arrow, the Master Sword's beam, a Boomerang, or a Bomb. In another room, there is a door which stays open only when there is constant pressure on a switch on the floor. By moving a statue, explorers are able to venture into the next room.
Floor 1[edit]

- 1A
This room looks somewhat like the entrance to the Eastern Palace. It has one central entrance and two side passages. Upon your first visit to the Dark Palace, you will want to take the left passage. Stand on the tile on the left side of the room and pass through the open door. You will revisit this room a few more times. The next time you will go right, and the next time, through the center.
- 1B
This room is a continuation of the last room. When you enter the left chamber, watch out for the helmeted enemy known as a Helmasaur (it can be defeated with your sword), and go down the stairwell behind it, to room 2A. The next time through, you will repeat the same action in the right chamber in order to reach room 2B. Finally, when you run through the center, you should be equipped with two keys, so open the locked center door.
- 1C
In this room, you will see two blue electric Baris, and two new turtle-like enemies known as Pometts. You won't yet have any item which will cause any damage to the Pometts so avoid them for the time being. Head over to the left bridge. Notice the weak spot along the center, and drop a bomb on it to create a hole (which will magically fill up when you return to the room.) Drop down into the hole to reach the higher platform in room 2C. You will revisit this room after you have collected the Big Key. Next time, walk over to the right bridge. Of the two blocks that bar your way, you can push the lower one right into the pit. Walk past the remaining block to the door above and enter room 1D.
- 1D
If you're following this walkthrough, you will enter this room for the first time from the lower right door. Walk up to the treasure chest there and collect the ![]() Small Key. From there, you may follow the arrow and jump off the platform to the ledge below. Climb up the stairs, and follow the platform to the left, taking care not the let the blue Pon that occupies the path push you off. Approach the locked door and open it to reach room 1E. When you return to this room through the door from 1H, you will want to jump from the down arrow tile in the center of the top ledge to the platform below. Toss a Boomerang or shoot an arrow at the Crystal Switch in the alcove below to drop the blue blocks, and proceed through the door on the right to the lower portion of room 1J.
Small Key. From there, you may follow the arrow and jump off the platform to the ledge below. Climb up the stairs, and follow the platform to the left, taking care not the let the blue Pon that occupies the path push you off. Approach the locked door and open it to reach room 1E. When you return to this room through the door from 1H, you will want to jump from the down arrow tile in the center of the top ledge to the platform below. Toss a Boomerang or shoot an arrow at the Crystal Switch in the alcove below to drop the blue blocks, and proceed through the door on the right to the lower portion of room 1J.
- 1E
To complete this room, you must think fast. Pick up the skulls that lie in front of you and throw one of them at the Helmasaur. Then, immediately begin to dash up the narrow bridge through the middle of the room. When you step foot on it, it will start to break apart behind you. As long as you are dashing, you are safe. When you make it to the other side, there is another Helmasaur and two skulls to contend with. If you dashed over, you should have plenty of time to remove the skulls and make it to the safe part of the ledge in the back before the bridge crumbles completely. Unlock the door to the left and proceed inside to room 1F.
- 1F
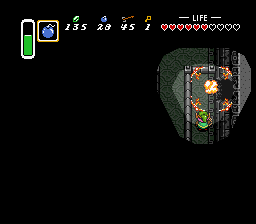
This room is dark, and there are no torches that you can use to light up the room. The room is occupied by four green fire breathing Kodondos. Kill them as the opportunity presents itself, but don't go too far out of your way in this small maze. There is a chest of bombs in the upper left corner of the room, but far more valuable is the ![]() Small Key in the lower right. After you have collected it, follow the corridor back to the left, go up a little and return to the right. Follow this path until it dead-ends along the right wall. Place a bomb here and stand back. The bomb will explode and form a hole in the wall through which you can travel to reach the large treasure chest in room 1E. Open it to obtain your first Dark World treasure: The
Small Key in the lower right. After you have collected it, follow the corridor back to the left, go up a little and return to the right. Follow this path until it dead-ends along the right wall. Place a bomb here and stand back. The bomb will explode and form a hole in the wall through which you can travel to reach the large treasure chest in room 1E. Open it to obtain your first Dark World treasure: The ![]() Magic Hammer. Now you must return to 1F and make your way completely back out of the room and through the door through you entered. Cross the way through room 1E and enter through the door on the right to room 1G.
Magic Hammer. Now you must return to 1F and make your way completely back out of the room and through the door through you entered. Cross the way through room 1E and enter through the door on the right to room 1G.
- 1G
You will now be faced with four Pometts. By now you should be equipped with the Hammer; the one weapon you need to make them vulnerable to your attack. When you pound the Pometts with your Hammer, or even the ground immediately around them, they will be knocked off their feet and flipped onto their backs, exposing the weaker portion of their bodies that can be hit with the sword. Pometts are determined to stay alive, however, and will flip back on their feet if you don't attack them quickly enough, or if you happen to hit the ground nearby with the hammer again. Your main focus is the treasure chest in the middle which contains a ![]() Compass. After you have collected it, pass through either stairwell at the top of the room which leads to room 3E. When you return to the room with a new Small Key, use it to open the door below to room 1H.
Compass. After you have collected it, pass through either stairwell at the top of the room which leads to room 3E. When you return to the room with a new Small Key, use it to open the door below to room 1H.
- 1H
At first glance, it appears that you must attempt to pass between all of the spike traps to safely make it through this room. While the treasure chest on the left side of the room only contains a single blue Rupee, it serves as enough of an indication that there's another way through the room. If you remove the left skull and walk around to the treasure chest, you can push the left statue from the left side over to right, blocking the spike trap in and allowing you safe passage to the door below. You will return to room 1D.
- 1J
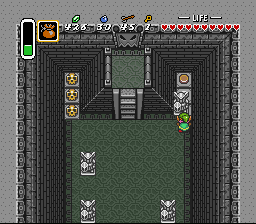
When you arrive from room 2G, you will be at the bottom of the room. Three red Baris will be floating around a treasure chest. Open the chest when it's safe and obtain the ![]() Map. When you're done, you will notice that the left and right walls are weak. Bomb or dash both of them. The hole to the right leads to a fairy pond in room 1K. When you pass though the left hole, you will be on an isolated platform in the lower right corner of room 1D, where you can obtain a
Map. When you're done, you will notice that the left and right walls are weak. Bomb or dash both of them. The hole to the right leads to a fairy pond in room 1K. When you pass though the left hole, you will be on an isolated platform in the lower right corner of room 1D, where you can obtain a ![]() Small Key. At this time, you should use the Magic Mirror again to return to room 1A and take the center pathway. When you return to the lower portion of this room from 1D, you will notice four statues and six skulls, three on either side of the door at the top. Underneath the skull in the upper right corner is a pressure plate that will open the door above, but only as long as some weight is applied to it. You can't stand on the plate and run through the door at the same time, so you'll need to find a substitute. Luckily, the upper right statue is not rooted to the ground. It can be pulled and pushed into position so that it is resting on the plate, allowing you to pass through the door and on to room 1L.
Small Key. At this time, you should use the Magic Mirror again to return to room 1A and take the center pathway. When you return to the lower portion of this room from 1D, you will notice four statues and six skulls, three on either side of the door at the top. Underneath the skull in the upper right corner is a pressure plate that will open the door above, but only as long as some weight is applied to it. You can't stand on the plate and run through the door at the same time, so you'll need to find a substitute. Luckily, the upper right statue is not rooted to the ground. It can be pulled and pushed into position so that it is resting on the plate, allowing you to pass through the door and on to room 1L.
- 1K
In this room, you can take a small reprieve at a fairy pond. You will want to regain any lost health, or restock any empty bottles that you have with fairies, courtesy of your Bug-Catching Net.
- 1L
There are three Goriyas positioned around the room, two green and one red. You've seen them earlier, and they are no different now. While the two green Goriyas can be taken out with your sword, the red one is only vulnerable to arrows. The two skulls in the middle of the room contain a resupply of arrows if you happen to be running low. Defeat the Goriyas, and the door to room 1M will open.
- 1M
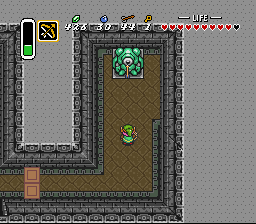
This room appears to be a dead end, but a little investigation will prove otherwise. The spike trap will bounce back and forth along the bottom. At this point, the Crystal Switch is most likely blue, so you'll need to hit it and change it to orange so that the orange blocks to the right will drop. Once it's changed, explore the right side of the room. All that will be there to greet you is a lone green cyclopean statue. It may not be obvious, but the statue is the key to advancing through the dungeon. After a little experimentation, you may discover that a single arrow through the eye is enough to trigger a reaction in the room that causes the right wall to slide over, revealing a staircase down to another portion of the basement. Follow it down to room 3A.
Basement 1A[edit]

- 2A
When you arrive in this room, two statues will be shooting fireballs at you. Do your best to avoid them. There is a switch hidden underneath one of the skulls. Find it and step on it to make a treasure chest appear. Run over to open it and find the first ![]() Small Key out of many found in this Palace. When you are finished, you need to return to room 1A and pass through the right door, so use your Magic Mirror.
Small Key out of many found in this Palace. When you are finished, you need to return to room 1A and pass through the right door, so use your Magic Mirror.
- 2B
This room is occupied by two torches and a Bubble. There are three warp tiles on the floor, one that transports you away, and two that arrive in this room. Stand on the active warp tile to be whisked away to room 2D.
- 2C
If you arrived from this room using the hole you created in the left bridge of room 1C, then you will be on the higher ledge. As long as you have a key, ignore the rest of the room and run up to the locked door that is only accessible from this ledge. Unlock it and climb the stairs up to the center of 1C, where you will find a treasure chest which contains the ![]() Big Key. Once you collect it, fall off the right side of the ledge and back down into room 2C. In the remaining portion of the room, you will see a warp tile surrounded by four skulls and a single skull at the end of a dividing wall. Look underneath the single skull to reveal a switch. Stand on the switch to reveal a treasure chest. The chest contains a
Big Key. Once you collect it, fall off the right side of the ledge and back down into room 2C. In the remaining portion of the room, you will see a warp tile surrounded by four skulls and a single skull at the end of a dividing wall. Look underneath the single skull to reveal a switch. Stand on the switch to reveal a treasure chest. The chest contains a ![]() Small Key but as you approach to open it, four floating skull Stalfos will fall from the ceiling to attack. You can fight them and make your way to the warp tile which takes you to room 2B and you can climb the stairs up to room 1B, or you can simply use the Magic Mirror to warp back to room 1A. Either way, make your way back to room 1C.
Small Key but as you approach to open it, four floating skull Stalfos will fall from the ceiling to attack. You can fight them and make your way to the warp tile which takes you to room 2B and you can climb the stairs up to room 1B, or you can simply use the Magic Mirror to warp back to room 1A. Either way, make your way back to room 1C.
- 2D
You may first arrive here after teleporting over from room 2B. There are two bubbles, an arrival warp tile and an active warp tile surrounded by a set of blocks. The active warp tile in the center takes you back to room 2B. You must push the block beneath the warp tile to the side to reach it. There is also a telepathy stone that allows you to contact Zelda. You will notice that the wall to the south is damaged. Bomb or Dash Bash it to open a hole in the wall and pass through it to room 2E.
- 2E
This fairly straight forward room introduces the Bari enemies. Baris hover in the air, and are generally safe to attack except for when they emit electricity. They do this periodically, and if you swing your sword when they are electrified, you will be damaged instead of them. When you reach the left side of the room, both parts of the north wall will looked damaged. In addition, so will the floor on the left. If you place a bomb here, you can discover which part of the wall is weaker, but you may also create a hole in the ground. It's safe to dash bash this wall as well. Proceed north to room 2F.
- 2F
Meet the Goriyas. These Goriyas play mind games. They only move when you move and like to move in the opposite direction from you. The red Goriya will move in the opposite direction from you both vertically and horizontally. The green Goriyas will move in the opposite direction from you vertically only. The two green Goriyas are pretty easy to take down, but the red one can only be defeated with arrows. If you line up facing him, he will spit a ball of fire at you. The best method of attack is to fire just to the side of the red Goriya, and move in the opposite direction, causing the red Goriya to walk into the attack.
Another method involves standing at opposite corners facing the Goriya. Charge a spin attack and walk in towards the Goriya with the charge held up. The Goriya will not turn towards you, so you can line it up for a volley of arrows.
The door to room 2G above will open when they are all defeated.
- 2G
From the bottom of the room, you must make your way along the conveyor belt to the stairs up above. Along the way, you must avoid the spike traps that slide back and forth as well as two floating blue Baris, and one stronger red Bari. Avoid their electrical attacks as you attack them. Don't get so caught up in combat that the conveyor belt pulls you into a spike trap. Climb the staircase at the top of the room and you will arrive at room 1J.
Basement 1B[edit]
- 3A
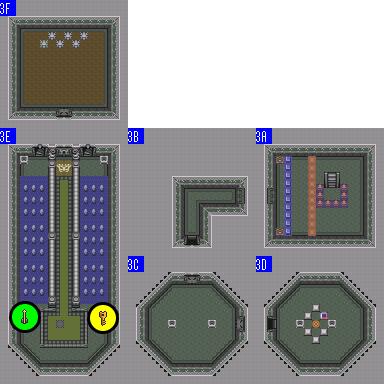
When you arrive, the room will be dark. Your lamp will provide enough light to see your immediate surroundings. You will be blocked in by a set of bobbing tiles. The trick to these tiles is to use the Magic Hammer on them and bash them down, creating an opening for you to pass through. As long as you've got that Hammer handy, you might as well destroy the Pometts that are lying in wait for you. You need to reach the left door, but the fence blocks present a problem. Even when the orange block are down, the blue blocks are up. In order to get through this conundrum, stand between the two columns, and fire an arrow, or the Boomerang at the Crystal Switch on the right to switch the fence while you are beyond the orange blocks. Now you can unlock the left door and proceed to room 3B.
- 3B
This tiny room only serves as passage between 3A and 3C. It is also the home to one lone Pomett which you can choose to deal with or avoid. Make your way south.
- 3C
Another dark room, this one is filled with six Pometts. You can light the two torches to make seeing a little easier, but your goal is to flip and defeat all six Pometts in the room. While the Hammer does this job well, you can get lucky sometimes by placing a bomb in a room packed with so many enemies and take out a good portion of them. Once the Pometts are defeated, pass through the unlocked door to the right to room 3D.
- 3D
By lighting a torch or two in this room, it will become apparent that the warp tile in the center of the room is surrounded by blocks. That shouldn't pose any particular problem for you, as a little experimentation will show that the block up and to the right of the tile can be pushed aside, granting you access to the tile, which will warp you to the previously inaccessible center portion of room 3E.
- 3E
You will first visit this room from room 1G. The outer portion of the room is shaped like a U with loads of blue Rupees just laying around waiting for you to collect them. The room is also dark, but a torch next to either staircase can be lit to make passage easier. Two Bubbles patrol either side of the room, so watch their pattern of motion to avoid them. Two treasure chests lie in the lower portion of the room. While the left one contains a set of arrows, the right one contains a ![]() Small Key. Be sure to collect it. You can swoop down one side of the U and back up the other to return to room 1G. When you warp to the room from room 3D, the narrow passage which leads to the dungeon's boss is blocked by two pairs of Pometts. Defeat each one and make your way to the last door at the top.
Small Key. Be sure to collect it. You can swoop down one side of the U and back up the other to return to room 1G. When you warp to the room from room 3D, the narrow passage which leads to the dungeon's boss is blocked by two pairs of Pometts. Defeat each one and make your way to the last door at the top.
Boss: Helmasaur King[edit]
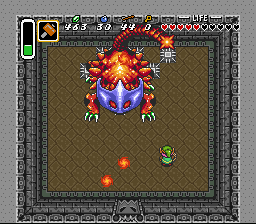
This gargantuan version of the little Helmasaurs that populated the rest of the Dark Palace won't be taken down quite as easily. In addition to the damage that he can inflict upon you with his claws and face, he has a massive tail that he can swing and extend in front of him in order to strike his opponents. You must watch his position and his tail. He can also spit deadly fireballs at you that break apart and scatter. He enters brief periods of immobility, giving you ample opportunity to attack. But how will you manage to damage him with the thick, skull-like helmet protecting his forehead? With the Hammer! You'll need to chip away at that mask piece by piece. As you do, he will continue to attack, especially with his tail. He will swing the tail back and forth just before he is about to attack. If you have plenty of health, then focus on hitting his head. If you are running low, play a little more cautiously with hit-and-run tactics. If you figure out the Helmasaur's movement pattern, you can also use Bombs. Eventually, his mask will completely break apart, revealing his weak point: the green crystal in his forehead. A few well placed slashes to the crystal with your sword will do King Helmasaur in completely. If your aim is true, you can also try your luck with the bow at a relatively close range—a quick volley of arrows can be devastating. He will leave behind a ![]() Heart Container. Once you collect it, the very first Crystal Maiden will appear for you to collect and learn from.
Heart Container. Once you collect it, the very first Crystal Maiden will appear for you to collect and learn from.
The remaining six crystals[edit]
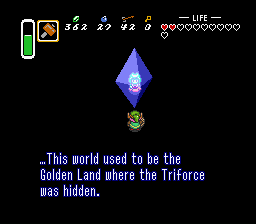

The maiden that you free from the Dark Palace tells you about how Ganon perverted the once beautiful Golden Land into the twisted place that it has become, and of his plans to do the same to the Light World. She also tells you how the seven maidens can work together to break the barrier around Ganon's hiding place. And so she informs you of the positions of the remaining maidens, and marks them on your map for you. According to her information, the next maiden for you to rescue lies somewhere in the Swamp Palace.
