Mission Objectives[edit]
- Main Quest-Hellscream
- Capture Grom in the Soul Gem
- Bring Grom to Jaina's ritual circle
Overview[edit]
This scenario looks ridiculously hard at the very beginning, but it isn't, as long as you follow the standard prescription. Since this is a Warcraft 3 campaign scenario, you know that you will be attacked early, and attacked often, so set up your defenses right away. This scenario is highly unusual, in that not only are you not outnumbered, YOU outnumber your enemies 2-1! As for the Infernals, they look pretty scary, but you can hunt them for sport. (This applies to normal difficulty.)
During the mission, the enemies' attacks will be very fierce because the Warsong Clan are now controlled by Mannoroth's blood, which give them chaos damage (full damage versus all armor types, including buildings and heroes), more attack and HP. However, they only attack occasionally, and they may attack your ally. If they attack you focus them down quickly or you could lose buildings.
Starting up[edit]
When this mission starts, you will start with 3 Grunts, 3 Trolls, a Shaman, a Witch Doctor, Cairne, and Thrall. You also have 4 each gold miners and lumberjacks.
First of all, decide your Order of Battle. 8 Peons might be enough, except that you really want to pump the economy, and you want to reserve several Peons for construction and repairs. Take this statement literally. These workers need to be standing around near the front, doing nothing at all until they are needed, so that they can be committed to repairs instantly. Accordingly, you want to get 2 more Peons. You will find that you will be wood-limited for a long time while gold piles up, so take one Peon off gold and build Towers with him. The 2 new Peons also build Towers, one at each entrance to your base, until your defenses are stable. This means 7 each Towers at the left and middle entrances, and 5 at the right one, plus one Burrow each nearby for the Peon to hide and to provide fire support. Another reason for hiding your Peons in Burrows is that it takes them off the idle workers list, making it easier to find your idle workers. (That is not a contradiction.)
You are now at 29 food. Get TWO more Witch Doctors (that's not a typo), two more Trolls, and one Grunt. Your small units will not stay alive very long. As they die, you will eventually want to replace the 4 Grunts and one Troll with two Tauren and a Kodo Beast, but stick with the basic troops for now until you have the chance to build the higher-tech buildings.
Other than building Towers, your immediate concern is to upgrade your Witch Doctors. The first step in that process is to upgrade to Fortress; do this as soon as you have 10 Peons. Don't wait for your Doctors to be upgraded, get Sentry Wards into operation immediately, one outside each entrance to your base.
The final step in your opening is to spit out a couple of Spirit Wolves and send them roaring off into the big black unknown. Far Sight is not a reasonable option at this time.
You can expect to be attacked once by the Warsong and once by Infernals while your defenses are still weak. After that, the Warsong will hardly ever attack you, and your Towers alone will waste the Infernals. The Infernals arrive at about 1-minute intervals. They drop in from outer space and then walk to your nearest building. The only time they can threaten your static defenses is when two of them arrive simultaneously and attack the same building. They always land in pairs, but they hardly ever arrive together.
Initial attacks[edit]
There is a pair of Lizards just outside the right entrance to your base. Send your two Heroes to take them out immediately, otherwise they might annoy you. They give you a Potion of Healing, which is almost completely useless, although you might be able to use it right at the beginning.
Since both of your Heroes are already fully loaded, it will take a little bit of extra effort to collect items. Just send Thrall home each time you find an item to dump the appropriate number of old items and clear up some space, then return for the new items. Cairne is too slow for this. Or just leave unwanted items lying around the map anywhere; it really isn't that important.
Keep spitting out wolves from time to time and explore as best you can. You will find a group of Harpies in the SE of the map; they give you a Scroll of Mana, which is also almost completely useless.
The Goblin Laboratory in the SE does not have Zeppelins, but it will allow you to reveal the map at a minor cost. There's no need to spend that money, however, and the other units are not useful here.

Thrall will be at level 10 about now, so it's time to get his final spells, those being Far Sight. While low-level Far Sight is to be used only sparingly, at level 3, it is a must-use spell, because you can reveal the entire map for just a couple hundred mana, and Thrall has almost 1,000 and high regeneration.
You will have found 25,000 gold just NE of your base (your "natural expansion") and 25,000 in the SE part of the map by now, both unguarded. You will have found a Fountain of Health at 3:00, guarded only by creeps. You will have found that the Orcs really don't have a lot of troops, and they are fairly scattered, so really, most of the map is yours to take and exploit.
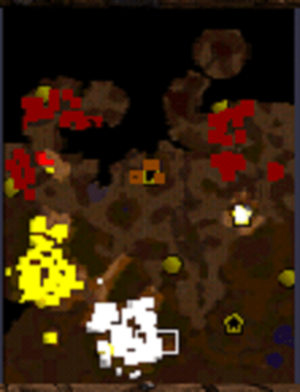
Take all 4 Grunts, all 5 Trolls, a Shaman, and both Heroes out raiding. This raiding force will become a permanent expeditionary force. All of your unit types should get their own control groups, but your main army should also get a control group. Leave all your Doctors at home to keep the Sentry Wards in operation and to provide a last-ditch defense. LOL. Against the Infernals, your Towers alone will suffice. If the Warsong should happen to attack your base, and with catapults, it will get messy, but this hardly ever happens, so it's not a real problem. Anyway, you will do unto them before they do unto you.
Seize control of the Fountain at 3:00. The creeps there understand that resistance is futile. They give you a Scroll of Protection (useless) and a Mask of Death (not as good as what you already have). This Fountain will become your base of operations for the next phase. Fortify this position with about 5 Towers and a Burrow. Commit a couple of Peons here permanently.
Attack the Warsong[edit]
It's surprising, but the Warsong base in the NE is only weakly defended. It produces troops, which will probably attack you once they reach critical mass, but that isn't going to happen any more. Go roaring in there, Wagner or the Stones or whatever going at full blast. Eradicate any mobile units on the way in, Earthquake the nearest Tower and hopefully a building cluster, commit all sorts of mayhem, and then roar back out and heal. The Warsong do not rebuild, so their base keeps getting weaker. It can be seen that you don't actually need artillery. If you lose troops, so what? You have a lot of gold. Keep replacing your casualties, aiming for the final OB as described above. It will take 3-5 charges, but eventually, the NE Warsong base will be erased, their economy reduced by 50%, and their production by 33%. You secure about 10,000 gold here.
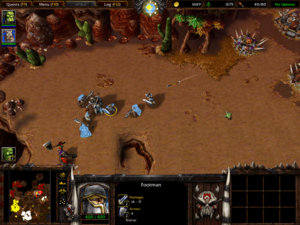
Jaina's troops will attack from time to time. They do quite well when defending their base, but hardly accomplish anything on the offense. However, they can tie down or at least distract the Warsong mobile troops, especially if they should happen to attack where you want to attack. Later on, they will be able to do more, but by then, both they and the Warsong will be on their last legs.
Now sweep across the map from right to left. The Centaurs near the Fountain of Health in the middle give you a Hood of Cunning. At +4 agility and intelligence, this is better than the Circlet of Nobility. Cairne takes it.
Next on the hit list is the SW Warsong base. Follow the prescription described above. However, depending on your casualties, you might have decided to include a catapult in your OB. It can help, but don't exceed the zero-upkeep limit. The Warsong Hero is lazing around on his throne, and the Warsong troops have nothing to match your level 10 Hero spells. In addition, you just have a larger army than them. You secure 12,500 gold here.
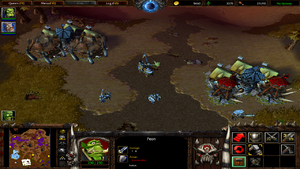
Next, take out the creeps near the Goblin Merchant. They give you a Pendant of Energy, which you hardly need. The Merchant's wares are of no value.
Now erase the final Warsong base. Their economy and production are now zero, although they still have some troops left. You secure about 10,000 gold here.
About this time, the humans will be out of gold, as will you. However, you should have a decent stockpile, and, of course, 80,000 that you could exploit. You may decide to build some Towers in the human base and to repair their buildings. If you don't, the Infernals will eventually grind them into dust.
The endgame[edit]
Clear out the rest of the map. There are two sets of cages that were in creep bases. You should have ignored them until now, because you want to be in control of your population. The cages north of the Merchant give you 3 Trolls. The cages near where the NE Warsong base used to be give you 2 Doctors and a Troll. This should put you into the low-upkeep zone, which is OK, because you can't be taxed at present. The Lizards in the north give you a Medallion of Courage. +4 strength and intelligence is better than a Periapt of Vitality. Thrall takes it.
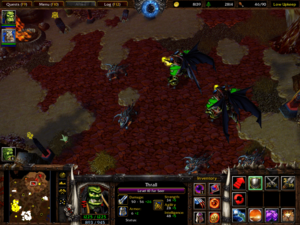
Reveal the rest of the map. You will find that Grom is defended by 3 sets of powerful units. First, there are two Doom Guards and 4 Felhounds. Then there is a group of two each Doom Guards, Raiders, Grunts, and Warlocks. There are two Doom Guards right next to Grom. This is a pretty tough force.
You should know enough about Felhounds to know that your Heroes, and magic users in general, want to avoid them. However, they are helpless against conventional flying units, so produce 5 Wyverns. Fly over, take out a Doom Guard, retreat and heal, do it again, and then crush the Felhounds, drive them before you, hear the lamentation ...
The second-to-last group is a different story. You DO NOT want to attack them with flying units. So just fall back on the old stand-by and build a bunch of Towers in front of their position. Send a wolf in there to taunt them, and when you have sucked them into your Tower killzone, kill them.
Finally, send Thrall in alone to capture Grom. You DO NOT want to risk killing him by accident. Kill the remaining Doom Guards or not; it makes no difference.
Deliver Grom's spirit to the ritual circle. Sit back and watch the videos.
Of course, you could have killed Grom's guards simply by using a huge force of any type. Of course, you could have played the entire scenario without any finesse, just using a huge army. In that case, you would have lost considerable gold to upkeep, which means you might have been forced to exploit a second mine.
More screenshots[edit]


Items[edit]
- Potion of Healing - Lightning Lizard
- Scroll of Mana - Harpies
- Scroll of Protection - Centaur Sorcerer
- Mask of Death - same place
- Hood of Cunning - Centaur Khan
- Pendant of Energy - Centaur Sorcerer
- Medallion of Courage - Lizards in north