Welcome to the second stage of the game: Greenhorn Ruins. This stage features a lot of introductory concepts that will be seen for the rest of the game, such as steel trapdoors, glue globes, mini-bosses, Battle Rings, and more. It's a much larger stage than the previous as well, and features a heavier emphasis on backtracking and exploration. The course also has some catchy music.
Treasure: Red and Yellow[edit]
This treasure is directly at the start of the stage. Use the rock block at the start to jump up and hit the button, then break the block used to get on the ledge to reveal the treasure. Almost directly next to the red treasure is a series of rock blocks around a ladder. By breaking them all, it reveals the yellow button and treasure. Simply climb the ladder to continue onward.
Spritelings 1 and 2[edit]
At the top of the ladder next to the yellow treasure is the first Spriteling right in the open on a pedestal. This Spriteling explains the importance of using Mad Moves on both enemies and terrain. Continue rightward. After a small handful of enemies is a second Spriteling. This one continues to explain Mad Moves to Wario. After this is a gate that can only be moved using the Swirly Spinner. Using a Wild Swing-Ding, spin a nearby Magon enemy in the direction of the arrows on the Swirly Spinner to open the gate. On the opposite staircase is the chartreuse button.
Trapdoor 1[edit]
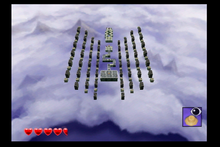
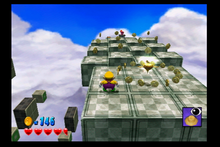
After a few Enemy Generators and Clubbosaurs, Wario will encounter the first trapdoor of the area. Unlike the examples prior, this one won't budge with a standard ground pound. Rather, these steel Trapdoors require a piledrive to enter. Anything will work to enter, whether enemy, pillar, or even cannonballs. Once inside, there is a simple walkway to cross before using a rising Glue Globe to reach the first Gold Statue Part. There are a few rotating blocks before reaching the Red Diamond at the end. This won't take more than a few simple jumps to complete. Falling into the bottomless void will not send Wario to the Unithorn's Lair, but rather back to the beginning of the challenge. No damage will be sustained.
Generally speaking, from this point forward, wood trapdoors will be more puzzle based and steel trapdoors will be more platforming based.
Spriteling 3[edit]
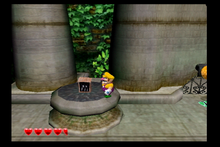
Spriteling three is found after exiting the first Trapdoor, and it explains Glue Globes. They are sticky balls Wario can latch on to and use to traverse vertically or horizontally. There's an ascending line of Glue Globes to use to get up to the next floor.
Trapdoor 2[edit]
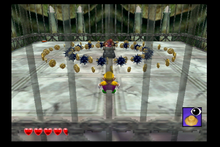
To the left on the second floor is the first wood Trapdoor of the stage. There is a ring of spike balls and two rings of coins surrounding the central Red Diamond. The spike balls will oscillate rotating through each row of coins every few seconds. It is recommended to bypass the coins and just grab the diamond instead of risking damage for a few coins.
While Wario can head downwards after this Trapdoor, he won't be able to collect everything until later, so heading right and upward is encouraged.
Mini-bosses[edit]
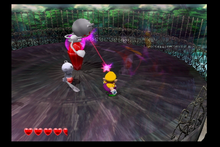
There is a circular arena at the top of Greenhorn Ruins containing the first of many Crystal Entities. This enemy will trap Wario in a barrier, fire a couple of lasers, and send some small minions after Wario to deal damage. Stun either miniature enemy and throw it at the main Crystal Enemy to deal damage. After three hits, picking up the now-stunned Crystal Entity will end the fight and destroy the barrier.
After the fight, descend the chains to get to the next section. There will be a new "mini-boss" to the left, called an Old Red Mug. These walls can't hurt Wario and only serve as bridges to previous areas: Only three appear in the entire game. Either three punches to the red face or a power thrown enemy will defeat the Old Red Mug and provide access to the earlier areas.
Treasures: Chartreuse and Green[edit]
The green button is located next to the Old Red Mug. The chartreuse should already have been pressed by the first Swirly Spinner. Both treasures are found back across the Old Red Mug south of the second Trapdoor. Punch the enemies out of your way, and be careful for gaps in the walkways. There is a wooden chest here as well.
Once both treasures have been collected, cross back over the Old Red Mug to progress.
Gold Statue Part 2[edit]
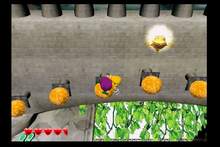
There is a Gold Statue Part over the bridge of Glue Globes to the right of the green button.
Treasure: Light Blue and Trapdoor 3[edit]
After heading down the stair-step platforms, continue right past an Ankiron and the light blue button to the third Trapdoor. It is a vertical tower to climb with several spike balls around the outside. Using the C-stick to rotate the camera is vital for success, though it is not inherently challenging. There is a wooden chest about halfway up, and the Red Diamond on the top.
The button is next to the Ankiron and Trapdoor 3, and the chest can be found on the stair step platforms Wario descended after Gold Statue Part 2.
Treasure: Dark Blue and Gold Statue Part 3[edit]
After getting the light blue treasure, head back to the water pool and this time head left. There is another Swirly Spinner to move a gate, which takes Wario to a relaxing waterfall...filled with monsters! Past them is the dark blue button and another Old Red Mug. The treasure is immediately on the other side.
Back at the relaxing waterfall, use the Glue Globes on top of pillars to collect the piece. Then, progress back to the right using the Swirly Spinner and an enemy from the Enemy Generator.
Trapdoor 4[edit]
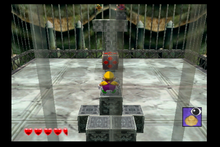
At the top of the glue globe chain is the fourth Trapdoor. This one features a new tool: An Arrow Block. Specifically from the left side, punch the block and it will fly to the right side to be able to access the next Gold Statue Part and Red Diamond. Afterwards, feel free to explore a bit with the punch block. It will fly in the direction opposite of where it is punched, and a ground pound will lower it. The bunny spring to escape is in the top left.
Spriteling 4 and the Battle Ring[edit]
Next to Trapdoor 4 is Spriteling 4. It explains the upcoming Battle Ring fight: For sixty seconds, Wario will be trapped in the arena with more and more enemies spawning in waves. There are multiple pillars in to use as tools if necessary: The Wild Swing-Ding is a particularly useful tool. At the end, a wooden chest appears for a brief period of time to deliver coins as a reward for surviving. The more enemies defeated, the more coins given.
A particularly skilled player may be able to skip the ring by grabbing onto the ledge of the platform, and jumping to keep hanging off the edge. This is an advanced strategy, and is typically only done by speedrunners.
Trapdoor 5[edit]
Under and after the Battle Ring is the next Trapdoor. This features several gear shaped platforms and concludes with a Gold Statue Part and Red Diamond. Be cautious of the spike balls halfway through.
After this Trapdoor is the final Old Red Mug. It can be defeated or merely jumped around.
Treasure: Purple and Pink; Trapdoor 6[edit]
Using the rock blocks to the right of the second Enemy Generator, the purple button lies. The purple treasure is left of the Ankiron for Trapdoor 7.
Underneath the purple button lies Trapdoor 6. It has some shifting blocks, but otherwise shows no real challenge or threat. It, like many others, has a Gold Statue Part halfway and a Red Diamond at the end.
The pink treasure's button is at the end of the rock block chain at Trapdoor 6, hidden in the wall. The treasure is at the end of the level by the Stone Doohickey at the bottom of the ledge. It's a Nintendo Entertainment System!
Trapdoor 7[edit]
After using the Swirly Spinner to climb the ladder and fighting off the Ankiron, enter the seventh trapdoor. Turn up your display's volume! This Trapdoor is unofficially entitled "Sound and Vision" as it features a bunch of statue heads with the Red Diamond and Gold Statue Part hidden randomly under two of them. As both pieces make a faint hum or "twinkling" sound, navigate Wario towards the heads where the volume of these noises get louder. Also, both emit a few particles that will leave the heads when viewed at certain angles. Alternatively, just pick up and throw every statue head until you get to the right one. The locations of the collectibles will be randomly generated each playthrough.
Spriteling 5 and Trapdoor 8[edit]
The final Spriteling at the end of the stage next to the Stone Doohickey says Wario might be rewarded if all Spritelings are saved.
The final trapdoor has a sea of blocks in between the Red Diamond and Gold Statue Part. There is no real challenge to this trapdoor whatsoever.
Boss: Sandworm[edit]
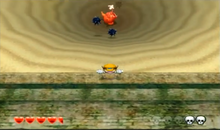
This ugly fellow is the boss of the Greenhorn Ruins. The arena is a sand pit that slowly drags Wario towards the center, but is actually quite large in size, and features plenty of places to get away from the action and recover if necessary. This boss is unique as it cannot be stunned, and merely instantly takes damage after a combo of three to five punches is delivered. The boss will pop up in a random location in the sand cone and fire a few spike balls, then pull out its massive bladed arms to attempt to chop Wario into bits. When slashing, it is immune to damage. Otherwise, just punch the boss whenever it is possible to get close. After the second and fourth skull of damage is delivered, Sandworm will move to the center of the arena, spin around, and spew spiked balls in random directions. It cannot take damage at this time, and the sand cone will speed up the flow of sand. After a short while, the attack ends and Wario can pummel the boss once more.
After the completion of this stage, DinoMighty can be battled. If all Gold Statue Parts have been collected in both stages, Wario will have five total hearts of health.


