Edgeworth is now at the outside of the Babahlese embassy next to the stage. He has left Franziska with the Allebahstian investigation. Now we need to check out the Babahlese statue to see if there are any clues about them being moved. We are greeted by the ambassador, Kay, and Gumshoe, though they've not made any progress thus far. Edgeworth gives the Stand-In Request, Letter from a Stalker and Lady's Undershirt to Gumshoe for keeping since we don't need those pieces of evidence anymore. Edgeworth also discards the Steel Samurai's Autograph. All of our remaining evidence has also been rearranged. If we try to enter the crime scene we find that it's blocked, so we can only spend some time looking around this open-air stage.
Talk to Ambassador Palaeno.
- Open-air stage: The stage is used to host events to promote Babahl. Palaeno planned to give a speech too, after being suggested by Manny Coachen, but the fire prevented that from happening.
- Primidux Statue: The statue was said to be a symbol of sovereignty, which is why both countries claim the statue they possess is real.
- Manny Coachen: The victim was very good at his job, so good that even Palaeno didn't realize he was involved in a smuggling ring. After Palaeno was selected as the representative of the Country Unification Council, Manny had been working extra hard. Palaeno also reveals that both countries were to merge back to one tonight if not for the events that had transpired.
Present Allebahst's Primidux Statue. Palaeno has received the news from Franziska and confirmed that the statue in the Babahlese embassy belongs to Allebahst. He also reveals that Allebahst has the real statue and that the rulers of Babahl wanted him to negotiate with Ambassador Alba to fake the results, claiming that the real statue could not be identified.


Now talk to Detective Gumshoe. He didn't find anything new in his investigation so far.
- Investigation update: Gumshoe reveals that Ambassador Palaeno gave him a lantern. The flame is green because the fuel used for the lantern is whitcrystal oil only found in Babahl. There are cutouts on the sides of the lantern that create silhouettes. The Silhouette Lantern is added to your Organizer.
Edgeworth now recalls all the facts of the case and determines that the person that smuggled the murder weapons across both countries must be the fake Yatagarasu, who made her appearance in both embassies. Ambassador Palaeno tells us that the Yatagarasu was first spotted in Allebahst's rose garden where Ambassador Alba was to give a speech. Kay gives us something she found that looks like a guitar pick. It is slightly wet, but there isn't any water around here. The Pick is added to your Organizer. Kay also gives us Ms. Yew's perfume bottle that she found and kept seven years ago. Ms. Yew's Perfume is added to your Organizer.
Now that we've just about wrapped up things at Babahl, let's continue our investigation at Allebahst, where the Yatagarasu was first spotted.
Investigation: Rose Garden[edit]
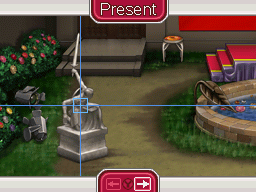


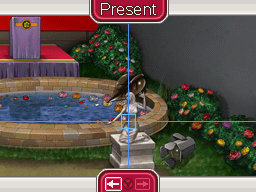
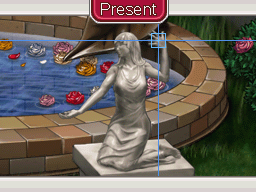
Edgeworth meets up with Franziska back at Allebahst. After exchanging some information, Franziska reveals that the silhouette of the Yatagarasu appeared just as Ambassador Alba was to give a speech. After that, the Babahlese fire started. Without further ado, let's get started!
Talk to Agent Lang. He says that he was called back to the Interpol Headquarters for some urgent matter, but he isn't leaving until the murderer is found.
- Yatagarasu's appearance: Lang said that he witnessed Yatagarasu's shadow at the same time as the others. The spotlight went on, the shadow was revealed, and the lights went off. When Lang and his men managed to get the lights back on, the Great Thief had vanished. He later found out that the reason the lights went off was that the cord for the electronics was unplugged, either on purpose or by accident. Lang also says that it couldn't have been someone else's shadow, since that shape is unique.
Examine the pool. Franziska mentions that the pool's water is used to put out fires. Edgeworth also observes that the pool automatically refills until it reaches its normal level. That means the pool must have been used recently. The Fountain Spouts are added to your Organizer.
At this moment, Larry suddenly emerges from the pool! He says that the reason he was there was to find the lost Iron Infant doll, which he lost around the time he shook hands with the ambassador. He then swims back into the pool.
Examine the left statue. Edgeworth notes its similarity to the Primidux Statue. Examining the right statue reveals that its the statue of a queen. Not much information for us.
After you've done all that, Edgeworth says that he has figured out how Yatagarasu's shadow was created. Present the left statue. It doesn't look like the shadow, but that's because the statue is only part of the shadow. Present the right statue. The Yatagarasu's shadow is in fact, a combination of the shadow of two statues. Some spotlights have been moved during the confusion when the shadow appeared, which is why it no longer shows the shadow.
Edgeworth attempts to recreate the shadow. Combining them looks nothing like the real shadow, so what did we do wrong? The king's statue shadow makes up most of the shadow's shape, but whoever created the shadow only needed part of the queen statue. Present her left hand. The missing portion from the king statue's shadow has five, thin lines which resemble hands. Rearranging the spotlights so it only shines on the hand makes it look exactly like the shadow we saw. That means the Yatagarasu wasn't in Allebahst tonight, only in Babahl, though we can assume she has an accomplice in Allebahst to set up the shadow. And with that, our investigation is complete!
Bad Ending Three: If you run out of logic here, Lang decides that it's too late at night. He asks Edgeworth to go home and get some rest as Lang himself is just playing around.
Back where we started[edit]

Detective Badd joins us, saying that he left the murder investigation to Agent Lang and wants to focus on catching the Yatagarasu. He said that a woman who claims to be an international journalist (Ace Attorney fans might deduce her to be Lotta Hart) gave him a photo. It was taken from a nearby building after the fires and shows a shadowy figure flying over the wall. The Photo of Yatagarasu is added to your Organizer. This is not the first time in the series where we have dealt with flying people. The figure flew from the Babahlese side, so that's where we should head for.
Returning to the theatre, we are joined by Kay. Go right into the Babahlese side. The staff had finished cleaning up the secretariat's office, so maybe we'll be able to get some new clues we previously missed. First, we need to compare the state of the room before and after the fire. Then we need to find out who the mysterious man Kay saw is. Kay seems to recognize the shadow in the photo we just received as that suspicious person. Let's get down to investigating!
Investigation: Secretariat's Office[edit]


Talk to Ambassador Palaeno. He reveals that two fires broke out tonight. The first broke out during the Jammin' Ninja show and only affected the fourth and fifth floors of the embassy, but was kept secret to avoid causing panic. Detective Badd also mentioned the first fire when he gave us the photo, which means it was taken right after the first fire. The Photo of Yatagarasu is updated in your Organizer. The second fire occurred on the third floor, alleged to be caused by the embers on the upper floors after the first fire. The Fires in Babahl are added to your Organizer.
- Morning activities: Palaeno was to shake hands with the Jammin' Ninja, but Manny Coachen wanted to turn it into a photo op, so they spent the morning tidying up Manny's office. The event couldn't be held in the ambassador's office because it was being renovated. You get the Renovations logic. That is also why the knife set and the Primidux Statue are in the secretariat's office. Palaeno also says that he used the fireplace during the cleanup, accidentally spilling some Babahlese ink on the back wall. He also forgot to clean the ashes in the fireplace. Amb. Palaeno's Testimony is added to your Organizer.
- Afternoon activities: Manny and Palaeno were together that afternoon, until the start of the Steel Samurai show. Palaeno had to return to his office to get ready for the photo op at the end of the show. After that, he went back to his office, but then the fire broke out and he had to escape down the stairs. This means that Palaeno did not see the victim at all after the Steel Samurai show.
First, examine the table to enter a close-up scene. Examine the ink bottle. It is still quite full, and the fire couldn't burn away any of it. Palaeno notes that something is odd about the ink. Talk to him about it.
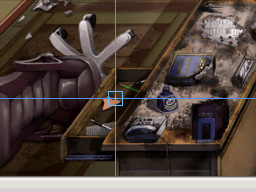
- Mr. Coachen's ink: Manny Coachen was worried about his office when the second fire broke out, so he rushed in. Ambassador Palaeno tried to follow him but was stopped by an inferno of green flames when he tried to enter the office. The flames could only have been caused by the whitcrystal oil in the ink, so he was quite surprised when there was still a bottle of ink on Manny's desk.
Back at the close-up scene, examine the open drawer to open it a bit more. Now that you can see what's in the drawer, deduce the orange paper and present DeMasque II's Note. The shape and color of the note look exactly like the one we have. Palaeno says that its a souvenir from somewhere in the country. He also confirms that the handwriting on the note is Manny's. That means Manny ordered DeMasque II to steal Allebahst's Primidux Statue! Talk to the ambassador again.
- Job for DeMasque II: Babahl's Primidux Statue was a fake, as we were previously told. Palaeno was concerned about this fact when the statues were to be examined at the end of the event. After consulting the victim, he probably wrote the note. Why did Manny want to ensure Palaeno became the ambassador of the reunited Cohdopia as he himself was more capable?
Detective Gumshoe enters the room, saying that he has all the information about the office before the fire. With this information, Kay can use Little Thief to recreate the state of the room before and during the fire!
Bad Ending Four: If you run out of logic here, Shih-na ends the investigation and asks Edgeworth and Kay to vacate the premise.
Recreation: Secretariat's Office[edit]

First, examine the grandfather clock. It seems like it was flush against the wall before the fire, but was moved afterwards. Detective Gumshoe finds a length of wire inside the clock that prevented it from chiming. The Wire is added to your Organizer. Someone, likely Mr. Coachen's killer, tampered with the clock.
Now examine the knife rack. It appears that one of the knives had already gone missing before the fire.
Examine the flames. Since the flames were out by the time Kay entered the room and because Ambassador Palaeno could not do the same when the fire was burning, we can assume that the only people that entered after the fire started was Kay and the mysterious person. There is one thing that could be the source of the fire, even though it's not as large. Present the Silhouette Lantern. The lantern burns with whitcrystal oil, which is probably what caused the fire. Palaeno was mistaken about the source. Present the Babahlese Ink. The ink also consists of whitcrystal oil, which was why Palaeno mistook it as the fuel for the fire. We know that the victim smuggled a lot of ink, which could be used to create something flammable, something that could cause such a large fire. Present the Counterfeit Bills. Manny Coachen was counterfeiting the bills used in Zheng Fa, and whoever started the fire used the bills as fuel. Counterfeit Bills are updated in your Organizer.
Now talk to Gumshoe. He says that the first fire took him by surprise and he tried to escape using the elevator, but it was being used by someone, so he had to use the stairs. The ambassador mentions that all staff members are warned to use the stairs, so who used the elevator?
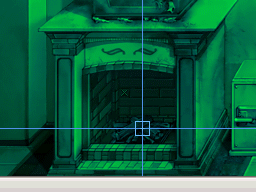
- During the fire: A mysterious person wearing a long coat was spotted in the embassy, causing quite some panic. It seems to match the figure that Kay saw.
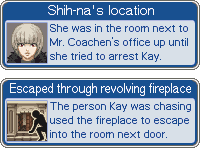
- What you saw: Gumshoe couldn't chase the Yatagarasu because he was lost, but soon encountered Kay being arrested by Shih-na. Gumshoe also mentions that he saw Shih-na coming out of the next room when he was nearing Kay's location. You get the Shih-na's location logic.
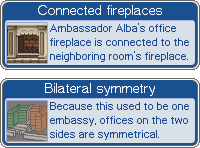

We have examined everything in this office, but there is still something that bothers Edgeworth. The office looks very similar to Ambassador Alba's. Ambassador Palaeno reveals that both embassies are bilaterally symmetrical. You get the Bilateral symmetry logic.
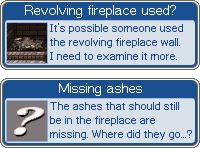
Now go into Logic Mode and connect Bilateral symmetry and Connected fireplaces. If the building is symmetrical, that means this room's fireplace might also have a hidden passage. The killer likely used this passage to escape. You get the Revolving fireplace used? logic.
We are now in a close-up scene of the fireplace. Sure enough, there is an X that activates the revolving wall, but something is missing from this scene. Deduce the logs and present Amb. Palaeno's Testimony. Ambassador Palaeno said that he forgot to clean up the ash after burning some files this morning, so where did they go? You get the Missing ashes logic. Kay inputs some new information into the recreation, so now the fireplace has the missing ashes.
Go back into Logic Mode and connect Revolving fireplace used? with Missing ashes. Ambassador Palaeno also mentioned that he spilt some ink on the back wall, but we can't see any trace of it. This indicates that the revolving wall was used and that both sides had been switched. The Revolving Fireplace Wall is added to your Organizer. That means whoever killed Mr. Coachen escaped through the fireplace. You get the Escaped through revolving fireplace logic.
Finally, connect Shih-na's location with Escaped through revolving fireplace. Since Gumshoe witnessed Shih-na coming out of the next room, it could mean that she used the secret passage, and that might make her Manny Coachen's killer!
With that, our investigation is complete!
The truth about Manny's murder[edit]
Edgeworth now recalls the time Kay was arrested. Shih-na came out of the next room as soon as she heard Kay scream and instantly accused Kay of the crime. However, we need to do something else before confronting Shih-na. Edgeworth requests Gumshoe to run a handwriting analysis on DeMasque II's note. He also makes Gumshoe try and fit through the passage, through the ashes.
We might have figured out who Manny's killer might be, but there are still a lot of unanswered questions. Gumshoe returns from the next room. His jacket is dirty from the ashes and ink, but we now know that someone can move through the passage. We still need the results from the handwriting analysis, though that would take a bit of time. For now, we should wait at the Theatrum Neutralis with Agent Lang and Agent Shih-na.
The chapter now ends.
