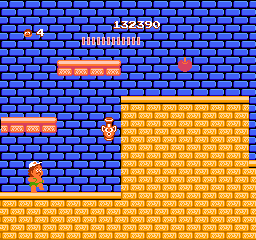
This stage starts off fairly straightforward until you get to the descending steps and the frogs. Be sure to jump clearly over the frogs. They can't jump up the steps, and they can't jump to the right, but they can still kill you if you don't plan for them properly. Shorty beyond that is a floating platform and a rock that sits in front of the wall. Trip over the rock to reveal the hidden Bonus Pot for this stage. Then ride one of the platforms to the top of the wall. Look for an egg just before a signpost.
The first platform you come to will drop. On the other side is a flower. Ride the next platform up, and get close enough to the one beyond to get it moving. Wait until it drop through the bottom and reappears on the top to jump on to it and continue. Watch out for the frogs that occupy the staircase. Near the bottom of the stair case, you can shoot a region of space to make a platform appear and take you to a bonus stage.
After collecting some milk from an egg, this entire section is composed of lateral moving platforms, each one a little higher than the last. This will test your patience more than your dexterity, as you must wait until you absolutely sure that Higgins will be able to land the jump from one platform to the next. Don't be too hasty.
After climbing a set of steps, and avoiding the boulder that comes rolling your way, you will arrive at a set of platforms. The first platform, and every other platform thereafter, will drop through the floor. The even platforms are stationary, so you can use them to launch yourself farther on to the dropping platforms, which will help you reach the stationary ones more easily.
This first section is straightforward, with a lot of uphill climbs that naturally contain boulders. You may even opt to take the skateboard provided for you at the start of the level if you already possess a weapon.
After climbing uphill a little further, you will have to work your way downhill with a set of fires along the way. Be sure to control your jumps so that momentum doesn't carry you right into the fires. One more uphill loaded with Cobras and you're on to the next section.
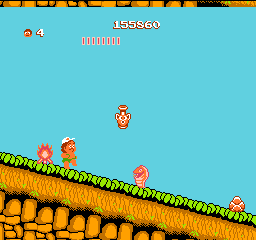
Right after the first egg in this section, two flowers along the downhill indicate that two Coyotes are about to approach you from behind. They should catch up to you right about when the terrain begins to climb up again. Beware of the frog near the peak. At the bottom of the hill is another frog. This frog is unusual because he faces right. If you play leapfrog with this Kello, he will jump over your four times, and on the fourth jump, he will suddenly turn into the Bonus Pot.
The beauty of this section is the Honey Girl fairy placed near the very start. Collect it and you can go crashing through a series of rocks, fires, and assorted enemies. The fairy should last all the way until you reach the goal signpost.
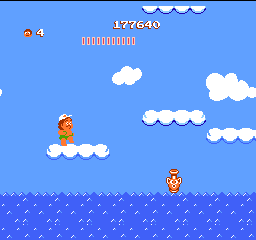
After collecting the flower from the first island, concentrate on leaping from one cloud to the next. You can choose to eliminate the Octopi as you proceed, or simply jump over them. Watch out for the last cloud which falls. Take out the Sneils on the next island. Another set of clouds awaits you before the next section.
Next is another section of cloud hops. There is nothing particularly special about this section. By now you should be able to tell moving clouds from stationary clouds by the darkness of the outline. Watch out for clouds that fall when you land on them. An extra life is hidden on the island after these clouds.
This section gives you another opportunity to blast through your enemies, courtesy of the Honey Girl fairy that you find near the start. You should be able to hang on to the fairy long enough to hit the Waler fish that jumps towards you in the cloud section.
In this final cloud hopping section, you must be cautious of the blue Octopi that jump out of the water, and even more cautious of the Walers that leap towards you. You can wait them out from several high clouds and jump over them when they're on their way down instead of having to deal with them. The Bonus Pot is visible near the water. Instead of jumping on to the ascending clouds, simply run and fall down on to one of them when they are appearing from the bottom to collect the pot.
Once again, you must face a legion of Zigmo spiders. They never get any more difficult to deal with, just greater in numbers. One Pooter will run by to mix things up. Beyond the spiders, an entire flock of Cavas will come flying by. If you have a weapon, throw it as fast as you can. If not, watch their flight pattern and find the safe spot to move through. Collect the flower at the section's end.
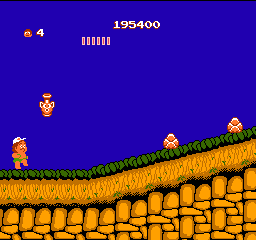
After dealing with another Coyote attack, you can find a Red Milk after the first fire. Next, you'll find a series of rocks followed by a set of Kello frogs. Later, you'll encounter a springboard. Do not open the egg beyond the spring, as it contains a deadly eggplant.
Right after the signpost, a hidden fireball egg can be revealed. Then you'll notice two flowers which indicates two Coyote attacks. These Coyote may leap, and if they do, they will leap together, but it's not guaranteed. Further on, you will find another Coyote flower, but this Coyote will appear in the midst of a few Pooters and some Zigmo spiders. Advance through this section patiently and cautiously and be sure to clear out the enemies ahead of you so that you have room to deal with the Coyote safely. One more Coyote attack will occur among rocks and fires.
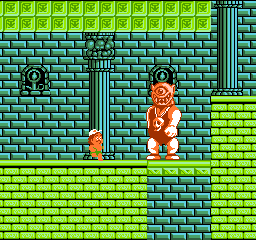
Trip over the very first rock that you come to after the signpost to reveal the hidden Bonus Pot. The rest of this section is must like every Stage 4 Section 4. Climb uphill avoiding the boulder, and then move across the other slopes, avoiding the Cobras and fires until you reach the platforms that lead to the boss. The first platform will fall away, but the second one is secure. This next boss requires 12 hits to destroy.


 Red Milk after the first fire. Next, you'll find a series of rocks followed by a set of Kello frogs. Later, you'll encounter a springboard. Do not open the egg beyond the spring, as it contains a deadly eggplant.