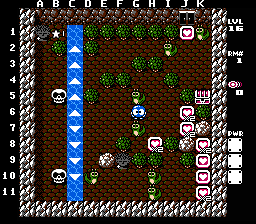
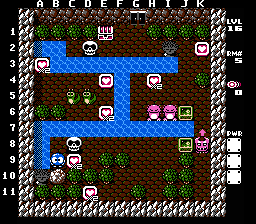
A Snakey and Medusa level that requires careful movement and some speed.
Push the F3 and H3 EFs up, and the G3 EF right. Get the hearts at G1, H1, and I1.
Push the I3 EF down one space, and move the H2 EF to D11. Get the B10 heart.
Move the H3 EF to D1, then get the F1 heart and push it left. After that, move the F2 EF to G9.
Push the H9 snakey to the bottom then quickly get the G11 heart, push the egg right, get on the bridge at I9 and shoot the egg away. Push the G9 EF all the way right and wait at H10.
When the H9 Snakey respawns, push it up two spaces, then quickly push the I6 Snakey all the way right and push the H7 egg left, push the K6 egg into the water below, get the K8 heart and cross back.
Move the I4 EF to A8 (push EF to D4, push it down four spaces then right three spaces then move it all the way left).
Get the G7 snakey into the water at C3, Push the B3 EF, and cross back. Get the A6 heart and go to H10 before it respawns.
When the H9 snakey respawns again, push it up three spaces, push the I6 Snakey up one, push the H6 egg into the water above and put the I5 egg into the water at K3 and ride it up to the chest.
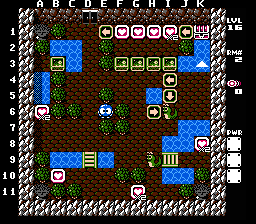
Another pretty simple level for so late in the game. This level has you using an active Skull to block a Medusa, though there is an alternative solution that does not require the use of this technique.
Move the E2 EF to C4, and the E3 EF to B5. Get the heart at D11.
Push the D8 EF left and get the C10 heart.
Push the F10 EF right above the Medusa, move the F9 Skull to G11, and get the E11 heart.
Shoot the J7 Skull away and move the I7 EF to D5. Get the H3 heart.
Quickly push the J7 Skull right, push the I10 Skull down, get the K11 heart, and get to the grass before they hatch.
When the other Skull goes into the corridor, quickly follow it and shoot it, then get the treasure.
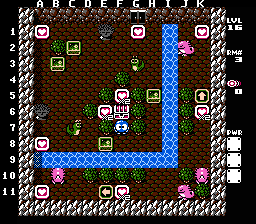
The most difficult part of this level is the beginning, where you have the most risk of getting into the Don's line of sight. A bit of variation is possible with the end steps.
Get the C9 heart and immediately go to B8.
Push the Skull to I8. When the Don passes you going down, quickly push the egg into the water above, push the Gol up one space, push the J6 EF right then push the Gol up another space. Get the H4 heart.
Push the K6 EF down all the way down and the J8 EF left two spaces. Then put the H6 Gol into the water below and push the EF to the bottom. Get the D11 heart and wait for the Gol to Respawn.
When the Gol respawns, use the Skull to cross the H7 water and move the Gol to J2. Get the K2 heart and wait for the Skull to respawn.
When the Skull respawns, use it to cross the water above and get the hearts at E6 and E4.
Push one Snakey up one space and the other all the way left. Get the final heart and wait at E4.
When the Skull is directly above you, shoot it and quickly cross the water and get to the chest.