Main room[edit]

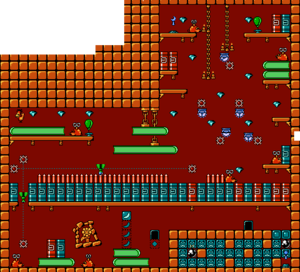
In the first room, you will simply climb to the top, collecting the balloons along the way. There are three exits in this area, leading to the three sub rooms.
To reach the first room, jump to the doorway. You will now have to activate the crescent switch to proceed.
To reach the second room, jump up until you reach the second spring. Use this spring to break through the ice blocks, and head to the left. Dive down to break the ice blocks and go through the door. You will now need to deactivate the crescent switch and activate the diamond switch before continuing to the third room.
To reach the third room, jump onto the lift that moves up and down and head right. Climb up the right-hand side of the room, and go through the door. You will need to activate the crescent and star switches. Note that the watering can in the room past the door.
After activating the star switch, you can collect the final balloon at the top.
Remote mine[edit]

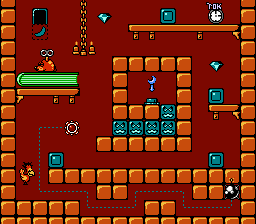
This is your introduction to the guided mine. It is in the bottom-right corner, and is controlled by boxes which appear to contain a square.
Peck these boxes to move the mine about. Pecking it when facing right turns the arrow clockwise, while facing left turns it counter-clockwise. Guide the mine into the scary-looking blocks to destroy them, them jump on the crescent switch to exit the level.
There is a stop-watch in the top-right corner. It reduces the amount of time spent on the level, thus increassing the end-of-level bonus.
Once you exit this room, you may optionally collect the can of worms. To do so, you need to collect the present in the main room, and fall down towards the spikes at the bottom. Walk to the bottom left corner, and jump up the books. Stand below the diamond, and jump to open the secret.
Library[edit]

This is the level's library, containing many books to stand on. You first need to head to the top-right corner, first travelling by the green platform. To reach the top, you need to jump onto the blue moving platforms. Even though they look dangerous, they do not injure Alfred.
At the top, get the balloon and flip the crescent switch.
Next, head to the bottom-left by the green platforms, then head right. You will need perform the second guided mine maze to activate the diamond switch. Move the guided mine to destroy the right-most block; the mine will fall and flip the switch.
If you mess up the puzzle, you can enter the door to reset it.
Corridor[edit]

Jump to the right, riding the platform and avoiding the mine.
As you proceed, you will see a new toy: The magnetic mine. To activate it, peck the face blocks to wake up the mine and have it follow you. Peck the face blocks again to turn it off.
Using the magnetic mine, deactivate the diamond switch, and banana switch. Activate the mine, and head to the right. Once you are near the exit, peck the face block to deactivate the mine and activate the crescent switch (allowing you to leave the area.)
If you want to collect the watering can, then deactivate the diamond switch and activate the banana switch. Head left to the ice blocks and destroy them to uncover a secret floor; it is located below the second ice column on the left.
Once you are down in the secret area, optionally jump through the left wall for a 1-up, then head to the right and jump over the mines - timing is crucial. At the last platform, you can walk off the edge of the platform to land on an invisible spring. This allows a very easy jump over the final mine, and access to the room containing the watering can.
Star switch[edit]

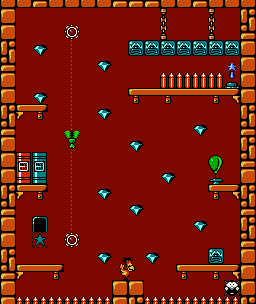
The final room contains a star switch far above, but you cannot access it yourself.
Use the face block to activate the magnetic mine. It can be done at the bottom for speed or at the top for safety. If you prefer using the bottom switch, you can jump up using the invisible spring one block right of the moving platform. Once you reach the top of the room, jump onto the face blocks on the right. Guide the magnetic mine just below the face blocks and above the star switch past the spikes. Deactivate the magnetic mine to press the button and head to the exit.
The star switch allows access to the final balloon in the main room.
Stage 4 boss[edit]
The Stage 4 boss behaves identically to the boss in Stage 2. However, it will also have an orbiting mine.
The same tactics apply to defeating the boss. Attack when possible, and fly either over or under it. However, avoid using the top-left corner when starting the boss fight, as the orbiting mine will trap and kill you.