Jump to navigation
Jump to search
- When playing either side, take into account the side-path and the fact that the enemy will send troops along it. Defense must be careful not to get sniped or grenaded by staying in easily recognizable and seeable points.
- Defense usually sends people to go along the path down the ravine.
- Assault usually sends its forces along the side path, but occasionally uses the bridge, or even both ways to the end.
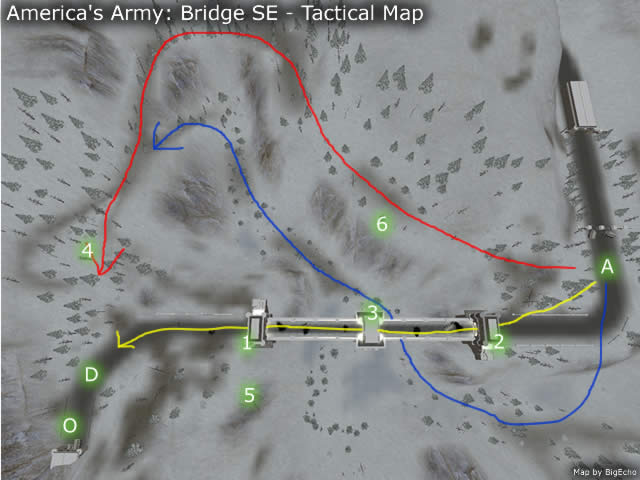
Tactical Map[edit]

Legend[edit]
A = Assault Spawn Point
D = Defense Spawn Point
O = Assault Objective
Important Locations[edit]
1 = Defense Tower
2 = Assault Tower
3 = Middle Tower
4 = Strategic Defensive Hilltop East Hilltop
5 = Common Sniper/203 Location
6 = Overwatches Bridge
7 = Lower North Hill
8 = Upper North Hill
9 = Valley Mouth
Common Assault Routes[edit]
Yellow Arrow = Across Bridge: A bit more difficult than in standard bridge due to snipers/less fog.
Red Arrow = Around Ridge: Very common route, generally easy until assault reaches location #4.
Blue Arrow = Through Valley: If defense isn't paying attention, this route is fairly easy, but you still have to get past location #4.
Black Arrow = Along the Eastpath over the South Hill, best Route to stop or spot rushing enemies.