| Map | DLC 1.0 | DLC 2.0 | DLC 3.0 |
|---|---|---|---|
| Alhambra | No | No | Yes |
| Castel Gandolfo | Yes | Yes | Yes |
| Florence | Yes | Yes | Yes |
| Forlì | Yes | Yes | Yes |
| Mont St-Michel | Yes | No | Yes |
| Monteriggioni | Yes | Yes | Yes |
| Pienza | No | Yes | Yes |
| Rome | Yes | Yes | Yes |
| San Donato | Yes | Yes | Yes |
| Siena | Yes | Yes | Yes |
| Venice | Yes | Yes | Yes |
There are eleven maps you can end up on when joining a game, depending on which DLC update you are on. The maps rotate after every session and some have a night or dusk version, which are community unlocks added by Ubisoft after reaching certain community goals. Each map has similar characteristics, such as chase breakers, hiding places, climbable objects and NPCs, but each has its own unique flavor and may require different strategies.
Alhambra[edit]
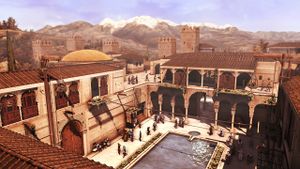
Alhambra, first playable in Discovery, is a fortress in Granada, Spain materialized as a multi-leveled map in Brotherhood. The map is large and labyrinthine, with many chase-breakers and lifts to help you ascend quickly. Stealth players will have a harder time on this map, as it promotes running and roofing. Because you can quickly drop out of pursuers' lines of sight by running off a ledge, Disguise works well on this map to escape chasers. Although the Hidden Gun is a threat, it is best to keep to the rooftops so you can maintain visibility on pursuers and quickly get to your target.
Castel Gandolfo[edit]
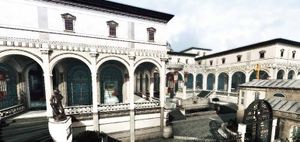
This former residence of the Pope is located a few kilometers outside of Rome and is mostly played indoors. This is a more confined map with many levels and enclosed hallways. It's easy to get close to your target quickly without being seen, as there are few places that present long stretches of uninterrupted view. The close quarters makes for a quick turnaround for contracts, and makes blending in with the crowds easier.
Florence[edit]
The Florence map is centered around a central market with buildings in a square around it. There are plenty of wires connecting all the buildings for easy acrobatic aerials, and chase-breaker gates lead in and out of the main square. On the outsides of the map, opposite each other, are two crowded areas good for mixing in blend groups to confuse your pursuers. You can see all the way across the map from most roofs, so approach you target from below to preserve your stealth meter.
Forlì[edit]
This is a gray, cramped map, full of short buildings and long cobbled streets. It is one of the more diverse maps, with an enclosed church, a small central market, odd passageways, underground tunnels and more. A couple chase-breaker gates leading into the market and a small courtyard beside it are high traffic areas where you can easily spot your pursuers or wait in handy blends for your target. If you have multiple pursuers, duck into the church and find a blend spot where it's hard to be line-of-sighted and they will have full compasses at all times.
Mont St-Michel[edit]
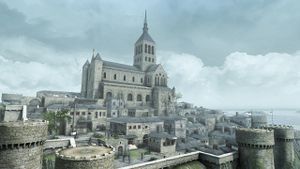
Located on a small tidal island of the coast of Normandy, France, Mont Saint-Michel is a small city built around the central abbey. The map is all open-air ledges and roofs and one of the most difficult through which to travel with speed. There are some open courtyards and cramped alleys, but the main traffic area is in front of the church where a Franciscan monk is preaching. This open area is accessible from three directions and from below through two staircases. There are numerous wandering groups, stationary blends and haystacks, which make being targeted or finding your own target difficult—helpful, depending on your playstyle.
Monteriggioni[edit]
The home of the Auditore family from this and the last game is laid out similarly, except for the addition of chase-breakers and you cannot access behind or around the Auditore villa. This map is even more cramped than Forlì, with much of the action taking place on rooftops. A double staircase from the courtyard below the villa leads down into the main street, which features moving crowds and stationary blend groups. A very roofer-friendly map, it also has its own underground tunnel that leads from the street level up to an out-of-the-way spot in the upper levels.
Pienza[edit]
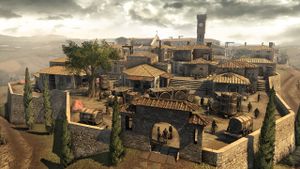
Built in Tuscany on order of Pope Pius II, Pienza is a bustling city with many large and tall buildings. Rising above the covered market stalls in the center of the map, the main tower gives you a view of almost the entire map. On two other sides of the market are a church and an open-roofed courtyard, both with stationary blends and multiple entrances. Pienza is one of the larger maps, with a lower section long one side that runs partially underneath the main level.
Rome[edit]
Rome is a much more open map with tall buildings clear lines of sight. Lifts will help you quickly ascend to the rooftops and escape your pursuers. Because it is so open, the Hidden Gun ability can be used to great effect and chases can go on for a long time. If you have a lot of contracts out for you, head to the bazaar in the center of the map to locate groups for blending.
San Donato[edit]

San Donato is an open map with a central courtyard ringed by a rooftop and a church off in the corner. There are long lines-of-sight on this map, so take care move slowly when approaching your target to preserve your stealth meter. Crowds are often roaming the streets around the courtyard, and they can be use to confuse your pursuers. There are a bunch of small buildings all around the outside of the map to help you break line-of-sight or set up an ambush.
Siena[edit]
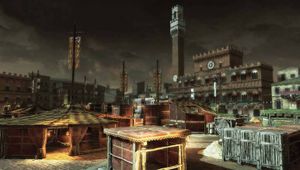
Siena is a nighttime carnivale theme, complete with striped tents, fireworks and a low auditorium in the center. This is a small map like Castel Gandolfo, but without the many levels, so locating your targets is easier—as is being found. Running through the tents can be somewhat maze-like at times, but it pays to familiarize yourself with them so you don't make yourself obvious by climbing on rooftops.
Venice[edit]
Venice is a simple, open map, split in two by a large building in the center. On one side is the water with numerous stalls and on the other is the main courtyard. This is a very easy map to get around in, and there are multiple lifts to get to the top of the building quickly as well.