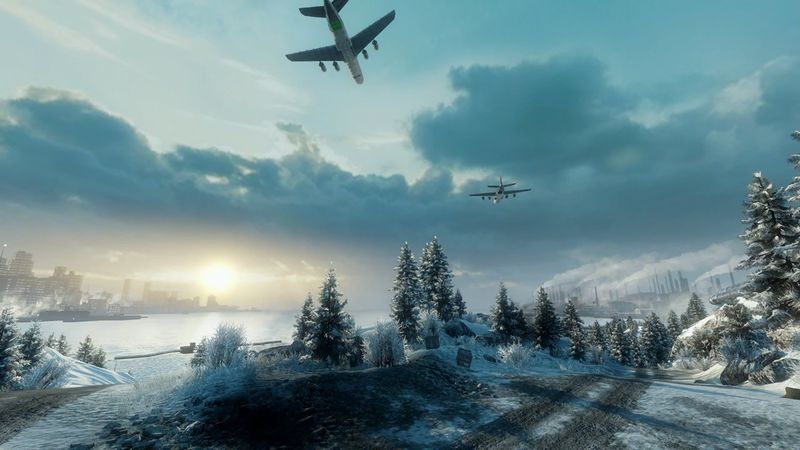
Port Valdez is an arctic vehicular map. Vehicles will often be forced to using a single large road that stretches across the map to be able to manoeuvre. Alternate routes exist but are often physically barricaded, making it difficult to navigate.
The map has 3 flags during Conquest mode, four stages during Rush with two M-COMs each (for a total of eight M-COM stations for the attackers to destroy), and just two M-COMs for the game's Squad Rush mode. Squad Deathmatch is not supported for this map.
Official Description: In arctic Alaska, airborne Russian forces clash against U.S. forces on this heavily vehicle-focused map. This is classic Battlefield warfare where there is a chance for everyone to contribute, no matter what the specialization.
Extended Description: Russian Forces are posed to attack the harbor in an attempt to seize the Trans Alaskan Pipeline. Without regard to arctic conditions, the area has been probed by Russian Pathfinders indicating an airborne assault is planned. U.S interrogation of captured Russian para's revealed that MBT's will be, or have been, airlifted into the area. All armor assets and attack helicopters are being diverted to the sector. No fallback exists for either side. This engagement will decide the outcome of the war.
Conquest[edit]
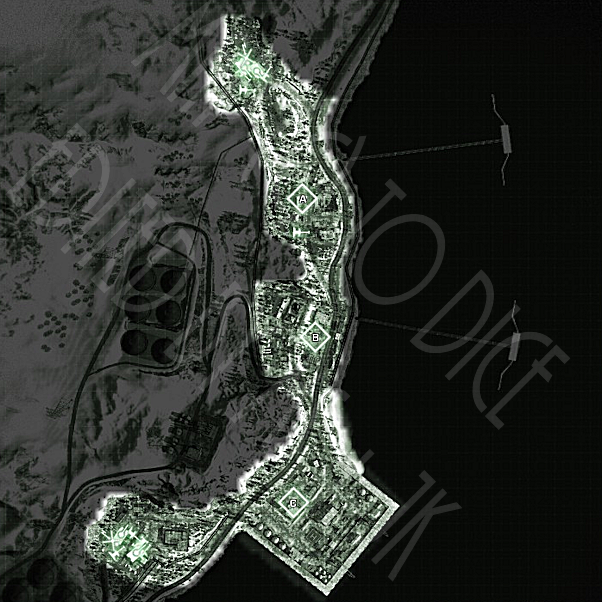
The Conquest version of Port Valdez has a very similar layout to the Rush version. It consists of three flags, with each flag spawning additional vehicles. Like Rush, the control points consist of several open areas with narrow passageways between them. The center flag, Bravo, is the obvious key to victory. Charlie and Alpha will most likely remain in control of their respective teams, unless a squad is able to slip past the enemy defences unnoticed.
In order from north to south:
| Flag | RU Control | US Control |
|---|---|---|
| RU Deployment | Mi-28 Havoc, CAV, T-90 (x2), KORD (shielded), KORNET, ZU-23 | N/A |
| Alpha: Construction Site | T-90, CAV, KORNET, KORD | TOW, XM312 |
| Bravo: Office Site | KORNET (x2), KORD, UAV-1, ZU-23 | KORNET (x2), KORD, UAV-1, VADS |
| Charlie: Harbour | M1A2 Abrams, CAV, XM312, TOW | KORNET, KORD |
| US Deployment | N/A | AH-64 Apache, M1A2 Abrams (x2), CAV, XM312, TOW, VADS |
Rush[edit]
A rarity for most Bad Company 2 maps, the Americans are defending while the Russians are attacking. This is a good spot to look for American stationary machine guns and other weapons; more often than not emplaced weapons will be of the Russian variety.
The attacking team starts in mid air. They parachute out of AI-controlled transport planes. During the drop they are vulnerable to long-range attacks from the defender's side; however, shooting parachuting enemies can prove difficult. Once one member of your squad hits the ground, you can use him or her as a spawn point to avoid being sniped while parachuting. Also during the drop there will be several explosions around you; these explosions are scripted and will not harm you in any way.
At the base, Russian players will find a pair of Quad Bikes, a UAV station, a T-90, and a BMD-3 anti-aircraft vehicle.
Construction Site[edit]
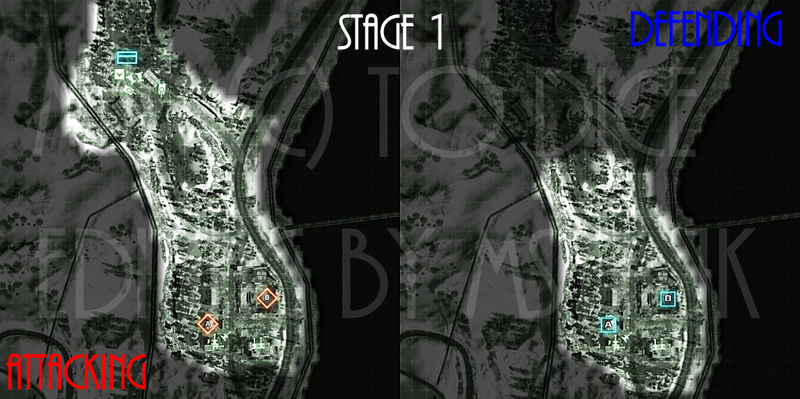
The first set of M-COMs the Russians must destroy are in a construction site. Possible avenues of attack include the small forested area west of objective alpha, and the road east of bravo. Also notable is the large hill that Russian snipers often use. American snipers can find best cover behind the building under construction.
The American defences include a shielded machine gun facing the hill, a TOW launcher one level above it, and multiple machine guns to the west in a building. There is also a second TOW launcher at the base of the building that the defending team can use against enemy armour. Its firing arcs are more limited, but it is less vulnerable to snipers than the launcher in the building.
Note that M-COM station alpha is located inside a building and can be destroyed by destroying the building it is located in.
Office Site[edit]
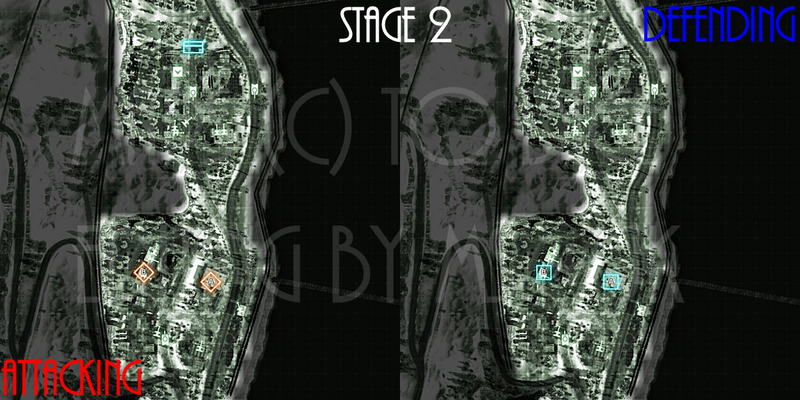
This stage's defences are a little strange, as most of them are positioned behind the M-COM stations you need to defend. Both Alpha and Bravo are located inside buildings, so this stage can be easily won by attacking teams adept in dismantling structures from afar.
However, the attacking team is forced to funnel their forces down a very narrow path, giving the defenders a chance to halt them here. Most infantry attacks will come from the hill between A and B. Russian tanks will probably position themselves along the main road to try and shell Alpha. This stage's TOW launcher has a limited arc and most likely will not be able to reach the tanks. Engineers will prove important on this level as a result. Defenders must also be aware of attacks coming from the west side of the map, along the pipeline.
The defenders also have access to a Bradley IFV for this section. It is often best used to cover the hill against enemy infantry attacks, as moving it out to the main road exposes it to tanks.
Harbour[edit]
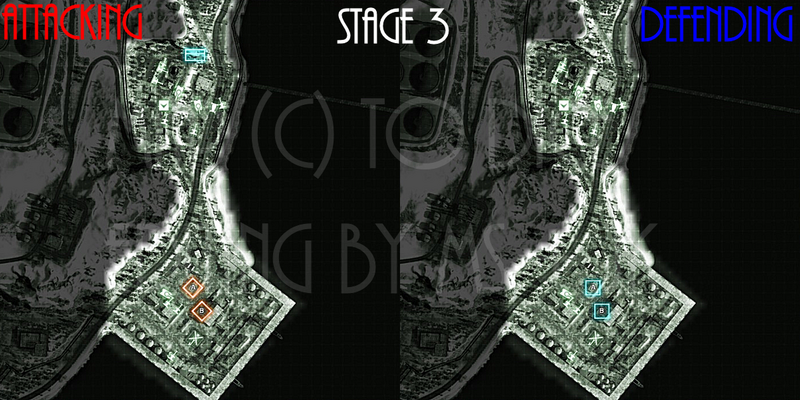
Losing the office building prompts a scripted A-10 strike against the main road, but it causes no damage and does little more than kick up dirt.
From the defenders' old spawn, the Russians must charge up a large open road to reach the American objectives. This region is easily covered by the Bradley IFV that appears. Instead of travelling up the main road, however, the Russians will often try to travel along the coast to flank the positions covering the road. Defending players should cover the shoreline as best they can, but watch for enemy snipers standing either on or at the base of the pipeline.
The rest of the area is rife with cover; buildings and cargo containers alike provide excellent protection to players who manage to secure the area. If the Russians manage to hold the road and force the defenders to fall back, expect multiple enemies near the cargo containers and the crane.
Although both M-COM stations are located indoors for this stage, neither structure can be collapsed on the M-COMs, so the attackers will need to destroy these with either explosive weaponry or by arming charges.
Comm Depot[edit]
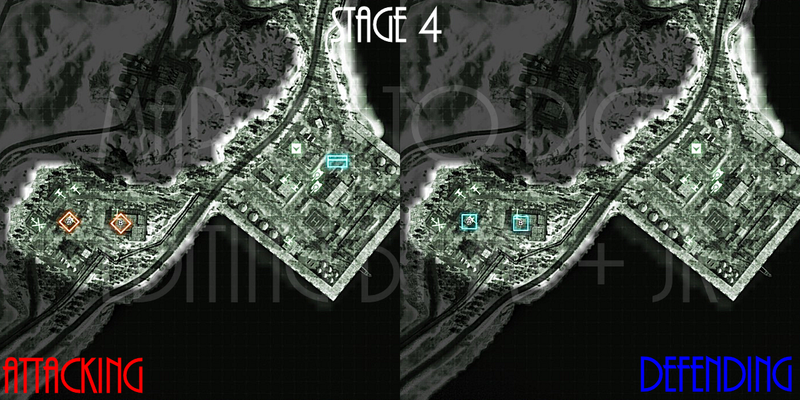
The final push for the Russians and the final set of M-COMs on the map, the Comm Depot can prove challenging for the Americans to defend. The Russians manage to keep their two armoured vehicles - the T-90 and the BMD-3 anti-aircraft, while the Americans lose access to the Bradley. Instead, the Americans obtain a single UH-60 Blackhawk that might tip the tides for them if used properly.
The American defences are relatively thin in terms of weapon emplacements, but the road to the comm depot will often be heavily protected by Engineers, Medics, and Assault classes. Mines will prove useful to the defenders, but attackers will often destroy the mines with gunfire first.
Objective Alpha is located in the middle of the base, and chances are Bravo will be destroyed first due to its closer proximity to the attackers. The building Bravo is in is almost identical to the satellite control room in Crack the Sky with few changes. Snipers have excellent sightlines from the top of the building, but are themselves vulnerable to counter-sniper fire as well.
Squad Rush[edit]
Port Valdez's Squad Rush game mode is small and simple with multiple buildings and places to hide. Unlike the standard Rush, the Americans are attacking while the Russian team is defending the single M-COM station.
Office Site[edit]
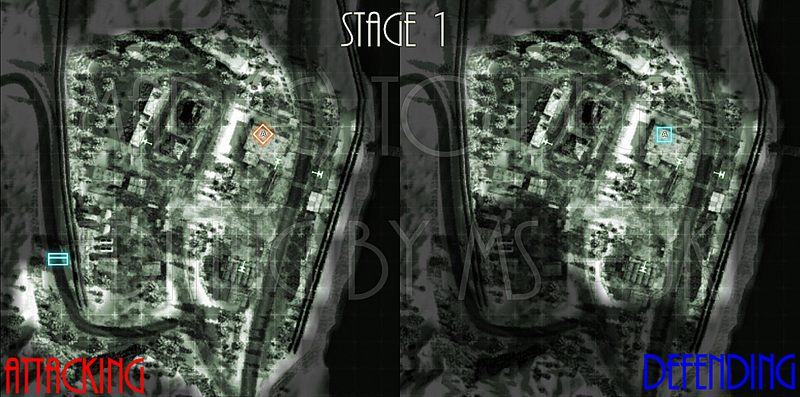
The Office site is identical to its appearance from Rush, except it has some new KORD machine guns located in various positions that were originally either empty or had a TOW launcher in it. With only four players on a given team, the value of the machine guns is situational in nature.
Construction Site[edit]
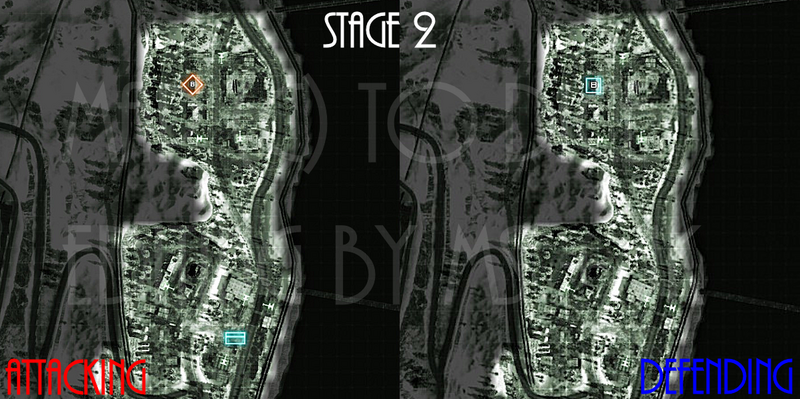
The construction site differs in that most of the Russian defences appear facing the office site instead of the Russian deployment. Although peculiar in that most of the defences point backwards from the standard Rush, this section of the map plays out as normally.
Outcomes[edit]
At the end of the match, a short cutscene will play, depending on which side won. There is one cutscene for each side, but the dialogue that follows varies greatly.
If the Americans win, the port is reinforced successfully by a column of Bradley IFVs.
If the Russians win, the oil pipeline explodes, with a chain reaction flowing into a series of large oil containers.