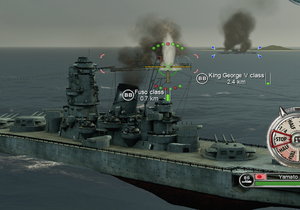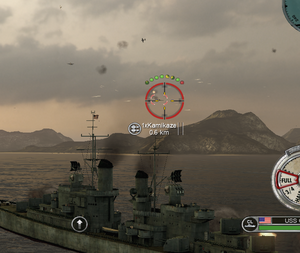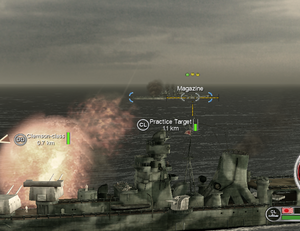
As the name Battlestations suggests, Battlestations Pacific is ship-oriented. Ships play a large role in gameplay - while not as fast as aircraft, they are tough and able to secure the sea against other ships and, to a lesser degree, aircraft.
Ship Types
Warships are separated into several distinct categories, listed below. Most return from Battlestations Midway, but a few have been introduced.
| Abbreviation | Type |
|---|---|
| DD | Destroyer |
| CL | Light Cruiser |
| CA | Heavy Cruiser |
| BB | Battleship |
| CV | Aircraft Carrier |
| CVE | Escort Carrier |
| AP | Transport |
| Abbreviation | Type |
|---|---|
| AK | Cargo Ship |
| PT | Patrol Boat |
| SS | Submarine |
| LST | Landing Ship (Tank) |
| LCVP | Landing Craft Vehicle/Personnel |
| LSM | Medium Landing Ship |
| AO | Fleet Oiler |
Moving and Looking

Use the move controls to look around your ship. This is identical to how you aim.
Pressing the accelerate key will slide the bar on the side of the helm to the top of the screen - pressing decelerate will move it down. There are seven speeds your ship can operate at:
- Full: Your ship will move forward, as fast as it can.
- 3/4: Your ship will move forward at 3/4 of its top speed.
- Half: Your ship will move forward at half of its top speed.
- 1/4: Your ship will move forward at a quarter of its top speed.
- Stop: The ship will stop.
- 1/2 Reverse: The ship will move backwards at half of its reverse speed (equivalent to 1/4 forward).
- Full Reverse: The ship will move backwards at as fast as it can (equivalent to 1/2 forward).
The rudder controls will steer your ship. If you've played racing games before, your ship's rudder works almost identically to a racecar's front wheels - they steer the ship left and right. It should be noted, however, that with the notable exception of PT boats, a ship's rudder will maintain a turn until you correct it (or if the computer takes over). Be sure, therefore, to watch your direction of travel and that you don't accidentally bump into land, which causes a small amount of damage to your ship. PT boats' rudders snap back to their neutral state when not turning, making PT boats more like cars than other warships.
Aiming and Firing
When in command of a ship, use the camera controls to look around. This is also how you aim your weapons. To fire on an enemy, just put your cursor over the enemy target and open fire. Use your binoculars to view distant targets. Warships have 4 kinds of weapons - only destroyers sport all four.
- Anti-Aircraft weapons, the smallest guns on your ship, are obviously meant for taking down enemy aircraft. They also, however, can be used against patrol boats in particular given their very low armour. AA does no damage against anything larger than a PT boat.
- Artillery are the main cannons on your ship. Use these to smack large armoured targets. Most of the time, this will be another ship, but it can also destroy enemy land installations too.
- Torpedoes are the deadliest weapon on your ship. Unfortunately, they are rather slow and somewhat easy to dodge. Only direct hits will count, so it's possible to miss by mere centimetres. Torpedoes are also the only weapon on a ship that has limited ammunition.
- Depth Charges are the only way of attacking a submerged submarine. Torpedoes don't run deep enough to strike submerged subs (although they can hit if on the surface). Fortunately, depth charges cause considerable damage, even at near-misses.
Air Defences

Naturally, most vessels are equipped with at least some form of defense against air assault; Which can come in the form of machine guns and triple-A (Anti-Air Artillery). Contrary to popular belief, you actually don't need to lead your targets much when it comes to anti-aircraft armament, as the game provides a major degree of aim-assist when aimed, in this way. Note that the crosshair changes; If it expands then that means the target is within firing range.
Machine guns are typically good at low-flying planes, and flak guns against high-flying planes. Use the tracers and flak shot trails to ensure the enemy is bracketed with multiple hits. It doesn't take a lot of ammo to send enemy aircraft down. Aircraft have low HP, and will often go down after a few hits.
Occasionally, novice players will send their fighters to attack you with guns. Fighters can be ignored for the most part - the most damage they can do is disabling your AA emplacements.
Artillery

Artillery - your warship's main cannons - has changed a bit since its last appearance in Battlestations Midway. There is now less emphasis on deflection shooting, or "leading" your targets. In Pacific, most of the aiming is done for you. Pacific has added aim assist that shows you exactly where you'll strike an enemy warship - in the magazine, in the fuel, or in the engines. Unlike in Midway, sustained fire will grow increasingly inaccurate, as shown by the expanding crosshair.
Sustained fire leads to far less accurate volleys than timed bursts, hinted by the crosshair expanding as the cannons fire. Battleships in particular should time their volleys to attack enemy warships from a distance. Use sustained fire should be left to closer engagements where accuracy is less of a concern when it comes to spraying the enemy during brawls.
Certain naval supplies can help your artillery quite a bit, namely the Autoloader (rapid fire, but hard to hit things with), the Targeting Computers (deadly accuracy), and improved shells which cause increased damage. These supplies are rare, however, and it is difficult to combine them. An autoloader and targeting computer combination can be extremely deadly.
Torpedoes
Torpedoes are a deadly weapon when used correctly. Patrol Boats, Submarines, Destroyers and Torpedo Bombers have access to these underwater munitions to strike vessels below the waterline, causing the hull to flood.
Speed is of the essence when making a torpedo run, as most torpedo carriers do not have a large health pool. Additionally, a torpedo's high damage makes torpedo bombers, destroyers, patrol boats, and submarines priority targets.
When fired at range, torpedoes are best fired in a spread to limit the movements of the target ship. Torpedoes are now launched singly, allowing players to create wide or narrow fans of torpedoes depending on the speed and movements of their target.
Depth Charges
Depth charges haven't changed much from Midway, and remain the main method of attacking enemy submarines. However, air dropped depth charges no longer one-hit kill submarines. The new ASW Fletcher class destroyer adds a Hedgehog depth charge launcher that deals heavy damage to submarines, and can fire from the front. The underwater camera can no longer track submarines below manoeuvring depth.
A combination of sonar and the use of the underwater camera is essential to gauge deployment but note that depth charges are the only way of striking a submarine underwater as a warship as torpedoes run too shallow to strike them. Submarines can be engaged by each other and doing so earns the achievement 'Hunter-Killer'.
Emergencies Onboard

Now that you have a general idea on how to attack targets, those targets are going to start returning fire on you. Knowing how to repair can save your ships, and is what separates a novice player from a veteran.
The repair screen has, for better or for worse, been completely done away with. The repair screen now consists of a large radial dial that appears in the middle of your screen when you hit the repair button. You can then choose, by pressing a direction, which part of the ship you want to repair.
Fire Damage appears to have changed slightly from Midway. Ships' fuel tanks are no longer explosive but are still flammable. Targeting the fuel tank will cause a fire, which will slowly drain the ship of its health. Sustained fire won't appear to rupture the fuel tank as before. Instead, this feature has been moved to the ships' magazine. The magazine is no longer flammable, but instead explosive. Targeting the magazine will result in a large explosion that will heavily damage the ship. It is possible to detonate the magazine multiple times. Magazine shots are the best way of taking down large battleships.
Water Damage appears when your ship strikes a torpedo, or when shells pierce the belt armour. Water begins rushing into your ship and increases its likelihood of sinking. Press the repair button and choose the uppermost option to begin pumping water out of your ship and help keep it afloat. The underwater section of your ship is your health bar (see the ship tactics page from the previous game) so don't worry about sinking randomly. Only fire damage will do that.
Engine Damage will cripple your ship's ability to move, rendering it extremely difficult to manoeuvre. Considering your engine is right in the middle of your ship, it is often struck by inaccurate shots. On ships, this will be the option at the bottom of the repair screen.
Periscope Damage will prevent you from using your periscope while submerged. Obviously this only applies to submarines, and replaces the engine option in the repair screen.
Armament Damage appears when one or more of your ships weapons have been destroyed. Both artillery cannons or AA guns can be affected, as well as the deck cannons on a submarine. Submarine torpedo tubes cannot be disabled. Weapon repair varies from completely useless to absolutely necessary. For example, choosing to repair your AA guns in a battleship duel would be completely pointless. However, if battleship's main guns was disabled, it becomes far more important. It's the leftmost option of the repair screen.
Body Damage is simple damage to your hull. It is the default position, and can be repaired by simply choosing the center option (pressing the repair screen and releasing it without choosing anything). When set here the health of your ship will increase - extremely slowly, but given a few minutes of game time, the ship will eventually repair itself to full health.
At any time you can tell the progress of your repairs - and which component is being repaired - by looking near the helm of your ship. The red ring will decrease slowly as the component is repaired, and the gold ring shows which component is being repaired.
Formations


Ships can be arranged into formations. Formations are nearly unchanged from Midway, although a few changes have been made.
Firstly, formations are made slightly differently than from Midway. Formations are now created by selecting a ship, then pressing and holding the right mouse button until a thin white line appears between them. In this sense, it is much easier to tell which ship is the formation leader. The white lines have a fatter end which is in the direction of the formation leader.
All ships in the formation will maintain a position relative to the formation leader. Formation members are not shown on the outermost and middle zoom on the command map - this can be a somewhat devious trick to new players, who may keep their maps zoomed out. You can attempt to hide carriers and mission-critical units in this case, although obviously it isn't very reliable.

Having a ship leave formation is as easy as ordering it on its own via the command map, or by choosing the right option in the screenshot on the right. This will cause that ship to leave the formation and act on its own. Formation leaders will instead have a Disband option which completely dissolves the formation.

The formation editor is back, and is under "Formation Settings". This allows you to click and drag formation members to a position around the formation leader. There are an infinite number of ways of positioning your ships in a formation, and they can be used for various things - to allow for powerful broadsides, to protect mission critical ships, to hide numbers, etc.
An easy way of telling if a unit is a formation member or leader is to take a look at the icon near the ship's helm. Formation leaders and members will have a small icon, shown left.
For new players, the formation editor is easy to operate - the dark blue ship shown in the screenshot at the right is the formation leader. The light blue ship(s) give the current location of all formation members, and the gold ship is where they are supposed to be relative to the formation leader. By clicking and dragging on the gold ship it is possible to change the location of all formation members relative to the leader.
Standing Orders
Standing Orders dictate how the AI responds to threats. While formerly there were several, Pacific has boiled them down to just two standing orders, which can be toggled. The commands are:

- Aggressive: The ship may deviate from its current course to engage targets. The ship will throw everything and the kitchen sink at its targets, including limited-ammunition weapons like torpedoes. Human-selected targets will have priority. When the ship has destroyed all nearby targets, it will resume its previous movement orders, if any. Submarines will employ torpedoes automatically in this mode.
- Defensive: The ship will not deviate from its current course to engage targets. Torpedoes will only be employed against targets selected by a human player. Submarines will not attack targets at all in this mode.
- Attack: Quite simply, the unit will move into an attacking position. Players can then focus on aiming, or jump to another unit. This order is automatically given when you select targets on the Tactical Map.
- Decommission: This unit will be sold off, regaining the number of this specific unit available, or in Island Capture, regaining command points spent on it. This cannot be applied to units attached to a formation; remove units from a formation to sell them. You also must be within the capture radius of a base.
- Leave Formation/Disband: Has the current ship leave a formation. If the currently selected unit is a formation leader, then the command changes to Disband, which dissolves the entire formation. In the image on the right, this is the rightmost option.
- Formation Settings: This is the formation editor. See above for further details. The lowest option in the image on the right is the Formation Settings option.