- Required items: Flare Bomb, Communicator α (red)
Part 1[edit]

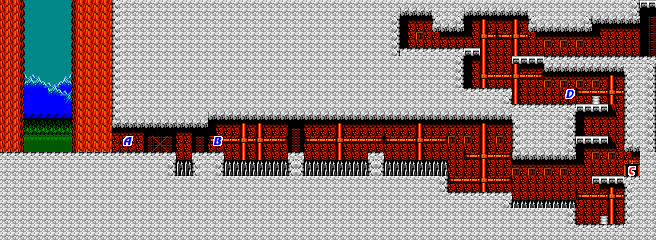
You will parachute down to the bottom of a canyon. After you land, walk a short distance to the right. When you reach location A, you will notice the lights in the tunnel go dim. If you remain in the darkness for a while, your eyes will adjust slightly, and you will be able to make out some details of the terrain, but enemies will remain pitch black. To overcome this limitation, press ![]() and launch your flare bombs. The flare will fly upwards, and light the rest of the area for you.
and launch your flare bombs. The flare will fly upwards, and light the rest of the area for you.
After swinging over the small patch of spikes, you will reach location B, where you stand before a very long bed of spikes. Stand close to the edge, and fire your grappling hook at an angle toward the ceiling. Then swing over the spikes, and you should land on the short platform beyond. Do this two more times until you clear all three spike beds.
When you land, you will encounter an enemy soldier who charges at you with a knife. Take him out before he can reach you, and continue right. Swing over one more spike bed, and attack the gunman when he stands up from behind the barrel. Then grapple up to door C and step inside to find a communication room.
- Communicate: MA-8 tells you how the communicator your using works in Areas 1, 4, and 5. There are three other communicators hidden somewhere.
- Wiretapping: You will overhear what sound like allies trying to take down a difficult opponent when one suggests to the other that they try attacking from behind.
Head outside and climb up to the location marked D on the map. You must run through a series of enemies in order to reach the entrance to the second part of the area. Some enemies run at you with knives, while others stand up to shoot at you before squatting back down. Clear them away and collect the bullets they leave behind.
Part 2[edit]

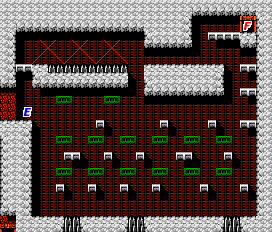
From the location E, you have a couple of choices on how to reach door F in the upper right corner. You can fall straight down the side, and then use the various small platforms to grapple over the spikes until you get closer to the right. You can fire your grappling hook at the ceiling to the right of E, and swing over to the small platform, and take a generally high pathway to the right. It's even possible to reach the high platform above E, and try to swing over the bed of spikes at the top, but this is a very risky route, and generally not worth considering.
Once you reach the far right side of the room, you must begin to ascend up to the top. Once you reach the ledge below door F, you must swing over to the left. Watch out for a soldier with a knife, and grapple up to the platform above to attack the soldier with a gun. Then step through the door.
Boss[edit]

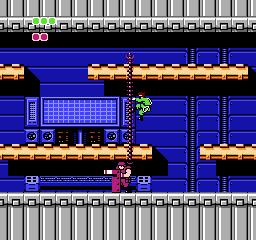
At first, it will appear that the central computer room is empty. However, once you walk all the way to the right, you will encounter a man who refuses to let you have any weapons. This person is a one-man army. He carries a gun with a bayonet attached to the front. He will shoot at you with the gun, and he will try to run into you with the blade. He wears armor that protects his chest from any attack that you throw at him. Because he only occupies the floor, you may think to climb up to a higher platform and ignore him. He is prepared for that, and comes equipped with a grappling hook of his own which he can only fire straight up. It doesn't attach to anything, but it will knock you back if it hits you. Like the soldiers who you wiretapped, you'll need to consider attacking him from behind if you wish to get rid of him. However, it can be difficult to do that since he typically turns around to face you. Since his grappling hook doesn't deal damage, the best chance you have of attacking him from behind is to let him knock you off the lower platform. Then you can shoot him in the back while landing.
Ultimately, however, all that matters is that you destroy the machine on the right side of the room. The truth is, you don't even need to attack the soldier at all. Although he will be a nuisance, you can do your best to ignore him and focus all of your attack on the machine until it blows up. Once it does, you will clear the area.
Reward: You will earn ten bullets along with the Wide Cannon. This weapon doesn't have the same range as your original gun, but it compensates by shooting two extra bullets at 45 degree angles, allowing you to hit enemies that might be above or below you.
Famicom Differences[edit]

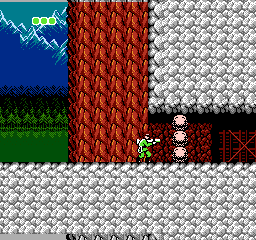
- Starting from location A, there is a wall of three boulders that you must knock them away with your grappling hook. This type of wall can also be found at location C and before E.
- To the left of location E there is an odd room with nothing in NES version. In FC version however, there is a knife soldier and a POW pickup. An extra live can be found above location E.
