Bergstein[edit]

- Bergstein
- 6 December 1944
- Difficulty: 5 out of 10
Clearing Out The Houses[edit]

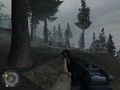
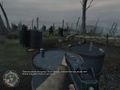
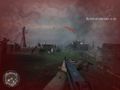
Before moving up to Hill 400 you have to clear out the village below the hill. The German soldiers here know of your arrival and will be hiding in the houses leading up to their HQ - the village church. These are pretty easy to tackle if you enter them in a row, taking out in the Germans in once before moving onto the next one. There is a door to the side which leads you into the first house, then once that is cleared use the other door to enter the second house. From this second house you could probably pick off some of the troops in the third house. Try to get the gunner as he will prove a problem when advancing. The fourth and fifth houses are a lot harder but if you try to pick off as many Germans from outside the houses then move in to take the downstairs and then upstairs, it should be much easier.
The Mortar Crews[edit]

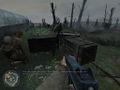
Regroup with the squad and you'll be told to head east. At this point the Germans will be in position so it's advised to use a smoke grenade here to cover your position. The safest places here are in the houses and not in the street. Go into the nearest house and quickly clear out the downstairs floor with the rest of your squad.

Reach the gates and enter the house, then clear it out. From here starts another series of houses to clear, which will at least be a bit more entertaining than the first set (for example, one house has its wall blown open by a Panzerschreck-wielding Private). When the MG-42 gunner at the end of the street is in sight, kill him before he can do serious damage to your fellow Rangers. Then, go around and into the back of the house he was defending; the door will be kicked open and grenades thrown in for a frag-move maneuver. The upper floor of this house has a good vantage point from where to pick off Germans defending the church, so make good use of it.

Get back down and watch the door being kicked open again. Make a run for the Panzerwerfer, then set the bomb on it and continue towards the church. Now, before moving in, stand by the rubble of the wall and kill as many Nazis as you can from here; this will ensure that you're not captured in a crossfire or killed by a grenade. Then, move in and take the stairs; killing the riflemen up here should be a piece o' cake. When the church is clear, get back outside and regroup to complete the mission.
Rangers Lead The Way[edit]
- Bergstein
- 7 December 1944
- Difficulty: 8 out of 10
You start at the foot of Hill 400 (behind you is the town of Bergstein, which you captured in the last mission). When everyone else starts charging towards the bunker, your first objective, equip the lighter gun you have (if you're starting from the mission select menu, it will be a Colt pistol), and make sure to keep up with them. If you don't, a stray mortar round will kill you.
It's okay to get a bit ahead of your rifle-carrying squadmates, but when you get to the crater behind the felled tree, stop and take cover. Randall will tell you to deploy smoke to avoid the MG-42 fire, but you don't have to, as other soldiers will.


Once the smoke fills and the fire stops, dash like mad and circle around the left side of the bunker, to its back door. Set the satchel charge (bet you haven't used one of those in a while) and, while waiting for it to blow, set another charge on the other door close by the first (this one leads to a barracks). Once the first door is open, take your pistol or submachine gun and clear it out (watch out for grenades; they might throw four or five in succession so you can't get in. Don't worry, they run out). When you're done, go back to that barrack. In here you'll find a fully loaded Scoped Gewehr 43, an MP44 with a bit of ammo, some frag grenades, and some smoke grenades. Ignore the MP44 if you want lots of ammunition (in that case, pick up an MP40 from someone inside the bunker), but the sniper rifle is worth ditching anything for in this mission--yes, even that Garand.


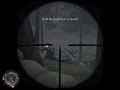
The area that immediately follows has some blocks for cover... unfortunately, the enemy on the other side has even more cover and there are lots of them. Use your scoped weapon well here, and you shouldn't have trouble; just remember to take your time and not be foolhardy in harder difficulties.
When everyone in the small camp is dead, go over there, replenish any ammunition, and man the MG-42. Although you're supposed to get to the top of Hill 400, because of minefields your squad will have to go back down a little bit. This MG-42 is in a convenient spot to kill many Germans who are waiting for you down there, so use it for some time before descending the hill.
Once you're down there, a firefight similar to the previous one ensues. In this case, though, just when you thought they were all dead, some more enemies from the smaller position behind the main one come up to take the spot; therefore, think twice before advancing or revealing yourself to enemy fire. When this fight is over, advance until you get to the truck. An MG-42 inside the second bunker, a bit further above the hill, will immediately start firing on your squad.


Take cover behind that truck, and for a minute try to pick up a BAR or at least a Thompson from fallen squadmates at this point to replace the MP40. If you can, great; if not, it's no big deal. When you're done, you should throw a smoke grenade to cover yourself... right? Wrong. You need about three smoke grenades. Here's the reason: from where you are, it looks like that bunker is the only thing up the hill, but on the left side of the bunker (you can't see because of the boulder blocking your view), a small contingent of Germans await you. Fighting all these guys as you're trying to climb the hill is pointless, so after you throw your first smoke grenade from behind the truck, wait until it fills part of the way; then, go up the hill just a little bit, and throw one smoke grenade up to the far left side of where the bunker is and one just left of the bunker. This might be overkill, but it ensures your safety. Don't worry about ammunition; go back to the truck, and you'll find three smoke grenades (they're represented as one in-game, but when you pick it up it becomes three) and even some frag grenades laying on some stacked boxes.
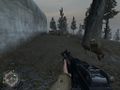
When you get to the bunker, blow the door out; killing the occupants shouldn't be too hard. Proceed to the east, go through another firefight, and just walk along the hill until you get to the third bunker. This one has additional ammo for your Scoped Gewehr 43 and also a Panzerschreck. The Panzer is optional, but it's not hard to find dropped submachine guns later when you need them, so you might want to pick it up. Also, with your back to the bunker entrance, you'll see an MG-42 nest a bit up the hill; snipe the gunner to silence it.

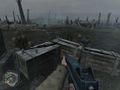
Continue on along the side of the hill until you come to a spot where you start to climb up again. At the very summit of this hill is the final bunker that you must take, but you're also given other objectives such as destroying a Panzerwerfer and taking out two mortar teams. You may tackle these in any order, but the best way to go about this is to get the first mortar team, take out the Panzerwerfer, take out the second mortar team, and finally storm the bunker.

If you just charge straight up the hill, you'll reach the bunker itself... and unfortunately, dozens upon dozens of Germans (over a hundred, actually). So once you're near the MG nest, circle around to the right (ignore the Panzerwerfer that passes by; it's not the one you have to destroy, so you only have to take out the gunner if he bothers you) and through the blocks. There are Germans in these areas, but if you circle around like this you shouldn't have too much problem from Germans near the bunker. Eventually you'll reach the first mortar crew. Take them out from a safe distance (sniping the fuel barrels is a nice way of doing it), go to the site, and pick up the Panzerschreck there. Guess what objective you'll be using this for?
The Panzerwerfer is parked near the bunker, so if you were trying to destroy it by planting a charge on it, you might suffer some injuries. But the rocket launcher can take it out from a distance, so there's your second objective done.
-

Bye Panzerwerfer...
-
Hey, looks like they never saw it coming either!
-
Exterminate this threat early on.


Continue circling around the bunker until the second mortar team is in sight. Snipe the fuel barrels here as well, then mop up. Now, you'll notice that this part of the hill is surrounded by sandbags, but there are some additional Germans beyond the wall of sandbags. To make sure these guys don't bother you later on, kill as many as you find of these lurkers (don't stray too far, though, lest you get lost or run into a mine).
-
This be yer hiding spot.
-
You can just poke your head around the corner and take out Germans.
-

When you can get here without getting shot, victory is near.


Now, proceed to circle around the bunker until you're on the right edge of the bunker (viewed from the front side, it would be the left). Hide out here with your squad, and slowly exterminate the German resistance. The bunker protects you more or less because you can just go back and hide behind the wall after poking your head out and shooting a couple Germans if you need to; when they throw a grenade, go back a bit more. Watch out for enemies trying to flank you: as a rule of thumb, every time you cap 10 or so Germans, turn around to see if there's anyone behind you. Ammunition will not be a problem here, as the sheer number of Germans that you'll end up killing while camping at this spot will provide for both gun ammunitions and grenades.

When the enemy has been thinned out (this will take a nearly intolerable amount of time on Veteran), make a dash to the top of the bunker. The spot is accessible by steps, just around the corner from where you are. From the roof of the bunker, you'll be able to deal with what's left of the Germans. Now, after the enemies have been almost exterminated, walk up to the bunker door (avoid that MG-42, or throw a grenade into the little hole) and slap an explosive on it. When that blows, you'll have another, inner door waiting to be blown apart. Then you'll be able to walk in and deal with the few Germans waiting for you... guess what you have to do next? That's right, blow another door inside the bunker! This last room contains more Germans than the previous, but a grenade or two can help the job to make it really easy. After you're done, you're charged with cleaning up any Germans that you missed on the hill before the mission ends.
The Battle For Hill 400[edit]
- Bergstein
- 8 December 1944
- Difficulty: 10 out of 10
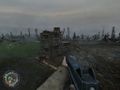
This mission is easily the most difficult in the game, and it requires basically every skill you've learned so far in the game to beat. You start out in a bunker with your pitifully small squad, with lots of wounded men inside. The German counterattack starts immediately. Get out of the bunker, and get started on your first objective: eliminate the mortar teams around the hill.

Whip out your sniper rifle, and go around the perimeter of the hill (since the last battle here, your squad has managed to scrunge up some trenches and foxholes), shooting mortar teams that are marked by objective stars. This is rather like the final objective of the Silo mission, except here mortars are usually manned by one soldier instead of two. Don't worry about the large numbers of Germans trying to swarm the bunker unless they're directly in your way or attacking you at the moment; your fellow soldiers can take care of them.
If you're on Veteran, you'll notice that the Germans that are inside the perimeter as well as outside try to shoot you a lot. If they're close to you, use your submachine gun to subdue them; even better, if there's a foxhole nearby, go in there so that there are only two possible directions that enemies can fire at you (you might even be able to get a mortar team or two with the MG-42s prepared in some foxholes)... just watch for grenades.
-
Here are the smoke grenades, not that you'll be needing them of course (note: for these screenshots, use the position of the bunker star to approximate the location)...
-
Here's an MG-42 and smoke grenades. This is hard to use because the Germans storm this position.
-
Here are three Panzerscrecks and more smoke grenades.
-
Last but not least, here's a partial view of the many rifles and BARs available, with even more smoke grenades.


Once you've taken out about 20 mortar teams, your objective reverts back (silently--there's no spoken or written indication of any kind) to defending the bunker. During this brief respite, take in what you can of the surroundings of this hill; most importantly, note the positions of the two large collections of weapons (one near the bunker door has three Panzerschrecks, which you'll need later, plus some grenades and rifles; the other has grenades, BARs, and assorted rifles) and try to memorize them.


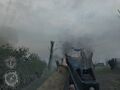
A few moments later, a massive artillery barrage starts pounding the entire hill--you need to either get inside one of the dozens of foxholes around the hill or the bunker itself to not get killed (the bunker is recommended because you take absolutely no shellshock from the barrage; also, you have a better spot to repel the initial attack after the barrage). When it lets up, the west side of the hill is breached and enemies start coming from that side with halftrack backup. Quickly snipe the halftrack gunners so they don't bother you (don't try to destroy them with charges, as this will only get you killed), and kill the invading Germans from a safe spot, such as the lowered area right in front of the bunker entrance or behind one of the crate stacks.
Soon after, Germans start coming from all directions. As you run around the place to avoid grenades, don't forget that your objective here is to keep the Germans from breaching the bunker. Usually, this isn't a problem, since your best hiding spot is the lowered area in front of its entrance (in fact, you should stay there for most of the mission), but when grenades are thrown in and you need to get out (going further into the bunker is suicide, since they'll only throw grenades further in), keep an eye on that entrance.


After a while, a five-minute counter will start, until which you need to defend the bunker and survive. Sound easy? It's not. First of all, there's a huge artillery barrage again at just before four minutes; it should end at about 3:56. Hide in a foxhole this time, so you can at least mow down some Germans with MG-42s. Then, the whole deploy-smoke-before-moving-in tactic begins, so you can't see where the Germans are and what they're doing. Still, that MG-42 should work as long as you're firing it. This time, they will come primarily from the north side; and instead of bringing halftracks, they bring Tiger tanks. Two of them (albeit not together). They shouldn't be too hard to take down, though; about two Panzerschreck rounds can do it. Make sure you don't let them get too close, though, because that could mean instant death.
-
This is arguably the worst time of the five minutes. You're near death, Germans are everywhere, and a grenade is right behind you.
-
As the timer counts down, find a relatively safe spot (like the east side of the bunker) to hide out your time in while fending off the attacks.
-
Good job Corporal, you did it.


Soon, the area in front of the bunker will be flushed out with hundreds of grenades. If you can survive that by being fast and hiding in places, good; if you can't, it's probably prudent to go to the east a little bit and hide out in those foxholes and trenches until the grenades die down a little. The final two minutes are pure hell; hundreds of Germans charge from all directions (a bit fewer from the south than other directions), grenades and bullets fly everywhere, and there is literally no safe spot on the entire hill. Only fast reflexes, paying attention to the grenade meter, and capping Germans before they injure you will help you make it through. When the timer counts down to 00:20, a bombing run will start and all the Germans will start retreating. Don't let down your guard, though, because these Jerries will be just as aggressive when retreating as they were when attacking (also, dying with that little time on the timer just sucks). When the clock reaches zero, congratulations--you've completed the most difficult task of Call of Duty 2.