Maze 1[edit]
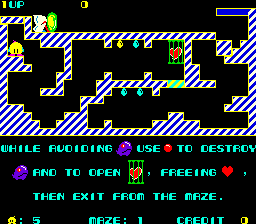
The first maze is a purely introductory maze. It teaches you the basics of the game. If you're new to the game, get to know the way that Chack can move through the maze. The first two Monstas make and easy multiple kill target, as do the two Monstas on the bottom if you're will to wait for both of them to hatch. If you happen to die on this level, you will not lose a life, but you will automatically be sent to Maze 2.
Maze 2[edit]
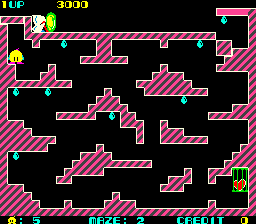
- This is Maze 1 in the NES version.
This is the first real stage. There are multiple paths that you can take to reach the single heart in the lower right corner. If you are concerned with the number of Monstas that may appear, be preemptive and bomb some of the eggs. Once you free the heart, you must come back to the center of the lowest level in order to progress to the top of the stage where the exit is.
Maze 3[edit]
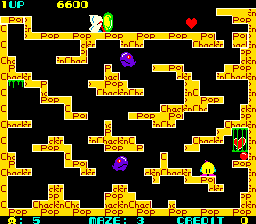
- This is Maze 2 in the NES version.
There are two hearts in this stage. It makes the most sense to free the heart on the left first, and the heart on the second last. Eliminate as many eggs as you can unless you want to earn a completion bonus. Since you have many choices as to how you can get from the left heart to the first heart, proceed cautiously, and take the paths that are least occupied. Send bombs ahead of you in case any Monstas decide to hunt you down.
Maze 4[edit]
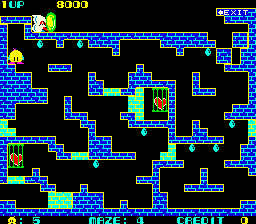
This maze contains easily identifiable walls that can be broken by your bombs. Use your bombs to open up pathways that give Chack access to the hearts. Free the higher heart first, then drop down to free the lower left heart. Try to clear out Monstas and their eggs in advance of your arrival. Once you free the left heart, you can take the lower path that crosses the boundaries of the screen, allowing you to move from the left side of the screen to the right side. Traveling back up the right side can be risky since you can't bomb up, only down. Travel back to the opposite side of the screen if you need to return to safety, but remember, the Monstas can follow you.
Maze 5[edit]
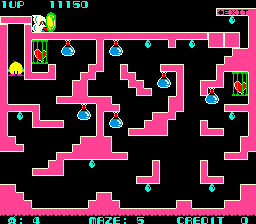
Maze 5 is the first maze that features water vials. They are essential to your escape from this maze. Free the heart closest to your starting point. In the process, you should break the water vial nearby, and water will begin to fill the bottom of the screen. Free the vial below it, and cross the screen boundary at the bottom of the screen. Carefully climb back up the right side, and free the right heart as well as one more water vial by throwing a bomb as last as possible while you are hanging from the ceiling to the left of the heart. By the time you do this, there should be enough water in the maze to allow you to swim to the L shaped platform in the center of the lower level. From here, you can climb up through the middle of the screen and reach the exit. Breaking more vials doesn't help you, but it won't really hurt you either. Just remember that bombs don't work underwater.
Maze 6[edit]
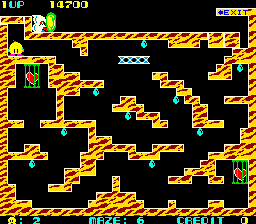
- This is Maze 3 in the NES version.
This maze introduces a moving platform that can (infrequently) kill Monstas for you. The platform in this stage isn't vital to your escape, but it can come in handy. Work your way towards the bottom of the maze. Free the right heart as soon as you like, but approach the left heart carefully, as you're an easy target in the narrow tunnel. Once you reach the gap beneath the left heart, push up so that Chack extends his legs into the gap. He will never be able to rise above it, but when he is at his highest, drop a bomb on both sides so that the bomb comes to rest above the gap. When they explode, they will each break a corner of the cage, freeing the heart and opening the way out.
Maze 7[edit]
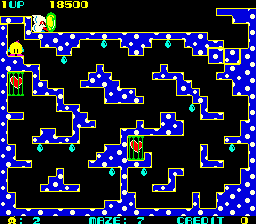
This maze looks deceptively simple, but the position of the hearts puts Chack in danger of getting attacked by Monstas, as a lot of backtracking is necessary. Either proceed cautiously by bombing as many eggs as possible, or move quickly through the maze before the eggs have a chance to hatch and overwhelm you. This maze can be particularly tricky to escape from once you're on the bottom.
Maze 8[edit]
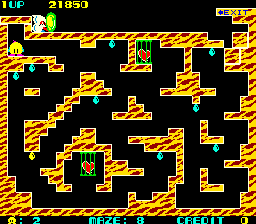
- This is Maze 4 in the NES version.
Just after you start this maze, some of the decision making is taken off your hands as you are forced down the left alley. Move quickly to reach the lower heart and use the same technique that you used in Maze 6 to free the hearts by rising up and throwing bombs just as Chack's head clears the gap. Make your way back up to the top and free the higher heart. Once you do that, you are forced to fall to the bottom of the right side of the screen where you must cautiously advance to the exit at the top.
Maze 9[edit]
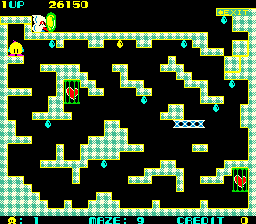
- This is Maze 5 in the NES version.
Maze 9 features another moving platform. Unlike the one before, this one is vital to your escape from the maze. In order to free the left heart, you must toss a bomb to the left as late as possible as you hang from the ceiling to the right of the cage and move to the left. If you release the bomb too early, it will fall to the floor below. The lower heart is easier, but you must travel towards the center of the lower level to begin your escape. Once you reach the moving platform, let it drop you off on the ledge to the left. Get back on top of it, hop over the obstacle along the platform's path, and ride the platform to the right side of the maze.
Maze 10[edit]
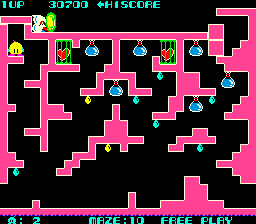
This is the last water vial maze and it can be particularly challenging. Start by dropping to the bottom and crossing the screen boundary to reach the right side. Climb up to the top and break the three water vials. Return to the middle of the screen and cross to the left. Free the right heart and break the vial in the center. There should now be enough water for you to swim to the gap on the left side of the screen that would allow you to climb up to the heart on the left. Once the heart is freed, the exit is clear, but the path to it can be quite deadly, especially if the water is full of Monstas. Only careful removal of the Monstas can ensure you with a safe path to the exit.
Maze 11[edit]
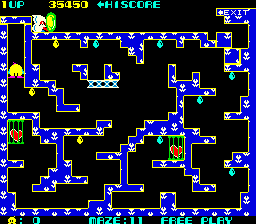
- This is Maze 6 in the NES version.
Maze 11 features a moving platformt that is both a friend and a foe. It moves slightly more erratically (although predictably) and is necessary to go from the left heart to the right heart. Both hearts must be freed by tossing a bomb from far away while hanging upside down. Once the left heart is freed, hang from the moving platform and exit to the left. Climb up over the to the first block above the platform. Cross over to the second block when the platform passes beneath both blocks. Then ride the platform over to the right where you can free the second heart and make your escape.
Maze 12[edit]
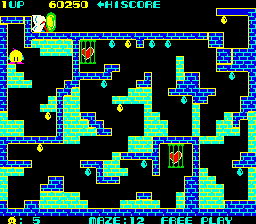
- This is Maze 9 in the NES version.
This maze features breakable blocks that must be destroyed to create the path to each heart and the exit. From the start, you will be forced to break blocks that cross the screen boundary not once, but twice. Once you're back on the left side, you can free the lower heart, and work your way to the higher heart. As a general rule, try not to destroy more walls than you need to, as they provide Chack with a defense against too many Monstas, as well as making it easier for him to navigate the maze.
Maze 13[edit]
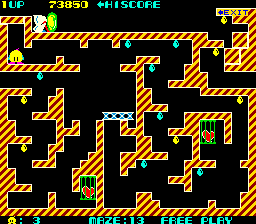
- This is Maze 8 in the NES version.
The platform that moves back and forth in this maze blocks one pathway to one heart or the other. It doesn't matter which one you go after first, although it's a little faster to take the right path first. To get the right heart, you must pass above the heart first and fall down to the right of it in order to pitch a bomb over by the cage. Once you collect it, you must climb up the alley to the right of the platform. The left heart is a little more straightforward. Once you free both hearts, you must cross the screen boundary to reach the small tunnel that leads to the exit. Beware of any Monstas that might be remaining on that side.
Maze 14[edit]
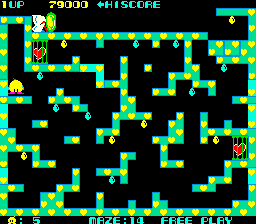
- This is Maze 7 in the NES version.
As the last level, this maze can be particularly challenging to navigate. Certain regions of the maze can only be reach by cross the screen boundary. There are a lot of breakable walls in this stage, but the color difference is slight enough to be deceptive. Keep an eye out of all of them, and pay attention the avenues that are made available by destroying them. The exit can only be reached by crossing the screen boundary at the highest point on the left, and that can only be reached by falling through the breakable wall to the right of the higher heart. Finish this maze to view an ending before you start back over on maze 2.