Stage[edit]

Stage 5 introduces another set of considerably dangerous enemies. In this stage, you will have to be far more careful when fighting against regular enemies if you are in pursuit of experience points, health and money. Failure to heed this warning can result in you losing significantly more health than you gain.
You begin in the mountains west of town. As you walk right, you will encounter a Lizardman. All of these red Lizardmen can shoot projectiles at you. Stand still to block them with your shield before attacking. Jump up the cliff and begin leaping over the water. Flying Snakes will begin to appear, bobbing up and down quite similarly to small Gatos, but with greater variability in their range. Ignore them for the most part unless you have a particularly easy shot at them.
After jumping across the water, you will reach the first door (A), where you will find a spell book shop. The truth is, although there is no indication of the fact in the game, you will need to purchase something from here. Read the spoiler below if you wish to know what to purchase and why.
In order to defeat one of the two bosses in the fifth labyrinth, the White Dragon, you will need to use a White Spell Book against him. The book contains the spell of Dungeon Warping, which ordinarily teleports you out of the dungeon. However, in this particular case, it actually damages the White Dragon instead.
After visiting the spell book shop, continue on to the right. When you jump back down to the ground, you will arrive a section that contains two pairs of Madmen, with one Lizardman found between them. As long as you are careful to avoid the projectile shot by the Lizardman, as well as the hammers thrown overhead by the Madmen, this is a relatively good place to patrol for experience, health, and money. Ultimately, you need to collect 620 metal in this stage.
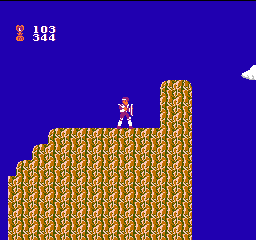
After you cross a small bridge, you'll reach a second door (5) which actually houses the fifth labyrinth. You can enter now if you like, but it's not a bad ahead to wander up ahead a short distance to do some shopping first. If you continue on, you will encounter a pair of Madmen, followed by a trio of Madmen. After one Flying Snake goes by, you will reach the next part of town.
The first door (B) in the set is the weapon shop. Here you can buy the Platinum Sword for 320 metal. This shop keep will suggest that it might be possible for the White Dragon to be seen outside a labyrinth. The next door (C) is an Inn, while the door after that (D) is a Medicine shop. Between that door and the next, you will encounter three Lizardmen. After defeating them, enter the last door (E) to find a shop which sells the Headband for 300 metal. Although expensive, it does add a small degree of protection. This shop keep will confirm that the White Dragon is indeed found in the labyrinth.
If you continue any farther, you will climb up the left side of a cliff which simply drops off to oblivion. Don't attempt a leap of faith to the right; you will only be rewarded with death. You have no choice but to turn around and explore the labyrinth at this point.
Labyrinth[edit]
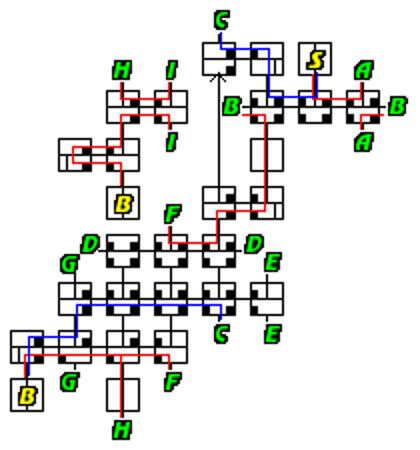
The fifth labyrinth is probably one of the most confusing labyrinths in the game, adhering to no particular shape or form. Even when mapping it out, it is incredibly easy to get lost and confused. Fire Demons make an appearance in this labyrinth. They behave very much like Lizardmen, spitting out a projectile at you every few steps. In addition, this labyrinth has not one, but two bosses. One is required, while the other is not. However, the boss that is not required contains a treasure that will vastly simplify combat for you for the rest of the game, and it is highly recommended that you seek it out and defeat it.
From the start, head down and to the right, and climb up the next ladder. You will actually be deposited at the bottom of the same room you just climbed up from, and be forced to face a Fire Demon. Three hits should knock it out. Then head one room to the right to take advantage of the wrap around effect, fight another Fire Demon, and climb down the next ladder.
What you find next may surprise you. You will be in a room that is similar to other boss rooms that you have encountered, and it will contain a Skulltas. However, the ladder in this room continues on to the room below. The fact is, you are under no obligation to fight the Skulltas, and you can easily avoid it by jumping down off the ladder to quickly reach the floor below, and slipping back down the ladder. This is not the last time you will encounter such a room.
Continuing on, climb down to the lower level of the next room and proceed to the left. Safely fight the Metal Armors and climb down to the room below. Then head left, and climb up the next ladder. You will actually wrap around to a room two floors below you. Defeat the slugs and pass through the one way passage to the left. Safely remove the two Metal Armors, then climb down the ladder.
Once again, you will find yourself in the presence of a Skulltas. And once again, you can completely ignore it and drop down to the room below. From here, you must head to the right, and climb up the ladder which will wrap you around to the bottom of the very same room. Watch out for the two Fire Demons here and return to the left through the lower level and climb down the ladder.
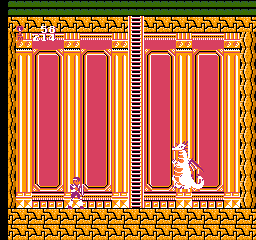
In the room below, walk to the left, fight the first Metal Armor, climb down the ladder, fight the second Metal Armor, and return to the right. You will now be one room above the first boss of the dungeon, the one which is required of you. After clearing the two Metal Armors (or just pushing them out of the way), climb down the ladder. You will encounter the White Dragon. You will quickly discover that any attempt to attack this dragon will result in you being killed. Even if you beat the other boss first and acquire the gauntlet which allows you to shoot fireballs from your sword, you will even die if you hit the Dragon with one. The trick to defeating this dragon is rather obscure, and hardly hinted at in the game. To read the solution for killing the dragon, read the spoiler up above concerning the spell book shop. If you do not have the proper item, then there is nothing you can do but return to the room above and escape the dungeon.
Assuming that you do have the proper item, and use it in this room (set your cursor under it on the status screen and press ![]() ), the White Dragon will be destroyed instantly, and you will be rewarded with the dragon's wing. This item is required in order for you to escape this stage and move on to the next. After beating the dragon, begin climbing back up and retracing your steps exactly the way you came.
), the White Dragon will be destroyed instantly, and you will be rewarded with the dragon's wing. This item is required in order for you to escape this stage and move on to the next. After beating the dragon, begin climbing back up and retracing your steps exactly the way you came.
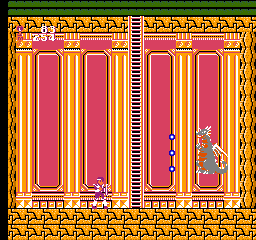
When you are back above the second Skulltas room, begin moving to the left. Fight past the two Fire Demons to the next room, and fight two more. You are now directly over the second boss room. You will need a bit of health to withstand the next fight. When you are prepared, climb down the ladder.
The fight with the Silver Dragon is a more traditional fight, so you will be able to utilize the tried and true practice of standing where it is about to landing and rapidly stabbing upwards with your sword until it is defeated. Do not attempt this with very low health until you have any yellow potions. Once you defeat it, you will obtain a terrific treasure, Viser's Gauntlet. This item will add a projectile effect to your sword every time you swing, allowing you to attack your enemies from a much safer distance than ever before.
From here, all you need to do is escape, and the escape route is quicker and relative safe compared to how you got here. Climb up the ladder to the room above, and continue climbing up to the top level. Walk one room to the right, and climb up the ladder. The row of rooms that you are now in are devoid of enemies, so you can travel safely through them. Walk to the right three rooms, and then climb down the ladder. This ladder will warp you all the way around to the very top of the labyrinth.
Fight the Fire Demon on top, head to the right, climb down the ladder and drop down to the next room. Then proceed one room to the right, and you will be back in the room directly beneath the ladder that leads out of the labyrinth.
Proceed to Stage 6[edit]
Assuming you have possession of the White Dragon's wing, you are prepared to proceed to the end of the stage. Walk all the way back to the right to the top of the dead-end cliff. From there, activate the White Dragon wing in the Item box of your status screen, and press ![]() to use it. The screen will flash, and the next thing you'll see if Kein riding atop the White Dragon.
to use it. The screen will flash, and the next thing you'll see if Kein riding atop the White Dragon.
This next part of the stage operates a little bit like a scrolling shooter, although the animation and movement is a little rough. Instead of attacking with your sword, you can command the dragon to spit a fireball at the enemies. In addition to some of the enemies that you are already familiar with, Flying Snakes and Lizardmen, you will encounter two new enemies in this section, the Flying Rock and the Wing Lizards. The Flying Rocks move up and down as they cross the screen, while the Wing Lizard suddenly warp into position, often directly in front of you, before they begin flying straight ahead.
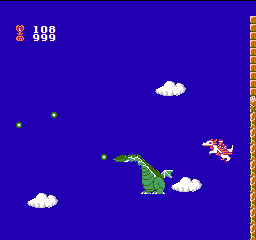
As you fly to the right and over the terrain, you will encounter a few houses. Two of them are houses that you can visit, while the third is locked. Many of the houses are guarded by Lizardmen, but it is possible to position the dragon low enough so as to attack their feet while their projectiles float harmlessly overhead. The first house (G) contains the town chief who simply tells you of the town legend that light will be restored when the White Dragon flies overhead. The next house (H) contains a man who warns against holding too many items.
Eventually, when you fly far enough to the right, you will reach three rock columns, the last of which is particularly high. After passing two sets of such columns, you will move on to the fight against the stage boss. This boss happens to be identical to the boss of the first stage, another Karukyunomu. The only difference is that you must fight it on the back of the dragon. This happens to be a little easier since you can control the altitude of your attack and move up and down with its head. Furthermore, you can swing around to its right side and attack it from behind, and it will not turn around to attack you. If you are fast enough, you can destroy it before it has a chance to jump all the way back to the right.
Once it is defeated, all that there is left to do is fly up to the door (I) on the right, enter it and ask the man inside to send you along to the next stage.