Lavos Beckons (12,000 B.C. second time)
The Ocean Palace[edit]
As mentioned before, this is your last chance to do things in Zeal, so buy whatever weapons or complete whatever quests you need to here before moving on. You'll run into Masa/Mune as you head into the Ocean Palace (leave the first room to the south) and then witness a brief cutscene concerning the Mammon Machine.
- Note
- Scouts (the flying cyclopes) absorb all magic except for their color (element). If they are hit with magic not of their color, they will counter with a party damaging spell of their element (i.e. Water 2).
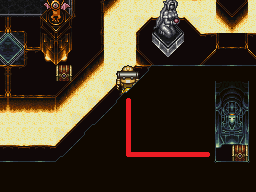
In this next area, there are several rooms which branch off of the main area. There are five new weapons available to be found here, however Ayla is the only one who will not receive one. Within the main area are patrolling monsters, ambushes and an Aeon Suit on the lower right side. There is also a Rune Blade south of the entrance. If you don't want to fight the Scouts and Mages, simply walk around the edge platforms, however you will probably have to fight to move on when you can. The left and right are simply mirrors, so the rooms look the same. Notice that the northeast, northwest and middle doors connect to one another, and that the southeast and southwest both loop around to one another.

You'll need to flip a few switches to open the path to the next area. One can be found in the northeast room, one in the northwest, and one in the southern loop (through the southwest or southeast doors). The switches in the northeast and northwest rooms, when pressed, will initiate a fight with a Jinn and a Barghest. These monsters are slow and may not even get the chance to attack, but if they get close to each other they will attack everyone in the party for around 120 damage. Barghest has a shield on Jinn, so kill it first, then Jinn; just use normal attacks.
The right middle room (which you can get to by the top right room) contains an Aeon Helm in the chest; however you will have to fight two Red Scouts and a Mage to get it. Falcon Hit should be able to kill all three instantly. In the left middle room, the Star Sword can be found in the chest; again protected by a Mage but this time with two Blue Scouts.
Head through the south-east or south-west doors to find the third switch. In the Room by the north-west door is the Shock Wave for Lucca. The room has two main "islands" with Scouts standing on posts. If you walk between the posts, you will initialize a fight between a Blue and Red Scout and a Mage. Again you can avoid the fights altogether by just walking along the edges. Hit the switch in the middle of the room, and then pick up the items in the chests. The Kaiser Arm is available in on the eastern side next to the entrance, the SonicArrow is next to the southeast pole (Red Scout) of the west "island."
- Note
- There's a Demon Hit if you go through the west side of the room, head around the left border (start near the entrance) and then when you get to the dead end by the statue, backtrack just a few steps and enter the passage to the secret room (you can see the chest).

Once all three switches have been pressed, the passage will be open to the south within the large room with the 8 doors. Head through that new door to come to a room with some stairs and an exit to the south.
The south exit leads to an empty elevator shaft used later, so head down the stairs. Fight two Thrashers and two Mages, then move on. The next stairway has four Thrashers jumping up and down; if you run into them they'll go wait for you at the bottom, otherwise you won't have to fight. At the bottom of the next stairway there's a statue that breathes fire which actually damage you, so keep moving. At the bottom of the next stairwell you'll have to fight two Lashers and two Thrashers at the same time. Continue on and you'll run into Masa and witness another cutscene; head to the bottom of the stairs to find a save point and an optional battle with another Jinn and Barghest pair (they will try and start the fight).
Head south and fight a few monsters so you can use the elevator by selecting the left globe. You'll be in for a long series of fights. You can take Marle and Lucca if you want to have Water and Fire magic handy to kill the different colored scouts, or concentrate on physical attackers. The first two groups will fall easily to Crono's Lightning magic, so equip the Gold Stud on him to make things faster, particularly if you have Luminaire. The third group will be three scouters of each color, so hit them with single target magic of their type, or just wear them down with physical attacks; a well aimed Falcon Hit will take care of all three.
When you hit the bottom of the elevator, go ahead and go in and out to ride it up again, there will be a Magic Tab in the left middle part of the elevator (embedded in the wall) once you ride it up. If you do ride the elevator up you'll have to run down the stairs again then ride the elevator, so be warned.
Head into the room you land on, and there will be a big switch there that doesn't do anything. Head into the left and the right doors to flip a switch and fight a few scouts, although you can actually skip by the scouts if you're fast enough. Once you've hit both the switches, step onto the big one to reveal a platform into another room with a chest containing an Elixir and a save point. After that, get ready to fight the Golem Twins.
Golem Twins[edit]
Dalton will try to summon the Golem Boss, but realize he doesn't want to risk giving up his chance to be immortal. Head down the hall to prepare for one of the coolest parts of the game. You'll stab the Mammon Machine with the red knife, and have it turn into the Masamune. After, that, prepare for a confrontation with Lavos.
Lavos[edit]
Ocean Palace Lavos
| ||||
|---|---|---|---|---|
| HP 30,000 |
Weaknesses None |
Strengths None |
Absorbs None | |
| Charmables None |
Drops None |
XP 0 |
TP 0 |
Gold 0 |
Attacks
| ||||
Description/Strategy
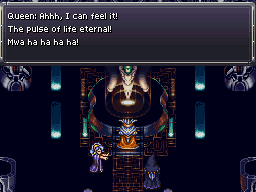
Much more powerful than the later confronted outer shell of Lavos. This fight does not have to be won. If you actually beat his outer shell in this confrontation, which is much harder than expected, you'll get The Programmer's Ending. However, this is extremely hard since his first attack does massive damage, enough to probably kill you instantly if this is your first time through the game, and he casts chaos on your party immediately, which you probably don't have any protection against at this point in the game. You can buy Sight Caps (which prevent chaos) from the earthbound people after Mt. Woe crashes to prepare for this fight. If you do an insane amount of leveling up and IF you do the sunken desert sidequest early to get some status protection you may have a fighting chance to beat him on your first game, but otherwise you'll probably just have to try for this particular challenge on a New Game+.
If Crono is at least level 35 and he wears an Aeon Suit, nn Aeon Helm, and the Gold Stud, then you've got a chance. The first attack will hit for around 700, so use the tech Life and revive everyone before Lavos activates "Chaotic Zone/ Chaos." Then he'll needle spin someone, then go back to the first attack. Make sure you heal up before he does this. Keep up this process, and Lavos won't stand a chance, even if it's not a New Game+. Lavos has 30,000 HP, so equip Crono with a Gold Stud (found in Arris Dome) to increase his MP efficiency. Use Life and Confuse (if you have Luminaire, acquired around lvl 37, go ahead and use it as well) throughout the fight. It should take about 30 attacks to kill Lavos. Also use all of your Elixirs and Full Tonics. If your party is wiped out by Lavos' initial volley, you cannot defeat him, even if you use Green Dream and Life Line. While you may be able to defeat him in a normal battle, this version has more hitponts than normal. The following tactics can be used to varying degrees of success:
| ||||

The prophet will reveal himself to be Magus, and try to attack Lavos, but to no avail. Crono will try to stop Lavos singlehandedly, and be disintegrated. Schala will transport you to safety with the last of her pendant's power, while the floating islands of Zeal crash down to the Earth, and you'll awaken in the remains of the earthbound village.
While you're here in the remains, head into the middle hut and wait for the Nu to leave to pick up a Magic Tab, and head into the Commons (the forest) to confront Dalton and have your items, money, and equipment stolen. Choose your party carefully for this part since you won't be able to switch for a while, and remember that Ayla won't need any equipment to attack with so she is the best person to have in your party. Talk to the Elder.
Challenging Lavos[edit]
If you go back and challenge Lavos at this point, you should get The Prophet Ending. There will be a few scenes involving "the Prophet" from this period and a particularly nice speech from him, hinting that he would have gotten the chance to do what he wanted without your interference.
If you defeat Lavos during the fight with him you're supposed to lose, you'll get the The Programmer's Ending, and get to talk with all the programming staff at the End of Time.

