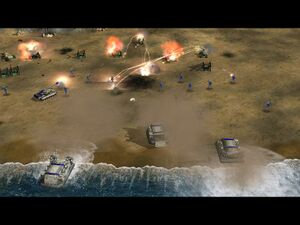
This mission is won when the GLA base in the eastern highlands is destroyed. This mission is of moderate difficulty and has no set time limits on how long it takes you to slowly build up your forces to attack GLA positions.
Straight from the opening cut scenes, you are thrust into the middle of the battle for the beach front. You must destroy the four stinger sites on the west side of the map, but do not start by attacking these sites.
Methodically, start at the eastern side of the beach and take out all visible bunkers with the long-range Tomahawk missiles. Although it is not necessary at this time to destroy these bunkers, it might save you time and energy later on in the mission.
Be careful not to lose your Tomahawks. They cannot be replaced!
Once you are ready to attack the stinger positions, move your troops and armor in supportive positions to repel a few minor attacks on your Tomahawks.
Destroy the stinger sites and a cutscene will appear and the area will be cluster bombed. It is your job to take out the remaining GLA in the hills.
Setting up Base[edit]
- It is probably best to set up your camp precisely where the bulldozers initially appear on the map.
- It is possible to set up your base on the beach. The positive aspects of this are plentiful room and a more defined defensive perimeter. A base on the far east side of the map may cause supply problems if your Chinooks encounter anti-aircraft forces. A base more centrally located on the beach will have fewer supply issues but will have more avenues of attack for the GLA. From the beach, Chinooks must be manually directed to the supply depot to the west to start delivering supplies.
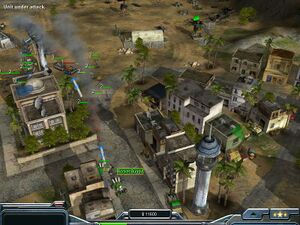
- When setting up your base where the bulldozers appear, immediately start building a Cold Fusion Reactor and Barracks. While these are building, it is necessary to clear the neighborhood south of this location of GLA armor. If not, the GLA will destroy structures before they are even completely built.
- After the immediate area is cleared, continue building a Supply Center, War Factory and Command Center.
- Leave enough room between these structures for a safe place for your Tomahawks to park. Do not lose your Tomahawks!!
- Build a second Chinook at the Supply Center. Do not have your Chinooks pick up supplies from the area east of the base. There is a stinger site in the area that may shoot them down.
- Select your General's Powers. Paladin Tank, Emergency Repairs and Pathfinder (sniper) are highly recommended.
- Start building a large battalion of Paladin tanks. Your initial tanks can guard the east while additional tanks will protect the south and start forming an offensive group.
- While building your tanks, alternatively build Cold Fusion Reactors and Patriot missile sites for added base defense. (Patriot missile sites suck up the power.) If the power bar is yellow, build a Cold Fusion Reactor. If it is green, you can go ahead and build another Patriot missile site.
- The west side of your base will have practically no attacks. Neither will the north.
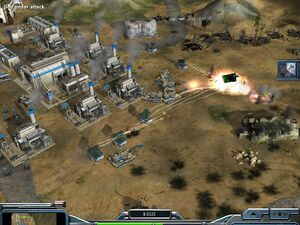
- The northeast and southeast of the base and all points in between will see heavy action. Build five or more Patriot missile sites on the east side of your base, along with the original tanks you started the mission with. The GLA will send over 700 units into combat, so a solid defense is called for.
- The south entrance to your base from the beach will see some armored attacks. Build a single Patriot at this entrance, along with about four or five tanks.
- Build a Pathfinder sniper unit and park him on the east side of your base. He needs the target practice.
- Upgrade some of your armor with battle drones to help eliminate infantry units.
- If things get a bit hectic, assign your Tomahawks a number and launch attacks on GLA forces to aid the front-line defense.
- Before supplies to the west of your base run out, carefully take your Tomahawks and destroy the stinger site directly east of your base so Chinooks can safely pick up supplies in this area.
There are no pressing time limits in this mission, so a solid base defense will lay the groundwork for distraction free offensive operations later in the game. Attacks will continue throughout the mission, but you should be able to hold them off with little difficulty, with base defense practically being on autopilot.
Alternative way to win:
Let the GLA Command Center uncaptured and use the worker from the captured supply depot to built all the infrasture you like.
For cash supply use the blackmarket and built some Scud-Storms. When the Scud-Storms are ready to fire, just capture the Command Center. First take out the enemy Scud-Storm with your own, then methodically destroy the enenmy base. The whole operation lasts around 90 Minutes.
Offensive Operations – Direct Assault[edit]
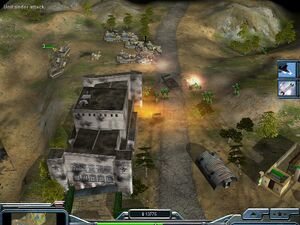
- Offensive operations can be accomplished by directly moving up the unpaved path to the northeast of your base with six or seven Paladin tanks, all surviving Tomahawks and a single sniper.
- The key to a successful offense is don’t use a “tank rush.” Rocket buggies, RPG troopers and fortified structures will attack them from all directions. Slowly move your tanks forward, keeping a lookout for rocket buggies and other vehicles that can be destroyed with your Tomahawks. Incoming Quad Cannons can also be targeted with the Tomahawks.
- Take out the GLA base structures with your Tomahawks while the tanks provide intervening protection. Troops are easily dispatched by your sniper.
- An occasional A10 Missile Strike can also come in handy to soften up the defenses.
Offensive Operations – Capturing the Oil Derricks[edit]
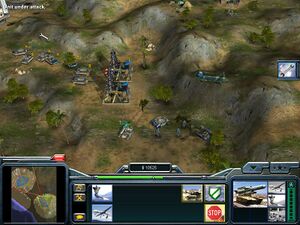
- If additional funds are desired, the oil derricks to the southeast can be captured by your infantry. Be sure to research Capture Building at the barracks first.
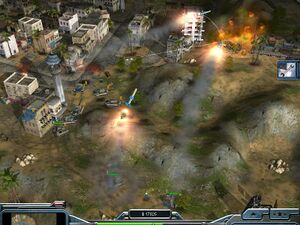
- Head toward the facility with a strong contingent of Paladins, and a sniper. It might be a good idea to have a Humvee on standby to bring in another sniper, if the first one is lost. You might want to escort infantry with you also at this time, although they may be lost in combat. You can also have your Tomahawks join this contingent, if you feel secure doing this, or they can be shuttled to the oil derricks later by Chinook helicopter.
- Upgrade your Paladins with battle drones to help combat GLA infantry.
- The GLA seem to have radar and know when you start moving infantry toward the oil derrick to capture it. They will fight you tooth and nail to prevent your infantry from arriving safely at the derrick. Replace lost Paladin tanks, if necessary.
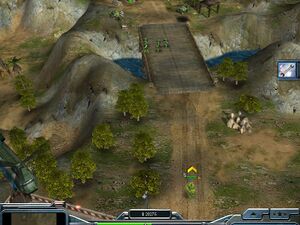
- Once the Paladins and sniper have established control of the oil derrick region, capture the southern oil derrick. If infantry are not present, put them inside a Humvee, a Chinook or have them walk over to the oil derrick.
- Do not capture the northern derrick until you confirm you can handle the counterattack in this area.
- The stinger site above you will be attacking your battle drones. Destroy it with an A10 Missile Strike if you have this ability.
- Once the area is secure, and if you haven’t done so already, shuttle in your Tomahawks for offensive operations. Transportation by Chinook is the safest way to do this!!
- If the stinger site to the north has not already been destroyed, destroy them now with your Tomahawks.
- Use the same slow, methodical methods mentioned above in the Direct Assault section to slowly dismantle the GLA base.
Mission accomplished!