Left Room[edit]
| Approach from | South | Strategy | ★★ | Agility | ★ |
|---|---|---|---|---|---|
| Exits | North | ||||
Solution:
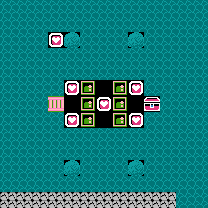
- Once again, you must patiently ride out the trip on the raft, and let it take you all the way to the right side of the island. Get off by the treasure chest and collect the two Emerald Frames here. Push the two outer Emerald Frames to the left, and push the center one aside.
- Collect the center Heart Frame, and then push the center Emerald Frame all the way to the left and onto the bridge. Collect the two left Heart Frames, and by now you should have two Ladder Powers and a Hammer Power.
- Simply build a bridge of Ladders from the upper left corner of the island to the upper left boulder, smash the boulder with the Hammer, and collect the final Heart Frame. Then return and collect the raft. Launch the raft straight to the right.
Room 2[edit]
| Approach from | East | Strategy | N/A | Agility | N/A |
|---|---|---|---|---|---|
| Exits | South | ||||
Solution:
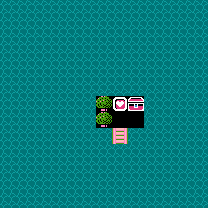
Although you will be forced to endure a rather long and unfortunate trip through the water all over the stage, it is practically impossible for you to fail to solve this room unless you stay on the raft for too long. Hop off once the raft reaches the bridge, and collect the single Heart Frame, and the raft beside it. Launch the raft from the lower right corner of the island to travel down to the room below.
Room 3[edit]
| Approach from | North | Strategy | ★★ | Agility | ★★ |
|---|---|---|---|---|---|
| Exits | North, South, West | ||||
Solution:
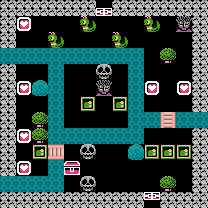
- You can only solve this room by approaching from the North. Collect the Heart Frame in the upper left corner. Then walk towards the upper right Medusa, down past the tree and between the Heart Frames. Of the trio of Emerald Frames, push the middle one down one space, and push the right one down into the corner.
- Push the middle frame over to the left until it is beneath the Medusa on the island and push it up. Then walk between the skulls, over the bridge, and push the Emerald Frame in so that you can collect the lower Heart Frame, which gives you two Egg shots.
- Return to the Skulls, shoot the top skull, and push it into the water. Use it to get across to the island, and push the left Emerald Frame one space to the right to block the Medusa's view. Then push the right frame up to block the Medusa's view right.
- Hop back on the egg and cross over to the right portion of the stage to collect the left Heart Frame. Then walk up and shoot the Snakey just above the island Skull, and push it to the right until it is below the Medusa, allowing you to collect the right Heart Frame.
- Jump back on the egg and use it to hop to the left portion of the stage. Collect the remaining two Heart Frames there, push the Emerald Frame out of the way and cross the bridge. If you don't stop moving, you should be fast enough to reach the raft before the bottom Skull can stop you. To travel to the west, launch the raft from the bottom edge of the room.
Room 4[edit]
| Approach from | North | Strategy | N/A | Agility | N/A |
|---|---|---|---|---|---|
| Exits | North, East, South | ||||
Solution:
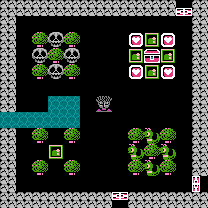
Oddly enough, this room is a no-brainer. You can only solve it by entering from the room above (which by contrast is considerably more difficult). When you arrive, you will find all four Heart Frames arranged neatly around a treasure chest in the upper right corner of the screen. This room is set up more for it's visual effect than for any type of puzzle. Obviously, once you collect all four Heart Frames, the Skulls will begin to move, but you should have no problem pushing any one of the Emerald Frames aside to access the key.
Room 5[edit]
| Approach from | West | Strategy | ★★ | Agility | ★ |
|---|---|---|---|---|---|
| Exits | North, West | ||||
Solution:
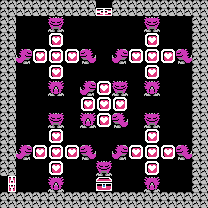
- This room is much easier than it appears. All of the Heart Frames are arranged in five groups. Save one of the lower groups for last (for example, the group in the lower left), and collect the Heart Frames from all of the other groups. The Heart Frame in the center of the center group will give you two Egg shots.
- When you are ready to collect the Heart Frames from the last group, collect the lowest Heart Frame first. Then shoot the Gol that sits directly above the treasure chest, and push him into the position of the Heart Frame that you just collected. Then shoot the Gol that lies directly above the highest Heart Frame and push him towards the wall.
- Now collect the remaining Heart Frames, saving the highest Heart Frame for last. You should be out of danger and out of the line of fire of any Gol. Simply walk toward the center column of the screen above the key, and then straight down between the two outer-facing Gols to collect the key.
Room 6[edit]
| Approach from | South | Strategy | ★★ | Agility | ★★ |
|---|---|---|---|---|---|
| Exits | East, South | ||||
Solution:
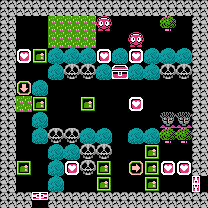
- Walk up to the Emerald Frame near the grass below the down Arrow Tile, and push it right until it touches the next Emerald Frame. Then walk above and push the right Emerald Frame down, and then over to the right to block the Medusa's view left.
- Collect the Heart Frame nearby, then walk below to the trio of Emerald Frames on the right. Push the top one over a space and a half so that it blocks both Medusa's views below, and then walk to the bottom frame and push it over all the way to the right. Collect the next two Heart Frames and get two Egg shots. While you're there, push the center frame over to the left on top of the Arrow Tile.
- Push the bottom of the left Emerald Frames all the way in, shoot the Skull above you twice to gain access to the Heart Frame. This one will give you the Arrow Power. At this point, you can arrange the remaining Emerald Frames so as to minimize the number of Skulls that will attack you when you try to get the key. You can't block them all in, but you can cut down on their number significantly. Focus on the Skulls at the top and remember to position each block so that it sits in the middle, blocking both of them in.
- Use the Arrow Power on the Arrow Tile on the left side and walk up to collect the Heart Frame above. Then push the nearby Emerald Frame up a space and a half so that it rests exactly in the middle of the start of the patch of grass. Begin pushing it right so that it traps the Almas in. Your goal is to push it all the way up to the tree, so you may have to move up or down to get the Almas to cooperate with you.
- With the Almas trapped, collect the last two Heart Frames. At this point the Skulls will begin to move around. Manuever Lolo along the left side so as to minimize the number of Skulls by the key, and run for the key when it seems safest.
Room 7[edit]
| Approach from | West | Strategy | ★★ | Agility | ★ |
|---|---|---|---|---|---|
| Exits | East, West | ||||
Solution:
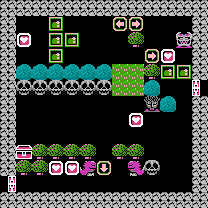
- Start out by collecting the two Heart Frames at the beginning. Then walk to the lower right corner and up along the right side. Push the right Emerald Frame up to pin the Don Medusa against the wall. Collect the nearby Heart Frame.
- Walk above the right Arrow Tile and then down and through it. Push the lowest Emerald Frame all the way in and collect the Heart Frame in the back.
- Now walk back to the right side of the stage, and down the side to the bottom. Walk between the two Gols, and stand to the right of the down Arrow Tile. Walk left and up through the tile. Collect the last Heart Frame. Then quickly walk down and along the top of the trees to reach the key. You should be able to move quickly enough that the Skulls won't present a problem, but just in case, you have two Egg shots that you can use to prepare.
Room 8[edit]
| Approach from | West | Strategy | ★★★★ | Agility | ★★ |
|---|---|---|---|---|---|
| Exits | West | ||||
Solution:
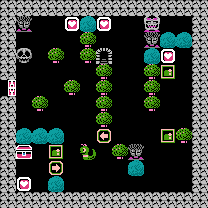
- Push the Emerald Frame by the treasure chest against the chest. Collect the Heart Frame nearby. Walk out, and shoot the Snakey once and push it to the right so it's right beside the lowest tree neighboring the Medusa. Then stand on the chest and push the Emerald Frame to the Snakey's original position. Then stand below the Snakey egg and shoot it again to remove it. The Snakey should reappear on the right side of the Medusa.
- After the Snakey appears, walk to the right side, and push the lower Emerald Frame up until there is a single space between it and the Emerald Frame above. Collect the Heart Frame up above, and then push the Emerald Frame that you just moved back down one space. Now push it left two and a half spaces. It should be partially over the Medusa, but slightly to the left.
- Now walk back to the right, around and under the Medusa, and around the left side of the Emerald Frame. Walk up to the left Arrow Tile and use your Arrow Power on it. Then approach the last frame that you moved from below, and push it up. You want to stop right when the Emerald Frame is half a space in the Don Medusa's way, so that it also blocks the Medusa below as well. Collect the Heart Frame nearby.
- Walk back to the Arrow Tile that you changed. Push the nearby Emerald Frame down one half space. Then walk around it to the left and below, and approach it from the right and push it left one space. Then walk to the left side of the stage and Egg the Snakey twice to remove it. It should reappear in it's original position.
- Once the Snakey returns, push the Emerald Frame that you moved up and around the trees until it blocks the view of the Medusa in the upper left corner, so that you can safely collect the last Heart Frame. The nearby Skull will awaken, but you should be able to move away from it and towards the key fast enough that it should not pose a problem.
The dungeon entrance that appears here leads to the Dungeon Rooms.
Room 9[edit]
| Approach from | North | Strategy | ★★★ | Agility | ★ |
|---|---|---|---|---|---|
| Exits | North, East | ||||
Solution:
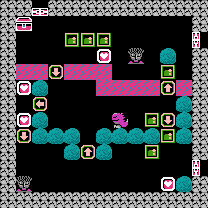
- Walk to the middle of the trio of Emerald Frames and push it down. Then push the right frame over to the right so that it sits above the upper Medusa. Walk around the boulder to the right, and push the frame below it to the left so that it rests below the upper Medusa.
- Walk back to left Emerald Frame of the trio, and push it right and down, between the Heart Frame and the Medusa, and collect the Heart Frame. Walk through the high down Arrow Tile, and then right and over to the down Arrow Tile below the upper Medusa.
- Push the Emerald Frame below the Arrow Tile down to the Heart Frame below, and then push it all the way to the left above the lower Medusa. Push the Emerald Frame to the left of the Arrow Tile that you just walked through, to the right, and then walk through the up Arrow Tile in the middle and circle back around to the frame that you just moved.
- Push that frame down, over once to the left, and down again, so that it blocks the Medusa's view to the right. Collect the bottom Heart Frame. Now return to the Emerald Frame behind the Gol, push it through the Arrow Tile, down and over to the up Arrow Tile, and push it up. Maneuver the block so that it sits in front of the Gol.
- Now you can safely collect the remaining Heart Frames on the left, and travel back up to the key in the upper right corner.
Right Room[edit]
| Approach from | Any | Strategy | ★★★ | Agility | ★★ |
|---|---|---|---|---|---|
| Exits | South, West | ||||
Solution:
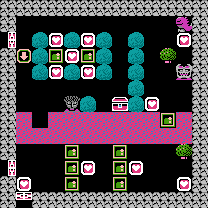
- While the second Ladder Power may give you the impression that the room is solvable if you enter through the upper left door, the truth is you cannot complete the room from here. You must enter through either door in the lower left corner. Start by collecting the Heart Frame in that corner.
- Of the first trio of Emerald Frames, push the bottom frame all the way in. Collect the Heart Frame. Of the second trio, push the top frame to the right two spaces. Collect the next Heart Frame. Then stand to the left of the middle Emerald Frame and push it all the way to the right to block the Don Medusa's view while you collect the Heart Frame from the lower right corner.
- Use your Ladder Power on the lava in the space directly beneath the Emerald Frame and push it up two spaces (be careful that the Don Medusa doesn't see you.) Swing around to the left side of the frame, collecting a Heart Frame in the process, and push the Emerald Frame right when the Don Medusa hits the lava. Collect the Heart Frame below the Gol.
- Now walk to the top of the screen and over to the left. Collect the bottom right Heart Frame first, then the top right frame, and push the Emerald Frame down one space. Collect the middle Heart Frame, and the upper left Heart Frame, and then walk around the left side and collect the lower right Heart Frame.
- At this point the Gol will wake up. Push the left Emerald Frame up one space, walk to the right, and walk into the upper row just long enough to make the Gol spit a fireball at you. Move back down and wait for the fireball to pass you. Then sprint up out of the area, to the right, and down to the key below.