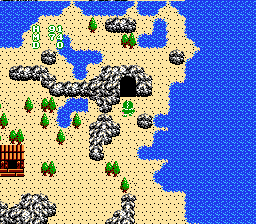
Make sure you return to the castle after you've visited the Lost Forest. Drop off the scrolls that you've picked up and exchange them for money. Speak with the king, especially if you have not obtained the useful Fairy Wings yet. Be sure to sell off any unneeded equipment at the Lyra Inn as well. When you are ready, start making your way up to the north end of Elysion Island. To the east of Hork Inn is the entrance to a tunnel that will lead you straight to the Desert of Mystery. When you arrive, you will be in the southern most region of the desert.
The Desert of Mystery has its own set of enemies, some of whom like to bounce up and down as they travel. These enemies are a lot stronger than those that you've faced so far, but if you've gained enough levels and wear the best equipment available, they shouldn't pose a significant threat. Be on the look out for an enemy that appears to be a three eyed floating head. These monsters can float right over mountains to get to you, so they are not easy to run from.
The desert is particular for the four different inns that you can find. Your goal should be to try and locate all of these Inns. One of them is selling a very important item. Another inn has a very unusual item that is quite expensive, but worth purchasing if you can afford it. Along the way to each inn, you will discover other features of the desert.
Finally, you should take your time and explore every path in the complicated desert. There are so many hidden treasure chests, and you will be well rewarded if you hunt for them all. In addition to finding a free Battle Sword or two, it's even possible to find the Feather +1 variety of your race's chosen weapon, which is even better than a Battle Sword. You may also find powerful pieces of armor, including Chain Mail (regular and enchanted) and Shields (regular and enchanted). It's extremely rare, but it's even possible to find Breast Plate armor and a Large shield. However, due to the random nature of many treasure chests, it's also possible that you will find none of these. The odds are good, however, that you can certainly find better equipment for free if you search hard enough. You can even find a free Speed Ring in the desert.
Mineo Inn[edit]
The first of the four inns is closest to your starting location. It can be found in the south west corner of the desert. To reach it, follow the path that leads up and to the left from where you begin. Whenever you reach a branch where the path goes east and west, always choose west. When you can't go west any further, the path will branch north and south. Walk as far to the south as you can, and you will arrive at Mineo Inn. As a shop, it doesn't contain anything particularly important. A Battle Sword is very helpful if you don't mind parting with 800 gold, but it's possible to find one for free in the desert. Again, you are given the chance to buy a Speed Ring for 10,000 gold, but if you know where to look, you can obtain one for free very close by.
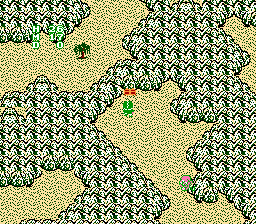
On your way to Mineo Inn, you passed a trail that lead north-east. If you explore this area, you will discover one hidden chest that contains gold. Past this chest, you will reach a dead-end, but at the very top of the dead-end is another hidden chest. Inside this chest is a free Speed Ring. When equipped, it allows your sluggish character to move at twice his or her normal speed, making it easy to move around throughout the rest of the game. To find the right spot, start from Mineo Inn and walk north until you can walk east. Then walk east as far as you can, ignoring the path to the south that you came from. Continue east until you are forced to walk north to find the ring.
Mikado Inn[edit]
The easiest way to find Mikado Inn is to start from Mineo Inn, and trace the side of the west terrain. Follow it as it extends to the north. Eventually, you will reach a cave. Make a note of this cave, as you will be headed there next, but continue on your way to Mikado Inn first. If you continue to walk along the terrain, it will head to the east a little bit before allowing you to continue north again. Eventually, you will arrive at Mikado Inn.
Assuming you have a good supply of gold and don't mind spending it, this is where you should stock up on items. Of course, it's a good idea to explore the entire desert first in order to try and obtain the best items possible for free. But if you've already done that, or have no desire to hunt for treasure, purchase the Feather +1 weapon of your race, along with Chain Mail and a Shield +1. These are the best items that you can invest in. When you're done shopping, stay at the inn if you feel it's necessary before heading out. When you're ready, make your way back to the cave that you passed on your way here.
The desert dungeon[edit]
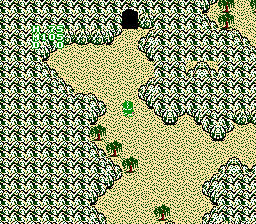
When you return to the cave, step inside. You will find two paths that lead to the right. Explore the lower path first. There, you will find a man sitting by the wall, alongside two treasure chests, which will be locked at first. Speak with the man, and he will explain that he's been guarding the chests from goblins. He will ask you for a healing potion. Say yes, regardless of whether you have a healing potion or not. If you do have one, your weakest potion will be used. If you don't have one, the man will carry on as if you did and gave it to him, so there's no penalty.
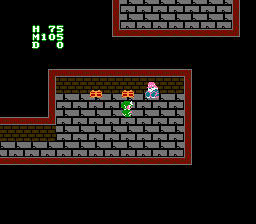
Once you heal him, he will tell you to take the treasures, and then ask that you find the Fountain of Heroes in the dungeon. Inside one treasure chest is the Magni jewel, one of the three sacred jewels of the Holy Sword. Use it as soon as you can, and you will see a blue gem light up in the center of the sword's hilt on the title screen. The other chest contains scroll number 7, so be sure to collect that as well.
With that complete, walk back up to the path above. You will see a knight standing on a teleportation tile. Defeat the knight in battle, or simply lure him off the spot if you wish, and step on the tile. You will be transported to a new location. In this place, a horizontal hallway extends infinitely in both directions. Knights are posted along the upper walls of the hallway. Alcoves appear on either side, leading up and down. Most of the alcoves are empty, but a few contain more knights.
Two alcoves in particular contain teleportation tiles. These tiles transport you back to what looks like the original floor you arrived on. If you use the teleportation tile in the lower alcove, it actually does take you to the original floor. However, if you use the teleportation tile in the upper alcove, it takes you to a new location that looks identical to the original floor. When you step on the tile in the back of the upper path, you will return to the endless hallway. However, this time, the knights will be posted on the lower wall. This is how you know that you're making progress. Now search the lower alcoves for a teleportation tile. If you find it, you will be transported to the room containing the Fountain of Heroes. (If you find and use the tile in the upper alcoves, you will return to the original room.)
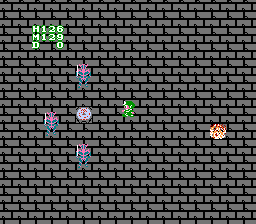
In this room, knights and a monster that resembles flame wander around to attack you. In the center of the room is a special fountain. Whenever you drink from the fountain, your magic and health are instantly restored to full. In addition, if you somehow made it to this fountain prior to reaching level 20, you will be instantly upgraded to level 20. Because this fountain will completely restore you, and because the knights give a good amount of experience points, this room makes for an excellent leveling opportunity. Stay as long as you can defeating knights and drinking from the fountain whenever necessary. You should be able to rise in levels quite quickly. It's a good idea to be as close to level 30 before you leave the desert, and you can accomplish most of that in this room alone. When you're ready to leave, just find the knight standing over the teleportation tile on the right side of the room, defeat him, and step on the tile. You will be transported back to the original room, where you can exit via the stairs.
Annin Inn[edit]
The easiest way to find Annin Inn is to start from Mikado Inn. Follow the southern terrain as it initially heads west, then south, and then back to the east. If you stay along this terrain, you will reach Annin Inn. The equipment in this Inn isn't nearly as good as the equipment that you can purchase in Mikado Inn. But it does have one very important item: a scroll. For a mere 400 gold, you can simply purchase scroll 6. With little other choice in the matter, you should purchase the scroll as soon as possible. Besides, you'll get 1000 gold for it when you bring it back to the castle.
Keego Inn[edit]
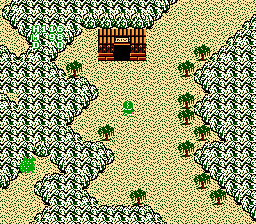
Of all the inns, Keego Inn is the most remote, nestled in the north east corner of the desert. You can reach it either by following the terrain to the right of Annin Inn, or by following the terrain above the cave where you entered the desert as it goes to the right. In either case, you will inevitably hit some dead-ends as you follow the terrain around, but as long as you continue to stick with the terrain as you double back, you will reach the inn.
When you step inside and attempt to shop, your jaw may drop at the astounding prices of the items. The price of everything in the store is artificially inflated ten times. This is the only store where you can purchase some of the best armor and weapons in the game, but the prices are extremely prohibitive, and you can find most of these items in the world for free. In addition to some of the best weapons, he sells some of the worst weapons for only slightly cheaper. For example, you may think you're getting a deal when you spend less for a Gold Mace than you would for a War Mace, but all of the weapons in the Gold Mace's price range are fakes, and do less damage than their small variety counterparts. In general, you should not try to purchase anything from this store except for one single item: the Fairy.
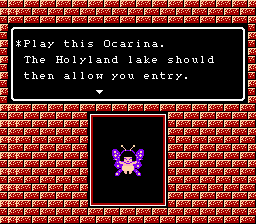
Buying the Fairy will set you back 10,000 gold, but this unique item cannot be obtained any other way. To gather this much money, you will either have to try to find as many treasure chests as you can and sell off the excess items and trade the scrolls you find for more money, or you can try to gamble for it. Though it's a slow and tedious process, gambling may take less time if you're considerably close to 10,000. Either way, purchase the Fairy as soon as you are able to. Once you do, wait until you increase in level before using it, as doing so will automatically advance you to the next level. Using the Fairy will set it free from the cage. As a reward, the Fairy will thank you and explain her story. She will hint that a crystal ball can be found in the Holy Land, and that the Ocarina she gives you will allow you to enter the lake. When the conversation ends, she will advance you to the next level.
Returning home[edit]
Now that you've explored every inch of the desert, you should have two more scrolls, used the second sword jewel, and possibly gained an Ocarina from the Fairy if you were able to afford the purchase. In addition, you should have increased quite a number of levels, and you should possess considerably stronger equipment. If you happen to have an extra 1500 gold to spare, it wouldn't be a bad idea to purchase an Amulet, which gives you better protection against enemy spells.
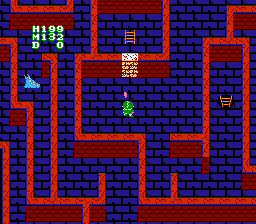
If you've accomplished all that you need to do, use the Fairy Wings to return to the castle. If you haven't spoken to the king since level 16, he will tell you that new reports indicate that there's still another scroll in the castle, and he will order the guards to stand aside so that you can reenter the dungeon. If you sold off your Needle set before, you'll need to purchase another one from Lyra Inn.
Return to the room where you collected the second scroll; the room that contains an odd colored barrier on the wall. Just as you did for the fifth scroll in the Lost Forest, you need to equip your Needle set and attack the barrier until it is destroyed. Then you can step inside and follow the short path that leads to a room where a hidden chest contains the eighth scroll. Collect it and bring it back to the queen for another 1000 gold.