When you come to you'll find yourself in a destroyed city, overrun by plants and wildlife. You were knocked out in the crash and the woman from before is waiting for you to wake up. You find out that she has put a slave headband on you and hacked it to obey her voice commands. It can give you intense pain and will even kill you if your captor's heart stops for any reason. The woman explains that she needs help to get back to her community 300 miles away. You'll need to safely transport her back home to get the headband off.
Begin your journey[edit]

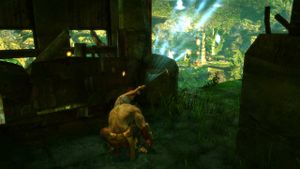
When you start walking with the woman, she'll hack your headband some more to give you visual feedback which becomes your heads-up display for the game. Everything is fuzzy to begin with and you won't be able to do much except walk until you get a Health Pack. Grab the Health Pack in the break in the wall and you'll start your journey together. While you're walking around, keep your eye out for Tech Orbs, which are little bright orbs floating around. They will allow you to upgrade later on. Tech Orbs are all over the place, some out in the open and others will be found by exploring every part of the area. Don't worry too much about where your captor is, she'll let you know you're getting too far ahead before she kills you and you can find her at any time by holding ![]() .
.
Head over to the woman and she'll lower half of a draw bridge. When she does, use the pipes right in front of you to climb around to the other side. Go over to the bridge, which is marked with a white icon of your head's silhouette, and use the controls when you're prompted to lower your side and let the woman across. It creates a lot of noise and attracts a couple mechs you'll need to deal with before moving on. When they're destroyed, you'll need to lift the block on the side of the area, and it's marked with another white icon, this time with both your heads' silhouettes. On the other side, you can pick up a Health Pack off to the left if you need it. Head around the corner and over some debris until you hit another cutscene where you'll see the smoke from where the slave ship crashed. Your short term goal is to get to the wreck so you can find your bike.
Meet some mechs[edit]

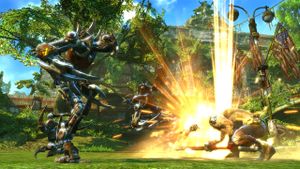
Follow the woman out into the open and when you get across a destroyed bridge you'll run into a sentry mech down in the next area. You'll get cover and the mech will start running around down there looking for targets. It has a red laser pointing out in front at whatever it's facing, so when you see it's pointing away from you, move from cover to cover down to the mech. When you get close to it, come out from hiding and starting wailing on it. Your shield will protect you from a certain amount of gunfire, so the closer you are before it sees your the better. When you take it out, two more mechs will jump down into the area and come after you. Take them out, then two more will come after you. After defeating them you'll get access to the Command Menu where you can give your captor instructions when you need her to do something. Collect the Tech Orbs in the area and the Health Pack in one of the storage trailers if you need it, then use your Command Menu to tell the woman to follow you. If you don't see it yourself, she'll point you in the right direction and even give you a marker in your display with a distance indicator. Head up the crates and platform behind the red flowers and lift the block up there for her.
On the other side of the block you'll be ambushed by two mechs and you'll find out that your captor can stun them temporarily with her EMP blast. Take advantage of the momentary stun to destroy the two mechs, then head up the stairs to the security door. There are two sentry mechs across the ravine from you and you'll need to distract them so the woman can safely get across. You'll see a white icon ahead of you with your silhouette, so head around the hole in the floor to that position. You'll draw the mechs' fire, so keep moving. When you get to the fence over there, use ![]() to yell at the mechs, distracting them so the woman can run across to cover, then quickly tell her to follow you from the Command Menu. When she's across, head up the stairs will her to the next level.
to yell at the mechs, distracting them so the woman can run across to cover, then quickly tell her to follow you from the Command Menu. When she's across, head up the stairs will her to the next level.

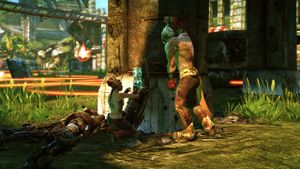
You'll find that she can also create a decoy, which you can select from the Command Menu. Get her to use the decoy, then quickly run across the bridge to the next section of cover. When you get to the other side, distract the mechs again and tell her to follow you. The woman can't hack the door with no cover, so you'll have to cross the ravine and take them out. Go down the stairs in the back of the area and head out into the open where there is a climbable pole and some cover. Hide behind the cover and use the woman's decoy to distract the mechs. When they're shooting at the decoy, climb the pole and cross the ravine to the other side where you can take handholds in the wall there to get closer to the mechs. Create another decoy, then go through the doorway and take out the first mech, then hop the low all and destroy the second one. Head back over to the other side where she'll hack the security door into the next section, grabbing the Health Pack on the way if you need it. Jump down into the next area and go through it to another block you can move out of the way.
There's a big tree in this area and beyond it is evidence that the path is mined. The woman has an idea on how to get through, but she needs you to catch a dragonfly for her first. Pick her up under the ladder and toss her up to the metal rung above to she can drop the ladder down for you. Climb up the ladder and she'll put one of the dragonflies on your display so you can chase it down. Just follow it over the jumps and climbs up to the top of the tree where you can finally catch it. The dragonfly will alight on handholds and branches, so it's pretty easy to tell where to go. Once you catch it, use the broken pillar down the steps to jump over to the side of the building where you can take the pipes down to the bottom. It turns out the dragonflies have evolved some sensors to sniff out energy sources and it will be able to show you where the mines are. It can also scout ahead pretty much all your routes so you'll know what's coming up. Head back over to the minefield, and now you can see where they all are.
The minefield sentry[edit]
Pick the woman up and head through the mines, avoiding the orange circles with the green orbs inside. Go through the first set of mines and up and over some debris to the next section. Through this next minefield you'll come out to a big open area where you'll do another scan that shows a ton more mines. Pick her up again and go down the ramp, through the bus carcass and around to the right where you can get up on a big piece of broken concrete. Hop across the rusted out cars over to the other side and throw the girl up to the ledge over there. Go over the overturned car and use the beam to cross to another car and over to a clear section in the minefield. A mech will ambush you here, so take him out and keep moving through the clear section and climb up the broken concrete on the other side next to the truck with the crates stacked at the back. Head over to the woman, who needs your help to get across. Jump over to her, then pick her up and throw her across. Jump over after her and pull her up before she falls, then continue on.

When you jump over to the concrete with the cover on it, you'll see a sentry turret and a big sign above it that you'll need to knock down and crush it. Use the decoy and jump off the concrete and head toward the turret until you can get cover beside a climbable pole. Use the decoy again, then climb the pole and swing across to the other side. From the truck trailer, jump onto the building next to it and take the handholds up. Inside the building a bunch of sleeping mechs you can either sneak past for fight for Tech Orbs. A scan will reveal the mechs' area of awareness, and as long as you stay out of them you can avoid fighting. You'll at least have to fight the first one when you jump down, but you can skip the other three at the bottom by taking the pipes across to the other side. If you do end up fighting the mechs, there is a Health Pack down at the bottom to heal with afterward if you need it. However you decide to handle it, go out the building on the other side and back down to the level with the sentry turret.
Run across the area behind the sentry and climb up the truck trailer over there and take it over the building on the side of the turret. Climb up the pipe on the side of the building and jump across the pipes to the ledge above the turret with the plasma beam ammo. Use your Staff Blast to shoot out the supports for the sign so it drops down on the turret and destroys it. As soon as the sign is down a bunch of mechs will start chasing the girl. Jump back across to the pips and go down to the bottom area. Start taking out the mechs that she's stunned and when all three are dead you can keep moving. Go back over to the building that had the sign on it, but this time go into the building and lift the block to go into the next area.
A strong enemy[edit]

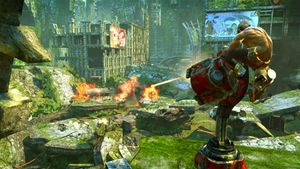
Here you'll finally exchange names with your captor. She goes by "Trip" and you like to be called "Monkey". Jump down into the next area and go through a doorway where you can climb up to a higher section. Take these walkways around until you come back out into the open where you'll do another scan and find a sentry turret, a bunch of mines and an old gas trailer truck. You'll need to get up to the turret and take control of it to blow the truck up and create a path through the mines. Have Trip make a decoy and start heading out across the concrete platforms. You'll want to go toward the gas truck, then back over to the building where the turret is, so keep using the decoy until you get under and to the side of it. Take the handholds and pipes up the side of the building, then climb down behind the turret and take it out. When you get the prompt, take control of the turret and use it to blow up the gas truck. The explosion attracts a bunch of mechs and you can use the turret to take them out before they get to Trip. They come out of the two building across from you in pairs of two, alternating which building the come out of starting with the one on the right. After you take out four pairs of them, a broadcasting mech will come out of the building on the right. He has a countdown timer above his head on your display and you need to take him out before it counts down or he'll radio in for backup.
When the last mech is dead, use the poles on the side of the building next to the turret to cross to another building that you can take around and over to the platforms where Trip is waiting. When you get back to her, she'll tell you she can upgrade your equipment. Now you can put all those Tech Orbs you've hopefully been collecting to good use by selecting the Trip Shop in your Command Menu and purchasing upgrades in the different categories. Head over to the building on the right that the mechs came out of and throw Trip across, then follow her. Go through the doorway and drop down the hole in the floor in the next room. Keep heading through the building until you can go up some stairs and drop down into a courtyard with a fish tank and a statue of Atlas in the center. After a cutscene where you learn a little more about Trip's community, a big mech wakes up and starts to fight you. This boss throws big wrecking ball hands at you that do a ton of damage. Don't bother trying to block his wrecking ball, it's too powerful. Keep on the move and use your dodge when you see an attack coming. Eventually he'll do a different attack where he jumps up and slams both hands down into the ground. He gets stuck like that for a few seconds, so take that time to attack him with your powerful attack. When you've done enough damage he'll start getting red between his plates and sparking like mechs do, but you won't be able to kill him by just attacking. Run around the statue of Atlas so it's between you and the mech, then taunt the mech with ![]() so it rams into the statue. Keep fighting it like this and when he's rammed the statue three times Atlas' burden will fall down and crush the mech. If you take too much damage during the fight, grab one of the Health Packs around the area. When you beat this mech you automatically move on to the next chapter, so make sure to collect the Tech Orbs in the courtyard during the fight if you want them.
so it rams into the statue. Keep fighting it like this and when he's rammed the statue three times Atlas' burden will fall down and crush the mech. If you take too much damage during the fight, grab one of the Health Packs around the area. When you beat this mech you automatically move on to the next chapter, so make sure to collect the Tech Orbs in the courtyard during the fight if you want them.
