You're very close to the crash site now, in fact it's just over the bridge. The problem is the side you're on has fallen down into rubble and you need to find your way up to the top and then cross it. After that, who knows what you'll find at the crash site itself.
Get up to the bridge[edit]
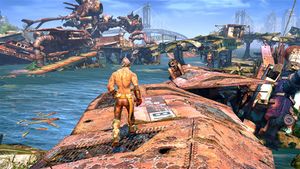
Follow Trip down the pathway made of metal debris until you get to a gap that's too large to cross. You'll be introduced to a new gadget of yours called a Cloud. This floating disc can travel very fast by hovering over land or water, allowing you to get to places off of platforms very quickly. The bay you're in is a very large area with a lot of broken pieces of the bridge in the water and lots of space to explore. Be careful not to venture too far out though, as Trip will kill you if she thinks you're leaving her behind. Look out to the left of the bridge from where you get on the Cloud and you'll see a small island of broken concrete. On the back side of it you'll find a ![]() Mask. Shortly after hopping on your Cloud, Trip will tell you to knock down the small structure above her so she can use it like a bridge. If you look behind Trip, away from open water, you'll see some debris forming a ramp that you can take up and around to the platform above her and knock the hut down. She'll continue on down the path to another gap, and point out the next thing for you to knock down for her. The ramp to get up to it is nearby, and after you release the truck's trailer Trip can make it the rest of the way to the bridge. Move the block for her and you'll continue to the next section and the Cloud will be deactivated.
Mask. Shortly after hopping on your Cloud, Trip will tell you to knock down the small structure above her so she can use it like a bridge. If you look behind Trip, away from open water, you'll see some debris forming a ramp that you can take up and around to the platform above her and knock the hut down. She'll continue on down the path to another gap, and point out the next thing for you to knock down for her. The ramp to get up to it is nearby, and after you release the truck's trailer Trip can make it the rest of the way to the bridge. Move the block for her and you'll continue to the next section and the Cloud will be deactivated.
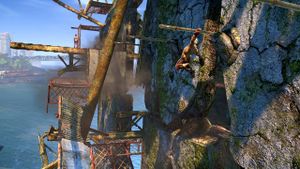
Follow Trip through the security door and you can start your ascent up to the top of the bridge. Throw her up to a high ledge and then head the other way where you can take a beam out from the side of the ground. Jump along the twisted beams to the pipe and start climbing up, following the shiny parts you can use to make your way. Don't stay too long on the handholds, as pieces of the bridge are liable to fall off. When you meet back up with Trip, throw her up again and take the pipe along the side of the wall over to start climbing up again. When you get up to the platform with the lawn chair and a light fixture hanging above it, go around the corner and drop down to a platform with another ![]() Mask, then head back up and continue to climb. You'll soon get back to Trip and from here on if you take too long getting to the top, the bridge will fall down, killing you, and you'll have to try again. Throw her across the gap, then quickly jump after her and pull her up. Pick her up and carry her for the rest of the climb up to safety. When you get to the concrete ledges with some Tech Orbs on them, you won't be in danger of falling anymore. Climb up the ledges and over the truck trailer to the next area.
Mask, then head back up and continue to climb. You'll soon get back to Trip and from here on if you take too long getting to the top, the bridge will fall down, killing you, and you'll have to try again. Throw her across the gap, then quickly jump after her and pull her up. Pick her up and carry her for the rest of the climb up to safety. When you get to the concrete ledges with some Tech Orbs on them, you won't be in danger of falling anymore. Climb up the ledges and over the truck trailer to the next area.
Get across the bridge[edit]
Up on the bridge you'll find the way is blocked by a bunch of mechs. You can bypass the two sleeping mechs across the small bridge between buildings on your left, although there are some Tech Orbs in there. Straight ahead are some more, and Trip tells you that one of them has a malfunction that can help you. When you see a mech with an icon with a stylized explosion it, you'll be able to do a takedown that lets you use the damaged mech to blow up the others around it. Just hit with normal strikes until the takedown prompt appears, then rotate around until you're facing an enemy, and throw the mech at it for a very powerful explosion. If you end up fighting the other two mechs as well, just take out the Electro Mech first and they shouldn't be a problem. Climb the crates by where the larger party of mechs were and hop down to the side of the bridge where you can throw Trip across and follow her to the next section of the bridge.
Straight ahead are some concrete block you can use as cover and off to the right is a way to the other side of the bridge. Whichever way you go, a couple machine gun mechs ahead of you will wake up and you'll start taking fire. Just go straight toward them behind the concrete blocks and destroy them with Plasma Blasts, making sure to immobilize the shielded one with a Stun Blast first. When you've destroyed them, head down the right side of the bridge to the next section where you'll see you're being chased by another Dog and Trip will crawl under a red trailer. Backtrack over one jump and go into the trailer there where you can kick open the doors and continue on. Some of the stuff you climb on falls, so don't waste any time on them. When you climb up you'll see that you and Trip are on opposite sides of the bridge. Start heading down your side of the bridge and Trip will do a scan, revealing some mechs blocking her path as well as a turret in the distance.
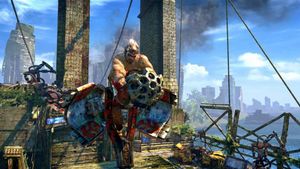
The easiest way to handle this section is to use Trip's decoy to get to the turret without waking up the mechs, then use the machine gun to destroy the mechs on the ground. If you have a lot of Plasma Blast ammo, and especially if you've upgraded your Plasma Damage, you could just start taking out the mechs pretty easily by shooting them from the beginning. If want to fight the mechs, use the decoy and start attacking the first mech, which will wake up the others. Keep using the decoy when it runs out until you've beaten all the mechs, then keep using it to get to the turret. Whichever way you did it, afterward, head over to the blue block with Trip and you'll get a short cutscene where you'll find another ![]() Mask. Move the block for Trip and continue into the next section.
Mask. Move the block for Trip and continue into the next section.
A scan reveals a bunch of turrets on the right side of the bridge and a vehicle you might be able to use on the left. Start out by yelling from behind the first concrete block and telling Trip to run until she gets to the vehicle, then follow her, using the decoy if you want. Open up the vehicle for Trip so she can try to start it up. Unfortunately, she has a hard time controlling it and there's no time for you to get inside with her. Run alongside the vehicle keeping it between you and the turrets, and at the end get behind it and then on its right until she gets past the last turret. If you have a hard time with this section, consider upgrading your Shield Strength to withstand more projectile fire, and make sure to pick up the two Health Packs along the way. When she finally stops, the bridge will start to collapse when you go over to the vehicle. Follow it, jumping across the first gap and then jumping to the pole sticking out on the left across the second one. You'll hang onto the top of the vehicle as it rides the collapsing bridge down to the crash site.
Fighting the Dog[edit]
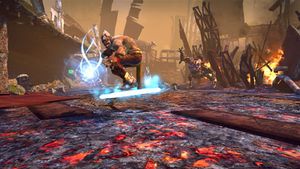
You've somehow landed safely and right where you were trying to go, but the Dog that was behind you up on the bridge has now caught up to you. Trip will hide inside the vehicle, leaving you to fight the big mech yourself. The area is a large oval with some platforms up around the sides where you can be out of reach of the Dog. Your Cloud also works here, and there are boosts around to help you get away from or catch up to the Dog. The Dog will attack you while you're on the ground and when you go up onto the platforms it will return to the vehicle and start attacking Trip. You have to kill the Dog before it kills you or Trip, or the fight starts over, so watch Trip's icon in the lower left corner to see her status. The Dog's health meter is at the top of the screen. Trip will tell you to stun it and get in close, and that's all you need to do for most of the fight.
Some upgrades that will really help with this fight are the Plasma Damage upgrades or the Stun Time and Focused Attack upgrades. Quadruple Plasma Damage will take almost half the Dog's health meter with each shot, making the fight extremely trivial, even without a lot of ammo. If you didn't upgrade your Plasma Damage, Stun Time will give you longer to attack the Dog while it's down, and the Focused Attack will do a lot of damage, making the fight much shorter. All you have to do is shoot the dog with your Stun Blast, then either shoot it with Plasma Blasts or wail on it while it's stunned, then repeat when it gets up. Once you've depleted its green health bar, a chase will ensue and you'll need to go after the Dog on the Cloud. The Dog will have a countdown timer over its head and if you don't catch up to it and perform the takedown in time, it will recharge and add a little bit back onto its health bar. After doing the first takedown, use the same tactics to deplete its second red health meter and then chase it down for the last takedown.