Now that you've made it back to Trip's community, you'll need to work together to get through the defense systems to one of the watchtowers where you can find out what's going on in her village.
The first watchtower[edit]

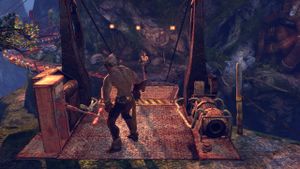
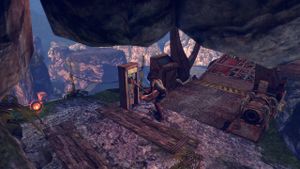
Follow Trip around the walkway to the bridges, where you'll find that no one is around to let you in. You'll need to get around and lower the bridge yourself for Trip. Take the branches over to a big red pipe you can use to cross the gorge. When you're across, head back over to the bridge by Trip and run up to the end of it where you can jump over to a vine that takes you up to a platform with a ![]() Mask. Head back down the way you came up and you'll drop back down beside Trip. Go around again, but this time lower the bridge for her to cross, then follow the walkway around to another bridge mechanism. Here you'll go through a series of bridge lowering/raising puzzles to get up to the top. You can now ask Trip to operate the mechanism on her side through the Command Menu.
Mask. Head back down the way you came up and you'll drop back down beside Trip. Go around again, but this time lower the bridge for her to cross, then follow the walkway around to another bridge mechanism. Here you'll go through a series of bridge lowering/raising puzzles to get up to the top. You can now ask Trip to operate the mechanism on her side through the Command Menu.

Start out by raising the bridge, then crossing and having Trip pull the lever. Cross again and use the mechanism to raise the bridge yourself, then tell Trip to cross. When she's across, lower the bridges and have her cross again to join you. Now when you lower the bridges again, you'll both run across. Throw Trip up to the ledge above, then attempt to cross the bridge she lowers. Use the handholds and branches to get back to Trip after it falls, and you'll spot the watchtower and see the next bridge puzzle. Open the left side bridges where you start, then run across and raise the right side bridges. Call across and have Trip close the left side bridges, then cross to the other side above Trip. Pull the lever to open up the left side bridges again, then cross to other side and lower the right side bridges. Have Trip cross, then raise the right side bridges again and run to the other side where you can close the left side bridges. You can now have Trip cross to your position, and when you open the left side bridges, you'll both head over to the lookout post.
The second watchtower[edit]

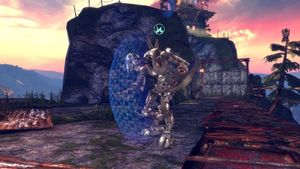
Unfortunately the watchtower is unmanned and Trip can't raise anyone on the radio. When she uses the zip line to get down to the village, you'll see that there are mechs waiting down there. They activate when they spot you and you'll need to make your way to the next watchtower while defeating waves of enemies. Take out the first two shielded mechs that arrive, but be aware that one of them will start broadcasting when you kill the other one. After they're defeated (and the two extra mechs that show up if you didn't get the broadcaster in time), a group of three will approach. Take out the Electro Mech first to stun the others, then finish them off. When you get to then end of the first section where you have to jump across a small gap to an area with a huge red cog spinning on the back, it will trigger the next wave. This one consists of a group of three mechs including an exploding one, followed by another group of three including an Electro Mech. You're done fighting mechs for a bit when you hear a garbled transmission from Trip.

Jump over to the next section, then drop off the side and take the branches and handholds down and around then back up to the next area. When you get to the watchtower, you'll be attacked by more mechs. The first three are normal mechs with one shielded, and when there's only one left the next group will attack. The next wave consists of three normal mechs and an Electro Mech you can do a takedown on. Once again, when there's one left another group will attack, this time from behind, back near where you climbed up. Besides the groups that attack when you're close to finishing off the previous group, if you get too close to the watchtower, you'll also trigger another group made up of two shielded mechs and an Electro Mech. One of the shielded mechs is an exploder and any of the three will start broadcasting when you kill one of them. If you don't kill the broadcaster quickly enough, you'll face two final mechs that drop down into the area from where you climbed up. Once again, you'll know you're done fighting when you hear from Trip.
Raise the gate to proceed into the next area, then use the branch hanging down along the wall to start climbing up to the ledge above. As soon as you get to the top you'll be attacked by more mechs. There will be a normal mech, two shielded ones and an Electro Mech you can use a takedown on. When you've taken them all out, head away from the watchtower and drop over the side of the ledge to collect the other ![]() Mask in this chapter. Drop down and go through the gate again and climb back up to where you were to continue on. Jump over to the next area and use the handholds on the side of the watchtower to climb to the top, where you'll use the zip line to slide down into the village.
Mask in this chapter. Drop down and go through the gate again and climb back up to where you were to continue on. Jump over to the next area and use the handholds on the side of the watchtower to climb to the top, where you'll use the zip line to slide down into the village.