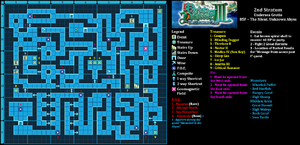
B5F ~ The Silent, Unknown Abyss[edit]

Available Quests: Too close to home; Message from aeons past I
Gathering Spots
Mine - Jet, Phyllite, Magnetite (Rare)
New Items:
New Enemies: Whorled Puffer, Red Starfish, Hungry Coral, High Onnep
New FOEs: Pasaran (2nd Stratum), Abyssal Death
After heading back to town, be sure to stop by the Via Senatus to report "Proof of will," and if you've discovered Ayutthaya, head to the harbor to be rewarded with an extra slot for your ship. At this point you can either head to the Butterfly Bistro and grab the two available quests, or set sail and further explore the ocean. The quest, "Too close to home," involves fighting 3 Greedy Lizards spread around the B1F, so start off by entering the 1st Stratum to have the trio appear on the map. They patrol like normally, going back and forth in a straight path with no way of being able to fight more than one at a time. For help on fighting them, reference the strategy on the previous stratum under "FOEs". After defeating all of them, head back into town and report the quest. Afterward, head to the second stratum and work your way to the hidden passage in C-1 past the third Abyssal Death to find the fossil pile. Each Abyssal Death can easily be avoided by luring them around the "pillars" in each room near them and there are also shortcuts near each one to help you skip them after passing them once. Just keep into mind that these FOE move 1 step per two of your actions, so you will need to move back and forth every now and then to prevent it from looping around to its original path before you. After you find inspect the fossils, be sure to step down into B6F and open up the remaining shortcuts in B5F. When you feel comfortable, return to the Butterfly Bistro to report your quest and pick up the new ones available before heading down to B6F (making sure to bring someone with a volt based attack).
Abyssal DeathWeakness: FireResists: PhysicalSkills: Tear ApartBehavior: AggressiveConditional Drops: Pig Iron Fang (Kill using a physical attack)Recommended: Zodiac, Monk, Hoplite, Buccaneer/WildlingThis FOE can hit all party members with Tear Apart so it is important to protect party members with lower defense and keeping your party's HP topped off. As with any FOE, you can disable its skill with the right bind, the head in this case. Have your Buccaneer/Wildling use Hanging/Call Bird to seal its head, and keep it sealed, use any defense raising skills you might have, use any attack lowering skills on it (e.g. Beast Roar), and attack it with fire based skills/limits.
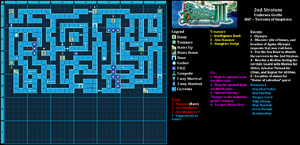
B6F ~ Torrents of Suspicion[edit]

Available Missions: Danger in the Undersea Grotto
Available Quests: Clinic's Request; Statue of salvation
Gathering Spots
Take - Green Algae, Sea Grapes, Narcissus (Rare)
New Items:
New Enemies: Blue Starfish, Great Hermit, Koolasuchus
New FOEs: Sea Wanderer
After heading back to B6F, the first thing you will notice are the currents blocking certain paths from you. As of right now, there is no way to disable them, so you will have to learn which currents to avoid and which to take to advance (take a look at the map for some help). As far as the quests are concerned for this floor, the Thick Throat needed for "Clinic's request" requires that you finish off a Koolasuchus on this, or a deeper, floor with any volt based attack and turn it into Missy. The other quest, "Statue of salvation," requires you to bring the offering to the statue located in B6F-C3, just a little past the campsite. There is not a whole lot to do on this floor until you can stop the currents, so focus on finishing the 2 quests, opening the shortcuts, and doing the requirements for unlocking the first mission of the stratum. In order to get the next quest, you have to find Olympia and investigate the location she directed you to before returning to Armoroad. When you reach the first set of currents, be sure to take the western most ones as they push you both to the right direction, and to a treasure chest containing the "Aim Hammer". Afterward, once you can grab the mission, return to town to report your quests and grab the new mission. If you would like, bring someone who can use chopping points to get a start on an upcoming quest that requires you to obtain an "Indigo Pith". Return to the path near where you found Olympia and it will now be "opened," enabling you to reach the next floor. When you are good and ready, head down into the next floor to continue the mission.
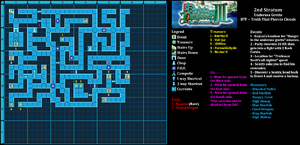
B7F ~ Truth That Pierces Clouds[edit]

Available Quests: Deep Blue; Professor Scott's all-nighter
Gathering Spots
Chop - Indigo Pith, Sturdy Timber, Abyssal Twig (Rare)
New Items:
New Enemies: Coral Octopus, King Starfish, High Walrus
New FOEs: Scaled Dragon
Once you reach B7F, you can either head back to town to grab the two new quests, or you can continue exploring and opening up shortcuts to make getting to one of the quest's location easier. If you brought someone who can use chop spots, it's recommended that you just continue exploring while using any of the chop spots on this floor or the next. On this floor, it is advised that you avoid the new FOE for now, but if you do decide to fight it, you should be comfortable with using binds and have a decently leveled Party Heal. In order to finish the mission, you must head down into B8F and fight an Abyssal Death, so make sure you are prepared before heading down, but be sure to finish up the quests on this floor first. For "Professor Scott's all-nighter," you need to head to D-5 during the night and observe the starfish continuously until you get into a fight with 3 waves of starfish. After defeating all 3 waves, be sure to pop down into the next floor before returning to report to Missy. While in town, be sure to grab the two new quests.
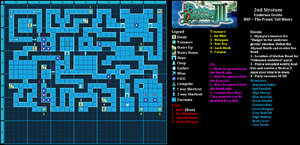
B8F ~ The Proud, Tall Waves[edit]

Available Missions: Door to the Deep City
Available Quests: Unknown mutation; Lost treasure
Gathering Spots
Mine - Jet, Phyllite, Magnetite (Rare); Take - Green Algae, Sea Grapes, Narcissus (Rare); Chop - Indigo Pith, Sturdy Timber, Abyssal Twig (Rare)
New Items:
New Enemies: Rock Coral, Iron Turtle
New FOEs: Ketos (Boss)
After you grab the quest, "Lost treasure," head to B1F-D3 and speak to the guard. Afterwards, speak to Aman, go to the Butterfly Bistro and speak to long-haired blond man, go speak to Aman and tell him about the long-haired blond man, finally, return to the Butterfly Bistro and speak to the man. Report the quest, stock up on supplies and make sure you have someone in your party that can use elemental based attacks before returning to B8F.
Materials from Enemies
Materials from FOEs, Bosses & Sea Quests
Gathered Materials
