The Suhalla is another desert, this time on the Gondowan continent. It's not as hot as the Lamakan was, so it's much easier to cross.
Suhalla Desert[edit]
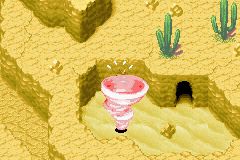
As soon as you enter the desert, head to the right and then move south. A sandstorm will appear, and Iodem will come out. When he returns, walk into the twister and use Douse . You will be engaged by a Tornado Lizard. Defeat it (it's very easy, though it can attack twice per turn) and head south to grab a treasure chest containing a Virtuous Armlet. Go back to the entrance and go down the left path this time. As you head down this path, another Sandstorm will erupt. Use Douse again and defeat the subsequent Tornado Lizard. Keep going down this path to a wide area; there are three paths from here, and all three are blocked by sandstorms. The Tornado Lizards are so weak for the amount of EXP that they give that it is recommended to take them all out. Neither one is required, however, as the only thing on the other side is a Mimic, so skip them if you're in a hurry. If you have time though, you should kill the Mimic, as it drops a Water of Life. Head down the path furthest right leading path to progress, after defeating this Tornado Lizard. Follow the path through a door going to the left.

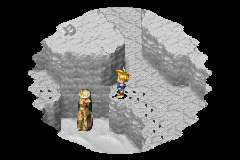
This is a similar area to the last one; there are three paths and all of them have a Tornado Lizard guarding them. The right path leads to a treasure chest containing a lucky medal, the center path is the correct one, and the left path leads to another chest containing a Cookie. Follow the center path all the way until you reach a cliff area. You should be able to see a huge, pink tornado here. If you use Reveal, you will see tiny footprints in the sand. Follow them, and they will lead off the edge. Use Reveal once more to see a hidden log. Jump across, then walk north and climb down the ladder. There is a Mars Djinni here. Defeat it to get Flash. Flash is essentially the same as Granite in terms of ability, so it's a welcome addition. Head through the cave for an optional boss battle, or go back across the hidden log to continue on. Head South and climb down a ladder. Once you're on the sandy plain, a large tornado will come up and attack you. If you are crafty, you can run past it, but other wise, you'll probably have to fight it. If you get caught, use Douse and the battle will begin.
Monsters[edit]
-
Brutal Troll
-
Magicore
-
Stone Soldier
-
Roach
-
Harridan
-
Vile Dirge
-
Tornado Lizard
-
Tempest Lizard
Boss
Boss Battle: Storm Lizard[edit]

If you fought the Tempest Lizard, this is almost exactly the same; consider it practice. Use Zephyr and Granite to start off with, and begin pounding away with the other Djinn. Every time you have 4 Djinn on standby, go ahead and summon. Storm Lizard uses a lot of full party attacks, so use Wish as much as you can, and if it isn't available, Spritz. It's weak to earth attacks, so use Kite on Isaac so you can get the level 4 summon out as fast as possible. By the time you have used all 4 different level 4 summons, he will probably be defeated.
Once you've killed it, head south through the small path and use Reveal on the rock circle to get a Psynergy Stone. Heal your party up before grabbing it, and you'll be in perfect condition. Head south, and then walk right until the sand turns back into rock. As you pass through a narrow point, Iodem will come out and note that Sheba was not in the desert. When he goes back, exit the area.
Optional Boss Battle: Tempest Lizard[edit]


After entering the cave near Flash, go right, then climb a set of stairs. You will emerge near the giant pink tornado you saw before. When you get sucked in, use Douse, just like on the smaller ones. This is a powerful foe, so use your Djinn wisely to stay alive. He gets to attack twice per turn, so try stunning him or delusion-inflicting techniques to avoid being attacks. Ground can disable him, and Kite can make up for that lost attack. Once it is defeated, unlike other bosses, it will return the next time you enter the desert, so don't fret.
Alternatively, you can not use Douse and your party will be drifted off to Crossbone Isle, an optional dungeon. Unfortunately, you're still too weak and don't have all the abilities to conquer it yet, so don't bother trying.
Suhalla Gate[edit]
Once you exit the desert, walk a little ways right, and then north to enter the Suhalla Gate. It is manned by guards from Tolbi, but once again they have been defeated. This time, it was Saturos' group that did the injuring. After a short cutscene, you can run north through this map and into a door. In the next map, random battles will occur. There is also a treasure chest containing a mint here, so slide down the cliff, grab it, then slide down again. Climb up the vines and continue to the right.
As you enter the next map, you will see many places to slide down the cliff. Walk to the third one from the left and slide down to land next to a Mercury Djinni. Approach and defeat it to gain Dew. After it is defeated, slide down again, then walk over and climb up a vine. Before climbing the second vine, head right and enter a door. In the cave, go down the stairs and through a door. This room has a lot of purple stones on the floor, but only one is a real Psynergy stone. Grab it if you need it, then go through the door.
Outside, Iodem initiates a cutscene. You have discovered the Lemurian ship, but it is sunk; Iodem gives you the Black Orb to use on it. Nothing happens, so he takes it back. Re-enter the cave and climb out. Go up to the top cliff and enter the next map. In here is another defeated guard. If you talk to him, he will die. Climb down the stairs and exit the area.
(In reality, this is Saturos and Menardi's ship, not Babi's, and they sunk it intentionally to prevent your party from taking it.)
Monsters[edit]
-
Horned Ghost
-
Gnome Wizard
-
Cannibal Ghoul
-
Nightmare
-
Mole Mage
-
Earth Golem


