< Gradius
Jump to navigation
Jump to search

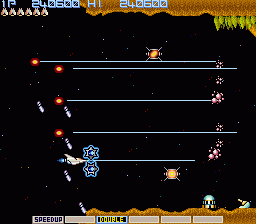
- At the start, this stage will appear to be a repeat of the first stage. But you'll soon come to find out that it has one major difference: It's upside down. Not that this will figure into your strategy very much, you'll still approach it similarly to the first stage. But you'll need a lot more firepower this time around, so make sure that when you finish the pre-stage portion, you have all four options, missiles, and lasers blazing.
- There is a lot more artillery here, and while a good portion of it is mounted on the bottom, there is a significant presence up at the top as well. And this time, the top has the benefit of protection from some of the mountains. Aerial attacks are going to come in much bigger swarms, and if you offense is charged to the max, the enemies will spray the air with bullets, so you'll have to dodge a lot more effectively. Let your shields take the hit, that what they're there for.

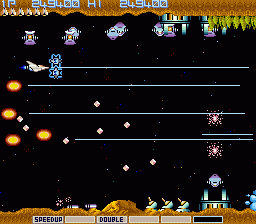
- Shortly after you start this stage, you'll be faced with a tough decision. There are tons of artillery on both sections of land, and a lot of enemies flying through it thanks to the hatches. Your missiles can take out the bottom tanks, but you have to chose between taking out the high enemies or the lower flying ones. Either choice you make is going to make you vulnerable to attack from behind, where your shields can't defend you. The ground targets scroll away more slowly, but the flying enemies shoot faster. Go with your instincts.
- Remember that the longer you let hatches remain on the screen, the longer they have a chance to fill space with deadlier flying enemies. You should make it a priority to take them out, but not if it means risking the safety of the Vic Viper. Always plan to clear out the space around the hatches first, and move in for the kill as soon as it's safe to position yourself close to the ground. Continued practice will help you determine precisely when that is.

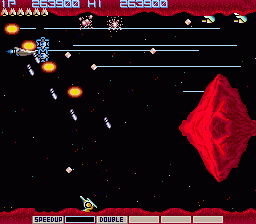
- Roughly halfway through the stage is a particularly tall mountain. Unfortunately, it's not just a mountain, but an active volcano. You may be reminded of the end of the first stage, but you're not nearly at the end of this one. You'll have to lay low and protect yourself from the spray of rocks. The volcano will stop shooting when it has moved roughly 80% of the way across the screen, making it safe for you to proceed ahead of it. Until that time find a good place to stay and fire weapons at the rocks so you survive the eruption.
- When you get past the volcano, you still have a bit further to go before you reach the end. More enemies will appear to stop you, including Jumpers and Duckers. The Jumpers will spray a lot more bullets into the air, usually in response to the high degree of firepower that you're packing. Since the Jumper's bullets spread out as they get farther, the easiest place to avoid them is near the top of the screen, which is where you'll be spending a lot of time anyway in order to take out the terrain enemies at the top.

- Just like the first stage, there is a rather large floating rock positioned near the end of the stage, complete with a group of five laser cannons that await your arrival and begin to fire at you. Just as before, you'll want to choose a path to take, and remove the cannons closest to that path. If your Options are maxed out, you may actually have the potential to remove every cannon if you line your Options up in a long string down the side of the screen, but naturally, don't risk your life.
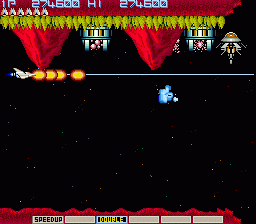
- The sub-boss for this stage is a double threat. You may be inclined to think that you'll have to deal with two more volcanoes, but the truth is far worse. There are two hatches that are extremely difficult to hit without double-shots, that spew forth enemy after enemy continuously. In addition to that, you have to face the legion of Iron Maidens. Iron Maidens are extremely hardy and take a lot of firepower to destroy. While it's possible to destroy them as soon as they appear if you concentrate your firepower as illustrated in the picture to the right, be prepared to let a few slip past you if you don't manage to destroy all of them, and make sure you fire at them as much as possible when they complete their journey around the edge of the screen and start advancing towards you. Once all of the Iron Maidens are eliminated, the Big Core will arrive.