Round 1[edit]
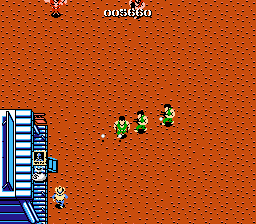
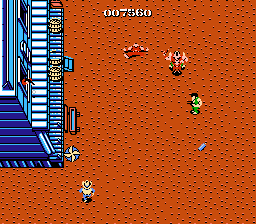
The beginning of the game starts out very lightly. A few Gunmen will approach as the first barrels appear on the right. They contain a rifle power-up and a money bag. Bombers will appear, along with a Sniper in one of the first left windows. Note that in this version, you can actually defuse the undetonated dynamite that Bombers throw by walking over them. You'll find boots and money bags in the next couple of barrels. Back-stabbers will also jump off the roofs and cross the screen. You will eventually reach a set of walls, and you will see three barrels lined up. The middle one contains a POW symbol. Wait until a few enemies are present on the screen before collecting it. Beyond the walls, you should reach the first shop. You should have enough points to purchase a Shotgun by now. Once you buy it, some enemies and barrels will drop Bullets in addition to money bags. Press ![]() to arm yourself with the Shotgun. Be aware that there is a red enemy in this game that also has a limited shotgun weapon as well. He fires three bullets which fan out. The last barrel along the buildings on the right side contains a horse, a rare free opportunity in this version. After a set of walls, you will reach the second shop. The wanted poster costs 20,000 but it's unlikely that you will have accumulated that much, even if you did not buy a shotgun. However, if you know the location of the hidden poster just ahead, you won't have to repeat the stage. Shortly after the shop keep, you will see three barrels on the right and one barrel on the left. The left barrel contains a money bag, and the wanted poster is hidden directly behind that barrel. Shoot the spot until the poster appears to collect it. Another building will appear on the left. Shoot at the lower corner of the building to make a blue Yashichi appear and collect it for temporary invincibility. The barrel directly behind a wall (ahead of the well) contains a red Yashichi which you can collect for an extra life. The next barrel beyond the well on the left contains a POW symbol. Once you reach it, the screen should stop scrolling if you have the wanted poster.
to arm yourself with the Shotgun. Be aware that there is a red enemy in this game that also has a limited shotgun weapon as well. He fires three bullets which fan out. The last barrel along the buildings on the right side contains a horse, a rare free opportunity in this version. After a set of walls, you will reach the second shop. The wanted poster costs 20,000 but it's unlikely that you will have accumulated that much, even if you did not buy a shotgun. However, if you know the location of the hidden poster just ahead, you won't have to repeat the stage. Shortly after the shop keep, you will see three barrels on the right and one barrel on the left. The left barrel contains a money bag, and the wanted poster is hidden directly behind that barrel. Shoot the spot until the poster appears to collect it. Another building will appear on the left. Shoot at the lower corner of the building to make a blue Yashichi appear and collect it for temporary invincibility. The barrel directly behind a wall (ahead of the well) contains a red Yashichi which you can collect for an extra life. The next barrel beyond the well on the left contains a POW symbol. Once you reach it, the screen should stop scrolling if you have the wanted poster.
Boss: Bandit Bill[edit]
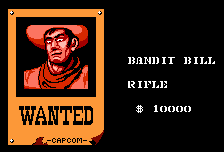
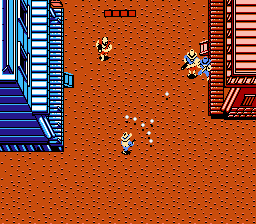
Health: 4 bars. Continue shooting the enemies that appear from the top of the screen until Bandit Bill arrives. Bandit Bill behaves very much like Master, the first boss of the arcade version. He shoots at you until he takes enough damage to lose one health bar. Then he crawls on the floor for a while, where he is invulnerable to your gunfire. Eventually, he will stand back up, and that is your opportunity to attack him again. No enemies will appear from behind you here, although some may appear from the side, so you can actually stay fairly high up on the screen and behind Bill's line of fire, until he stands back up again. Don't waste shotgun bullets on this fight, your normal pistols are sufficient. Keep hitting Bill when he stands up until all of his health is gone.
Round 2[edit]
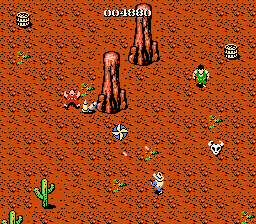
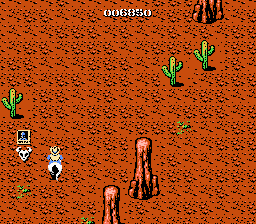
The second round of this version jumps ahead to the fourth round of the arcade version. You will have to navigate around rocky terrain, and Gunmen and Back-stabbers will jump down from the cliffs to attack you. Riflemen will appear in this stage, behaving much like the did in the arcade; advancing toward you, firing a couple of shots at you, and then retreating to the top of the screen. It won't take too long for you to reach the first shop. At this point, you should be able to afford the Machine Gun or the Magnum, but probably not both. Buy whichever one you prefer and save the other for later. Watch out for all of the enemies jumping off the cliff behind the shop keeper. You will see a barrel on the right which contains the first cattle skull. Don't collect it, but do aim your gun at the foot of the rock in the middle of the screen. Shoot at it until a blue Yashichi appears, and pick it up for invincibility. From here, the barrel on the right path contains a red Yashichi while the barrel on the left contains a cattle skull. However, don't rule out the left path, as the free wanted poster is hidden directly above that barrel. It is possible to get both the extra life and the poster if you're quick enough. From there, it's a short distance to the next shop, which will sell you the wanted poster for 24,000 if you missed it. You may wish to buy a horse if you have enough points. The remainder of the level proceeds along fairly uneventfully. You will eventually reach a barrel that contains a POW symbol. After that, the screen scrolls on until no more cliff terrain is visible. If you have the wanted poster, the screen will stop scrolling and the boss will appear. If not, the stage will continue to scroll from the beginning. However, this time, you will be able to reveal a free horse below the cactus on the left side of the screen.
Boss: Cutter[edit]
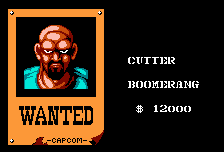
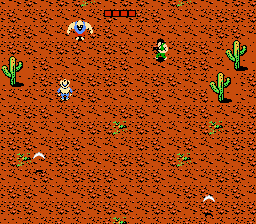
Health: 4 bars. Cutter is a tough boss only because his weapons are very hard to predict. He throws two boomerangs which curve on the screen in an effort to pinpoint your location and fly toward you. Even as you move, they may still fly in to you simply because they have no other direction to move than the one your going in. Cutter is not vulnerable to attack until he throws his boomerangs once. After he throws, he tends to leap back and retreat, or scoot from one side of the screen to the other. Try to stay ahead of the boomerangs and take shots on Cutter when he's clearly to one side of you. Focus more on dodging the boomerangs, as you will get plenty of chances to shoot at Cutter if you can stay alive. While using the Magnum, you can shoot his boomerangs before they reach you.
Round 3[edit]
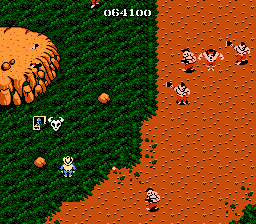
The third round of this version is very similar to the sixth round of the arcade version, where you attack a Native American village. Fortunately, it's not nearly as long. You will be attacked by Native American versions of the Gunmen you've encountered previously. In addition to the Gunmen and the Spear Throwers, there are Snipers peeking out of the tee-pees. You'll also have to contend with a new type of native, one who jumps around and blows fireballs in your direction. You will encounter the first shop in a short amount of time. Buy any weapon you have not already purchased, including a Smart Bomb if you can afford it. Just beyond the first shop, you'll find a barrel on the left that contains a POW, and two barrels on the right. The bottom barrel contains a red Yashichi while the barrel above it contains a skull. Around this time, Hatchet Throwers will join the fray. In an unusual move, you will find a blue Yashichi simply by shooting a barrel on the left, so be sure to collect it for limited invincibility. A second shop will appear shortly after on the right. The wanted poster costs 50,000 points, but you haven't yet passed the free poster, so skip it. Do buy a horse if you're able. You will then pass a long section of tee-pees on the right with only a pair of barrels for the duration. In the open section, many fire breathing native will appear, and the Magnum is an effective weapon to use on them. Following that, a third shop keeper will appear, a second opportunity to buy weapons if you need any. Beyond him, you will find a lone barrel on the left that contains a skull. Hidden immediately to the left of that barrel is the free wanted poster. Make sure you grab it if you did not shell out the points for the one at the shop. You will encounter a set of barrels, two of which contain skulls, but one has a red Yashichi. After that, it will a short distance before the screen stops scrolling if you possess the wanted poster.
Boss: Devil Hawk[edit]
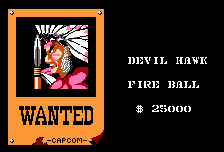
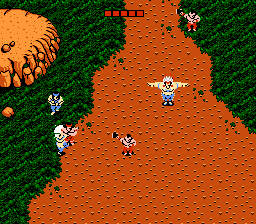
Health: 5 bars. Devil Hawk bears some resemblance to Wolf Chief from the arcade version. However, rather than firing a shotgun at you, he throws several fireballs that fan out. He can throw five or three at a time, typically throwing three if he aims to either one of his sides. Like Cutter, he isn't vulnerable to attack until he launches his first attack. He can't throw behind him, so you are relatively safer there, but he jumps around a lot, and he can cover a lot of distance with those jumps. Don't be too surprised if he jumps all the way back to the top of the screen. Use a Shotgun to try and fire at him from the side and avoid his fireballs. Watch out for the other enemies that appear, and try to predict where he's going to land so you can move out of the way and position yourself for the attack.
Round 4[edit]
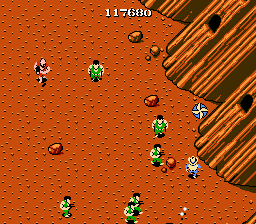
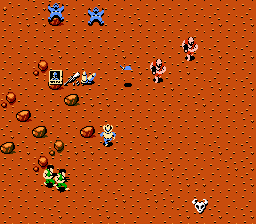
The fourth round will have Billy walking through a valley between two sets of cliffs on either side of te stage. While most of the game will resemble the arcade to this point, the first departure appears in the form of a new enemy type, the ninjas. Ninjas run at you with swords, and throw shuriken. Also be aware that, starting this round, Gunmen will start appearing from the bottom of the screen to attack you from behind. After two Ninjas, you will encounter a number of Gunmen. A boulder will fall down the cliff and a Sniper will appear from the hole nearby. One Shotgunner will appear before more Ninjas follow. After the first major cliff-side ends, the first shop will appear on the left. Buy any weapons you need. A couple of Shotgunners will appear from the right. Killing them is always good for a bullet drop. A lone barrel on the left contains a blue Yashichi. More Gunmen will appear from behind until the next cliff-side ends and the second shop appears. Purchase a horse if you can afford it and continue on, as you haven't yet reached the hidden poster. For the next stretch, ninjas will attack you from the front while many Gunmen appear from behind. After a break in the right cliff wall, more cliffs will appear on the right. In one of the crevices is a hidden blue Yashichi that will surely come in handy. After that, two barrels will appear side by side on the left and one contains a red Yashichi. Only a short distance after that, another pair of barrels appears on the right with another red Yashichi in one. After the cliffs end, three barrels appear on the left. The outer two contain skulls, but the middle barrel contains a POW symbol. Two barrels appear immediately after, on the left. Shoot the space to the left of these barrels to make the hidden wanted poster appear. Collect it in time to make the screen stop scrolling very shortly after, where the boss will appear.
Boss: Ninja[edit]
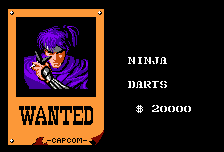
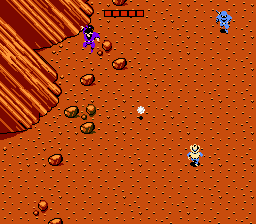
Health: 5 bars. Despite the difficulty of the stage, the boss is considerably easier, especially compared to the ninja boss in the arcade. While he hops around, he is far more vulnerable to attack and cannot dodge attacks from a Shotgun or Machine Gun very well. He can teleport in a puff of smoke, but he doesn't disappear for long, nor does he reappear very far from where he left. He will always do this if he losses a bar of health. He tosses shuriken at you, but only if he appears long enough to throw them. Naturally, you will have to contend with other ninjas and Gunmen joining the fight. If you attack the boss Ninja persistently, he won't have time to counter attack, and he will go down very quickly.
Round 5[edit]
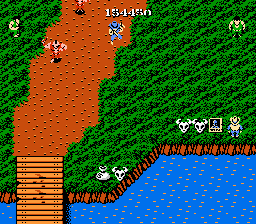
The fifth round starts out in a sprawling forest with trees everywhere. You can't walk through the trees, although sometimes small paths exist between them. Gunmen will first approach you from the top of the screen, and then just as two Riflemen approach and two Bombers, the first shop will appear very early. Purchase any weapons that you need, As you approach a bridge, one Gunmen will appear from behind. A large number of Riflemen will appear, many of whom will rise from the water. Another will cross the bridge to attack. You can jump in the water to escape from the Gunmen who appears from behind on the bridge. A barrel can be seen beyond the trees on the left, and you can shoot at it from the front to reveal a blue Yashichi, but you'll have to swing around to collect it. It's highly recommended that you do so that you can jump in the water and deal with the plethora of Riflemen by running into them while the invincibility lasts. Gunmen and Bombers will attack from the front, and some Gunmen will appear at the back of the bridge. Eventually, you will reach another bridge on the right, but halway along a dock appears in the middle of the water on the left. The right of the two barrels at the edge of the dock contains a red Yashichi. Above this dock will be the second shop. You haven't passed the hidden wanted poster yet, so you don't have to buy one here. Buying a horse is recommended. You will see two barrels on the left before some water, one of which contains a POW symbol. The next bridge does not cross the water completely, while another dock on the left extends from the opposite bank. Many of the barrels on that bank contain skulls. However, if you shoot the space to the right of the right most barrels containing skulls, you'll reveal the hidden wanted poster. Collect it quickly, as the screen will stop scrolling shortly afterwards once you have it.
Boss: Fatman Joe[edit]
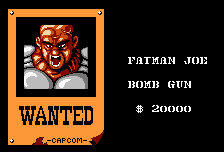
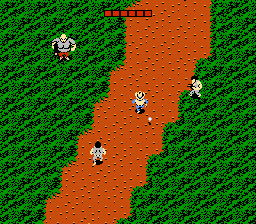
Health: 6 bars. Fatman Joe is very similar to his arcade counterpart. He makes very short hops around the screen, and attempts to fire his bomb gun (which is akin to a grenade launcher) at you whenever he can hold still long enough to use it. You can hurt him until he launches his first attack, so focus on the enemies that are appearing around him before you worry about him. Because he is large and somewhat slow, the Magnum happens to be particular effective against him, not to mention that it will make short work of any enemies that happen to be standing around him. Wait until he is vulnerable to attack, and then fire at him as constantly as you can until he goes down.
Round 6[edit]
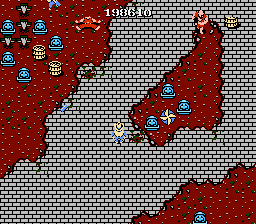
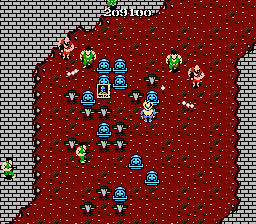
The final NES round looks unlike any round found in the arcade, containing considerable amounts of buildings and cemetery grave stones throughout. Gunmen will appear on the rooftops, and Snipers will shoot at you through the windows as you progress along side these buildings. The first store, a weapon shop, will appear very early on so that you can stock up on any weapons that you are missing. Gunmen will appear from the bottom fairly frequently so be on the lookout for anyone who can attack you from behind. You'll pass by another building filled with Snipers while Bombers appear from above, until the stage opens up into a clearing. A set of enemies will approach as you reach the next set of buildings which appear on either side of you. The lone barrel that you encounter contains a POW symbol. After these buildings, there is another break in the action. The next area is much more open with no buildings to navigate through. When you see a set of graves in the middle and two barrels on the right, shoot the space between the graves to make a hidden blue Yashichi appear. Collect it and crash through the enemies that appear. When it wears off, you will begin to see the next store. Buy a horse if you can afford to. Then you will pass between two buildings. The Magnum can make quick work of the Back-stabbers that jump off the roof. A third shop will appear very shortly after, containing weapons. After that, you will see two barrels on the left, one of which contains a red Yashichi. You will have to walk through a narrow path between two buildings with Snipers on either side. Watch out for Gunmen which appear from behind. Soon you will reach a clearing with many grave stones in the middle. Fire very rapidly into the space below the middle grave stones along the top to make the hidden wanted poster appear. Be sure to run up and collect it and get back out. From this point on, you must navigate through a couple more buildings and many enemies that show up to stop you before you reach the final boss of the game. There are no secrets or tricks, you must simply use all of the survival skills you have learned up until now to reach the end.
Boss: Wingate[edit]
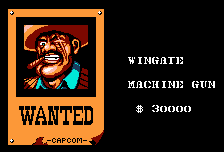
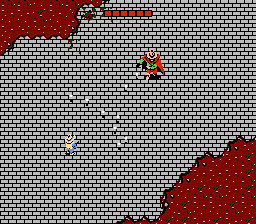
Health: 6 bars. When Wingate first appears on the screen, he will rush forward firing his machine gun at you as he approaches. Be prepared to dodge his fire and set up your counter attack. As with many bosses, the Magnum is an especially effective weapon since it does a lot more damage to him than standard bullets, allowing you to chip away at his health a lot faster than usual. Move continuously around Wingate, so that he can't get a fix on your location and shoot you. Do not double back unless there is a break in his firing. To your surprise, when you defeat this Wingate, the game will not end. Instead, a second Wingate will appear. This is the true Wingate. However, there is no difference between the strategy that you used to defeat the first Wingate and this Wingate. Apply the same tactics, moving around him in a semi-circle and firing your Magnum at him until he is defeated. If you run out of Magnum bullets, switch to the Machine Gun instead. Once the second Wingate is defeated, you will be treated to the ending and the credits. Congratulations.