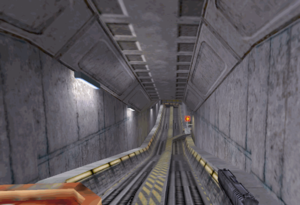
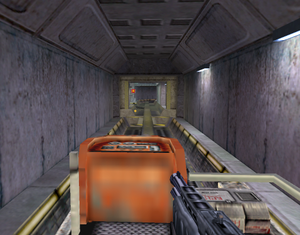
A short trip later, you will see a security guard at a checkpoint; he will mention that there's a rocket you need to launch. After listening to him (or earlier), flip the switch to raise the barrier, and move the tram forward.
Note that the center of the track is electrified, and will harm you if you step on it. While it may be possible to complete parts of the map without the tram, it may be less convenient.
The rail loop[edit]


The first part of this chapter, after you ride the lift down, is the first rail loop. If you let the tram continue, you will move around in circles past the same areas.
On the side of the walls before a branch, you will see a side switch similar that found in the image. When you see the second one, shoot that to change the direction of the tram. This route will eventually lead to a green-lit section with stairs leading up. Stop the tram here.
Under the stairs are some grenades. When you climb up the stairs, you will reach a crane control room blocked by boxes. Destroying them will activate the turret, which can easily be destroyed by a shotgun blast. Alternatively, you can stop at the exit track switch and hop across to the other platform. From here you can lob a grenade to easily destroy the turret. However, be careful because the turret can detect you if you go too far sideways away from your tram. Push the crane to unblock the exit route.
Continue along the track until you see the a track switch coming up. Shoot it, and continue onward.
Elevator ambush[edit]
After exiting the loop, you will reach an elevator that corkscrews the tram up one floor; the military uses this opportunity to ambush you from a raising elevator, and you might not have much cover. The best method is to fire a grenade at them, and neutralize any threat before you start the ascent. If you get injured, there's a health station near the ladders at the elevator.
Down the corridor will be a firefight between aliens and soldiers. The tram will move behind three soldiers, but in front of another one (and a usable machinegun mount). To the left of the firefight are stairs that lead to an HEV charging station.
From here, you can either choose to continue along the track, or to take the stairs. The stairs lead to more soldiers, while the track has wall mines planted en-route. You will still encounter action in either route. Near the end of the track (during a second level transition), there will be three soldiers waiting on the left next to the blocked off wall - firing a grenade will take them out easily.
Detour[edit]
The track stops after an initial ambush from three soldiers to the left. The only exit is to the right, and entering the corridor causes aliens to teleport in.
As you return to the track, you will encounter a gun turret. To disable it, you need to hit the soldier inside it, either by firing a grenade to the side of the turret, or running up close and tossing a grenade behind the bunker.
The dark tunnel contains only mines and need not be explored. The ledge above the blast door contains an HEV cell. To continue, enter the blast doors to the missile silo, and climb down, killing the soldiers as necessary. Recharge the HEV, and get on the tram - continue forward as there is not many items gained from exploring (aside from seeing anti-Freeman graffiti.)
Around the corner is a missile turret. Duck as soon as it enters view, and slow down. There is also a mine next to the turret - shoot it to get past (but this will not kill the soldier manning the turret.) Beyond the turret will be two more wall mines.
Switching tracks[edit]
Eventually, you'll see the track fork, but the right path is walled up. Continue until you get to a platform to the right, and disembark. You should find a staircase blocked by metal crates; disarm the wall mines past the stairs, and climb over the crates.
You will find another set of soldiers at the control room above, where you can pull a switch to open the other track. Head down, and take the tram on the far track (killing the soldier first).
The tram leads to another barricade, with another ambush point. First, take the machinegun, and use it to take out the soldier in the machinegun bunker. Eliminate the three other soldiers, and flip the switch to open the barrier to reach the second elevator.
Alternatively, when entering the room, hide behind the sandbags or walls away from the machinegun bunker. Proceed to take out the soldiers, in any means necessary, while backing down if they throw a grenade. Before going to the "First Aid" station, go behind the machinegun bunker and throw a grenade, then run away before the soldier can shoot, Last, activate the switch.
You can either use the tram to go up, or take the nearby service elevator. If you are going by foot, use a satchel charge to clear the upper floor first.
Past the tram elevator are generators that are shooting electricity, which can be passed by proper timing. These are followed by two more wall mines.
Hauling cargo[edit]

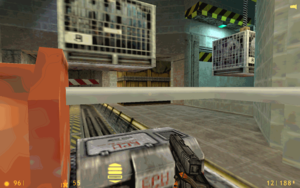
Next is a room where heavy crates are being transported by overhead cranes, and another track barricade. Soldiers are waiting behind the wooden boxes, and are dispatched by a single grenade. Flip the switch behind them.
Continue along the track, past the next room. Once you go up the first ramp, you will see another missile turret. Duck, and take out the soldier behind it. When you see the wall switch coming up on the right, shoot it to continue.
The track will end for good. Head to the right and climb down the ladder to get to a level transtion.
Ready for launch[edit]
While climbing down, the level transition will create a few turrets and wall mines. Drop a grenade to disarm them, and jump off the ladder to avoid waking the remote turrets. The office has a medikit, but also two zombies waiting to attack.
The corridor leads to another machine gun bunker. Take cover behind boxes and the hardened blockage, and fire a grenade into the bunker. Exit to the right, and you'll head outside to see two marines talking. There will also be a sniper outside, which will become alert if you remain still too long. Head to the blast doors across from the track to continue to the launch silo.
The outdoor silo has soldiers waiting to the right, and a machine gun nest to your left. You will need to get inside.
The military mined the staircase with powerful explosives. To get past them, move the metal crates past the stairs, and crouch-climb them. Defeat the two soldiers in the way, and press the launch button to get the satellite in orbit.
Return through the blast doors to the place the sniper watched over, and turn to the left. Then go down a ladder, which will be located on the left. It will take you to a fancy tram car, which you will need to board to proceed.