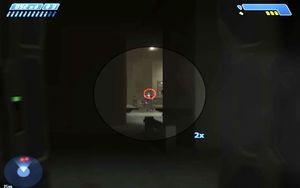
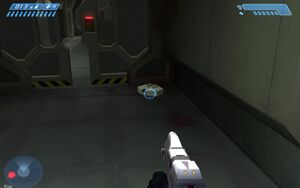
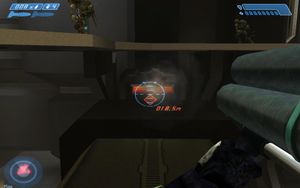
Welcome to the final level of Halo: Combat Evolved: The Maw. The first level took place on the Pillar of Autumn, and the last level has the same scene. But the ship used to be full of Covenant and, more importantly, humans. Now it's full of Covenant and Flood, and everything is a mess. We'll be trying to blow up the Pillar of Autumn so that we can destroy Halo and stop the flood.
Getting to the Bridge[edit]
Cortana explains that "we need to get to the bridge," so that we can self-destruct the Pillar of Autumn. Take a left and then a right, and enter the familiar claustrophobic hallways that were in the first level. Take your first left, and follow the path. Some Flood Infection Forms will come out from below. Shoot them, or just let them hit you.

Down below are some Carrier Forms and some Sentinels. Let them battle it out before you drop down. If there are any more Carrier Forms down there, simply run back up the ladder to stay safe. Once they're all gone, drop down and take out the Sentinels with your Plasma Rifle. If they give you trouble, just duck behind the small barrier.
As you continue to the right, a number of armed Flood will come around the corner. There aren't too many of them, but don't worry about ammo – empty as many bullets into them as you need to. I don't recommend swapping out any weapons yet. Don't go around the corner too far, until you beat them. If you do, floodgates will open...so to speak.
Once you've beaten these guys, there's a closed door, which will burst open. As soon as it does, chuck a Frag Grenade inside to make a big dent in the flood, then fire away. One of them will drop a Shotgun somewhere, so pick it up (it doesn't matter which weapon you swap it for). Continue on, using your new Shotgun to easily kill Flood.
Soon, you'll enter a wider area. To your left are a number of Flood. If you keep your distance, a Hunter will come in and fight them. Let them fight each other until it's just the Hunter left. Once that happens, lure him into punching you, then as he lunges, use the Shotgun at the orange spot in his back. Another will exit the door on the right; use the same strategy.

This next room is full of Elites and Grunts. Don't go in there yet -- stay in this room. There should be a Pistol by the Flood on the left side. Use it to pick off Grunts. Once you beat all of them, swap it out for a Plasma Pistol. You should have a Plasma Pistol and a Shotgun at this point. Walk into the room, and stay behind cover. Once your shields are full and you're ready, shoot a charged Plasma Pistol shot into an Elite. This will stun him; use this time to shoot him with your Shotgun or stick him with a Plasma Grenade. Once you do this, run back to cover. Repeat this strategy for all of the Elites.
Before you leave the wide room, grab any Health Packs you might need. Head through the mess hall and exit through the door on the left.
There will be a Health Pack on the ground right before you turn left. Ready a Plasma Grenade. As you turn, there will be an Elite; stick him with the Plasma Grenade and run away. If you miss, he's pretty close – you can beat him with a Shotgun.
We're in the bridge now. Take care of the few Grunts that are here, then head to the spot where you first met Captain Keyes in the beginning of the game. There's a brief cutscene here, which changes things. We were going to blow up the Pillar of Autumn, but 343 Guilty Spark made that impossible.
It looks like we're going to need to blow up the engines using grenades or rockets. Let's make it happen.
To the Engine Room[edit]
Sentinels will come to try to kill you, and you could kill them, but I think it's much easier (and faster) to just run away. Head back the way you came.
When you enter the wide-ish room after the bridge, look to your left. There's a door there, but a bunch of Flood are inside. Toss a grenade in there to kill a few of them, then hold your position with a close-range weapon. They'll keep coming out for awhile. When you've killed enough of them, continue through.
Head through this long, dark room to the door on the other side. Head through the door and run straight, and ignore the battle happening to your left and right. Continue through this hallway until you reach a room full of Sentinels. If you have a plasma weapon, use that to beat them. If they hurt you, just hide behind cover, and take your sweet time.

Duck under the blast door and continue through the hallway to face a couple more Sentinels. There are a number of doors on your right through which we'll need to proceed, but I'd first hop over the pipes in the middle to the other side -- there is a health pack there. Once you get that, hop over the pipes and head through the door on the left.
You'll notice a room full of fighting, but ignore it and head straight. At the other wall is a ladder. Climb it and head back on this platform, killing anyone that gets in your way. When you reach the other side again, take a left and you'll encounter a couple of Sentinels, who will respond well to a couple of Shotgun shots. Take a right and enter a little control panel room.
In this room, there is a health pack, Frag grenades, and a Shotgun. Use any of those things to your advantage, though only use the health at the last minute. To your left, Flood will keep pouring (get it? Flood...pouring...) in. Use grenades to make a clear path, and head on through. This turns out to be much easier said than done, so take your time - this is a hard checkpoint.

Once you get past there, don't waste your time, because more Flood will appear. Head right and enter the clausterphobic corridor again, like you did at the beginning of the level (and the game). Turn your flashlight on.
Take a right, a left, and then a right. If you need a health pack, when you can see the open door (with light on the other side), take a right. There's a health pack at a dead end. Once you're ready, head straight forward, through the door with your Shotgun ready. Head to the other side, and use this as a little base. When you take damage, stay inside. When you're ready to go back out, use your Shotgun on the Elites around you.
Your goal is to get to the right end of the hallway, and also not to die. Once you've cleared as many Elites as you want, head to the other side, to the Armory. Follow the red arrows.
In the Armory, you want to stock up on the following: a Rocket Launcher, a Shotgun, and every grenade you can hold. Make sure you have full ammo, as well. Once you're done, follow the red Engineering arrows to the engine room.
The Engine Room[edit]

Cortana explains what we need to do: blow up the Pillar of Autumn so we can destroy Halo. The way to go about this is a three-step process:
- Get to the third floor. There are plenty of ways up - just follow the white arrow signs that say "Level 2," and then to "Level 3." Bring a Shotgun - there's lots of Flood.
- Find the control panels and retract the exhaust couplings.
- Stand on the thing that's moving back (the retracting exhaust coupling). Fire a rocket or throw a grenade into the fusion reactor when the little flaps open. It'll explode, and you should continue on.
You must do this for all four reactors, two on each side. Should you need them, there are plenty of health packs on the first floor. Take your time, and go back to the armory if you need to.
Run Away![edit]
Head back to the third floor (if you're not there already). Follow the nav point through some doors and to an elevator shaft. An elevator will come down to meet you - if you've got explosives, use them! A few Covenant will be on the elevator. Kill all of them with a Rocket Launcher or grenade, and then ride the elevator up.
When you reach the top, you'll have a time limit to get off of the ship (varies depending on the time limit). Grab a Warthog (and a health pack) and drive.
While I could give you strategy for this, it's pretty straightforward. While you have a time limit, you can still afford a number of mistakes. Keep driving forward and eventually you'll reach a spot where you can't drive anymore. Cortana will tell you that you "need to get aboard, now!" So run forward and do that, and then you're done!