Combat[edit]
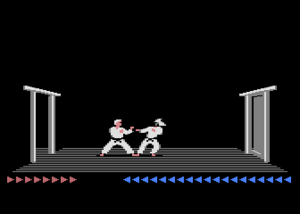
As the player proceeds, he will continue to encounter members of Akuma's army. Once he is within the proximity of one of the warriors, both the player's and the warrior's hit points will become visible at the bottom of the screen, displayed as follows:

Every triangle represents one hit point of damage that each combatant can take before dying. Every time a punch or kick connects, whether high, medium, or low, the recipient loses one hit point. When only three hit points remain, the remaining triangles flash as a warning. If a combatant avoids getting hit for several seconds, they will regain one hit point, but only up to the number of hit points that the fighter started that match with.
Kicks have twice the range of punches, but you may only kick thrice in a row before you must put your foot back down. There is one caveat. On many versions, if you press kick 4 times in a row, it will buffer the 4th kick and use it in the next attack set. However, it will then let you get three more kicks in a row after this, giving you four kicks instead of three, provided that you wait for the first kick animation to start before pressing kick three more times. Most notably, this is not true on the NES version, which in fact limits you to 3 consecutive kicks. There is no limit to the number of consecutive punches you may throw, but you can be kicked from outside punching range. However, you can punch while advancing or retreating in combat stance.
Most normal enemies attack at half your speed. Akuma, however, attacks at your speed. Against a normal enemy, you can get into a situation where you can punch continuously and the enemy will do nothing but punch back. This invariably leads to either you taking no damage and winning easily, or, more commonly, you trading hits every second blow, which if you have enough health to withstand it will give you a quick win. Again, the NES version is different. All enemies attack at your speed, and strategies from other versions are not as effective.
There is no blocking an attack, you can only be outside of the attack's range. Either you may be too far away to hit or be hit, or you may be in the process of performing an attack, such as a high kick, that moves your body away from a potential offending attack. Attacks can interrupt forward movement. If you are walking towards your opponent, and you are struck in mid-stride, you will be forced back. You must be in fighting stance to withstand an attack. If you are ever hit while running, standing, or bowing, you die instantly.
When a fight is over, you will regain most of your health back. However, as you progress, you will regain less and less hit points. This indicates the rising relative strength of your fresh opponents. While it may take your first opponent 16 hits to knock you out, it will take much more advanced opponents fewer hits to do so. Likewise, your opponents will increase in the amount of damage they can take before you can knock them out, with the exception being Akuma's bird.
Walkthrough[edit]
Outdoors[edit]

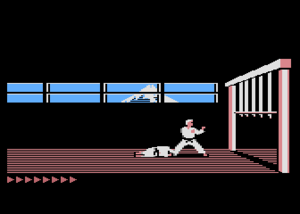
The beginning. Your mission begins at the edge of the cliff which you just climbed. After walking forward a few steps, you will encounter the island guard, who greets you in front of the island gate. This will be your first, and easiest fight. Once you defeat the guard and pass through the island cliff gate, you will be treated to a cut scene where an informant alerts Akuma to your presence. He immediately dispatches his army to attack you.

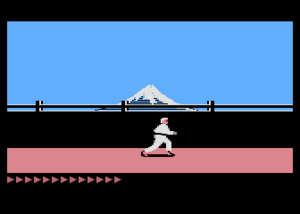
Race to the entrance. Now the level begins in earnest. You should run as much and as soon as possible, for the longer it takes for you to reach the palace entrance, the more guards you will encounter along the way. As you run along the walkway (with a picturesque view of Mt. Fuji in the background) the game will cut back and forth between you running forward, and the guard rushing to stop you. Once you are close enough, the game locks on you and commences the fight. Be sure to stop running before you reach the guard. If you run into his combat stance, he will kill you instantly. As soon as you defeat one guard, begin running right away, preferably before the next one will leave the palace, to close your distance to the entrance of the palace. The next guard will be a little stronger and a little smarter. Continue this pattern until you are fighting in front of the palace gate. It is difficult, but doable, to defeat only three guards before you are inside; four is a very achievable target. Once you beat a guard with the entrance in view, you will have a few seconds to run inside before Akuma sends another guard to fight you. Don't waste the opportunity.
Palace Hallway[edit]
The battle continues indoors. The Palace plays in a manner similar to the outside. You begin with one guard at the entrance which you must fight and defeat. At that time, another guard will inform Akuma that you are inside, and he will send his more talented fighters to defeat you. Once you're back in control, you must continue running since the same rule for outside applies here: the longer it takes for you to reach the dungeon, the more guards you will have to fight. You have one more concern to deal with inside the palace. A sound plays when you are presented with a new enemy entering the floor, but at certain intervals, you will hear an additional indication that something is about to attack you. That something is Akuma's hawk.

Akuma's hawk. Just like regular fighters, if the hawk hits you as you are running, you will die instantly. When you hear the indication that the hawk is about to appear, stop running, and get into fighting stance. If you time your strike correctly at the right height, you can hit the hawk and avoid taking any damage from the encounter. However, even if you do not manage to hit the hawk, as long as you are in fighting stance, you will take two hit points worth of damage, which you can easily withstand and eventually regain.

The Gate Trap. The most pivotal moment on the floor occurs at the very end where a spiked portcullis stands in front of the entrance to the dungeon where Mariko is kept. The enemies can't trigger the gate, but you can. If you try to rush through the gate, walking or running, the spikes will immediately slam down on you and kill you instantly. In order to bypass this death trap, you must inch towards the gate until your foot is right by the edge of the entrance. Then you must advance your fighter just enough to trigger the gate, and pull back in time to prevent the gate from killing him. If you do it correctly, the gate will fall just in front of your face. Now you can back up, wait for the gate to rise, and run through it once it is high enough for your head to clear. If you hit it while it is still a little low, that's all right, you'll simply lose a hit-point or two, and you'll get it back anyway. In most versions, simply advancing as far forward as safely possible, and then kicking or punching, will cause the gate to fall.
Dungeon[edit]
The final floor. By now, Mariko is convinced that the noise she has heard means that help is on the way, but there's no promise of rescue yet because you still have the most difficult battles ahead of you, including with Akuma himself. The good news is that there is no more need to rush from one fight to the next. Take your time, you will be facing four guards. This is important since you want to be at full strength for every fight, and you don't want to unexpectedly walk into any traps, although there are very few.

Expert combat strategy. You will first fight a guard at the bottom of the steps. By now, you will need to employ a lot more strategy in your fighting if you haven't begun to do so already. Since the warriors here are smarter and stronger, you must time your attacks with better precision than before. By throwing kicks continuously, the enemies will eventually settle just out of your kick range. They will throw kicks of their own in hopes that you will walk into them (which is more common than you'd expect). The trick here is to stand still until the first kick is thrown. Once the first kick ends, start edging closer to your opponent. As long as the fighter doesn't get in one of those rare four-kicks-in-a-row attacks, you will end up inside of his strike range by the time his attack is done, presenting you with an opportunity to get in a few hits before his attack resumes. Use this strategy carefully and cautiously, and don't be afraid to back up in case you are low on health and need to regain your health. Your enemy will regain health too, but it's better than dying and starting all the way over after having come so far.
Hawk combat strategy. Once you beat the first guard, you will pass through a doorway that locks behind you. From here on out, you will encounter closed doors that must be kicked in order to open. You will have to fight three more guards, using the strategy described above. Once you defeat the third and final guard, you will receive what looks like a large amount of health. When you try to kick the door down, you will immediately be attacked by Akuma's hawk for two hit points. This time, the hawk will not give up until you or it is defeated. You must successfully attack the hawk. The best way to do that is to stand just left of the center of the room so that you have enough time to judge the height of the hawk and time your attack properly. Remember that your attacks have a bit of a delay to them, and you must time them accordingly. Every time you miss the hawk, it will cause you two more hit points of damage. If you hit the hawk five times, it goes down, leaving no one but Akuma between you and Mariko. You don't want to run into the next room - Akuma is waiting for you right on the other side of the threshold.

The final fight. Your fight with Akuma clearly will be the longest and hardest fight of the whole game, but Akuma is susceptible to the same strategy described above. You need to modify it slightly because Akuma is quicker, and the time between his attacks is a lot shorter. You must react to (or predict) the start of his attacks sooner and edge closer to him as soon as safely possible. However, compared to his guards, Akuma's a bit more impatient. If you keep standing outside of his range, he will advance on you and open himself up for attack. Take advantage of this and give yourself a breather if you're taking a beating and need to gain some health back, you will only have a maximum of eight hit points. Once Akuma goes down, you're almost done with the game. All you need to do now is rescue Mariko, but remember your place when you find her.
You must give careful consideration as to how you approach Mariko. She is a lady of royalty who has been through quite a lot lately. If you approach her in a fighting stance, she will mistake you for a guard who means to harm her, and she will quickly change your happy ending to a sad one when she instantly kills you with a swift kick in your future. If you stand up, she will hold out her arms for you to run into and rescue her. Congratulations!