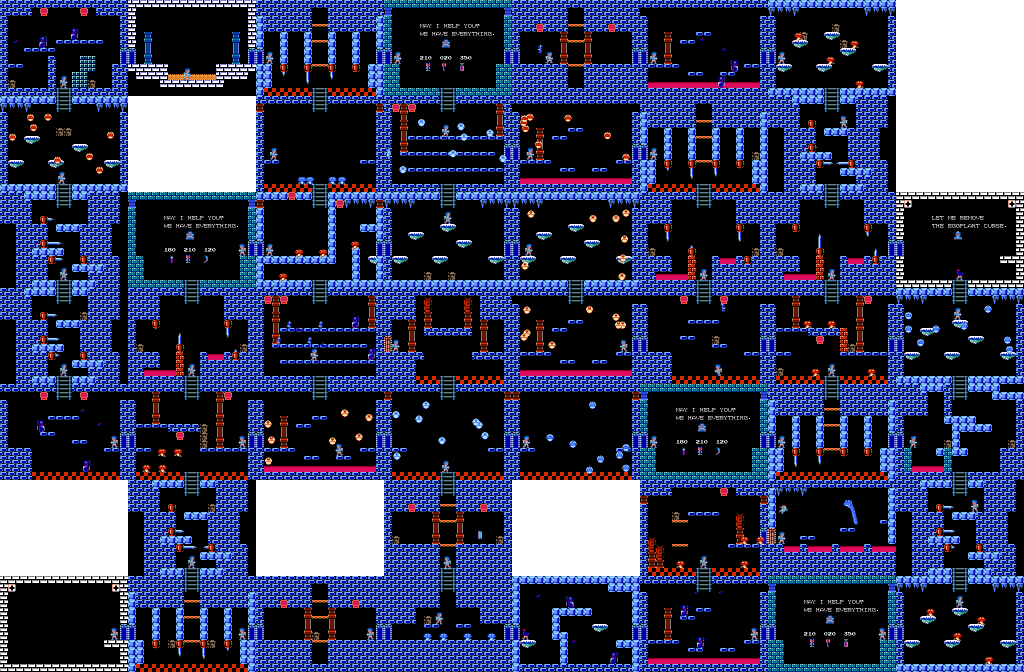
The Overworld fortress is structured like a complicated maze and has many traps and powerful enemies. Be aware that within fortresses, the power of your enchanted weapons is nullified. You will not be able to depend on the protection of the Crystal Rod, or the attack boosting effects of the Sacred Bow or Flame Arrow. The starting point is the room located in the center of the fortress. You will primarily navigate around the outer edge of the fortress. Be aware of your remaining energy; the only restoration point is half way to the boss. After dropping down to the bottom, climb up the left side of the fortress and head for the Pool of Recovery. After restoring your energy, continue on to the right along the top of the fortress and drop down along the right side until you are close to Hewdraws room.
Fortress Walkthrough[edit]
- From the entrance, you have no choice but to climb down the ladder to the room below.
- Battle with the blue Tamambos if you like (they move just like Specknoses and the Ganewmedes from the last fortress) and climb down to the next room below.
- Drop through the thin platforms to reach the ladder at the bottom. Use your mallets on the two Centurions in the room, and collect the map on the way.
- Rescue the Centurion on the platform, and watch out for the blue Shrooms on the floor. Take the left door, as the right door leads to a dead end containing Eggplant Wizards.
- Cross below the Shemum pots, and free the Centurion along the way. Pass through the left door.
- Watch out for the spikes that drop down to the floor and make your way to the center platforms. Rescue the Centurions safely. Remember this room, as one of two hospitals can found through the door to the left. Jump up the platforms to the ladder above.
- Do your best to jump up the platforms while maneuvering between the spikes. Rescue the Centurion before jumping up to the ladder.
- Carefully take out the red Shrooms that stand between you and the door to the left, then enter the left room.
- You may wish to enter this room while squatting so as to avoid getting hit by the eggplants. Take out both Eggplant Wizards, the lower one first, and climb up the top ladder.
- Jump up the platforms while maneuvering between the spikes. Rescue the Centurion before jumping up to the ladder.
- Once again, jump up the platforms while maneuvering between the spikes. Climb up the ladder.
- Clear out some, or all, of the red Tamambos to make it easier to reach the top of the room. You may wish to rescue one of the Centurions, but do not rescue both, or you will be unable to reach the ladder at the top. Climb up the top ladder.
- Be very careful of the Eggplant Wizards up above. You will not be able to fight against them, all you can do is carefully navigate your way to the right door while avoiding any of the eggplants being thrown. If you get hit by an eggplant, double back to the hospital at the bottom of the fortress, or continue on to the one to the right.
- Enjoy the chance to regain your health in the Pool of Recovery. When you are at full strength, continue through the door to the right.
- Pass below all of the spikes and cross over to the right side of the room.
- You'll enter a shop. Spend your hearts on cheap Bottles of Life if you can afford it. Pass through the right door.
- Cross to the other side of the room and enter the right door. Be aware of the Shemum pots.
- Two more Eggplant Wizard will be waiting for you in the room. Watch out for the eggplants. You need to enter the right door, but the wizards stand in the way. You may need to get in the lava to safely remove the lower wizard, before taking out the higher one. It's better to take a little damage than to become an eggplant. If you do get hit, don't worry, you'll pass a hospital along the way.
- Fight the red Shrooms and rescue the Centurions before passing through the lower ladder.
- Pass between the spikes and drop down to the bottom ladder.
- From this room, you can either head to the right and visit the hospital, or head to the room below.
- If you visit the hospital, drop down the ladder. If you climbed down the ladder instead, fight the red Shrooms, rescue a Centurion, and use the door to the right.
- Fight the blue Tamambos and climb down the lower ladder.
- Simply drop down to the bottom of the room. Rescue the Centurion and climb down the ladder.
- Pass between the spikes and drop down to the bottom ladder.
- Fight the red Shrooms if you wish and enter the left door.
- You'll visit another shop. Buy a Cup of Life or two if it will help.
- This is another Eggplant Wizard room, so stay low until the bottom wizard is defeated. Then defeat the second wizard, and climb up through the ladder above.
- Fight the red Shrooms and rescue the Centurion if you wish, and enter the right door to begin the battle with Hewdraw.
Boss fight: Hewdraw[edit]

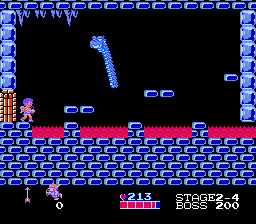
Hewdraw is a much more difficult fortress boss than Twinbellows, and is possibly the toughest fortress boss. Hewdraw bounces in and out of the lava pools on the floor of his room. He never deviates from his pattern, and will bounce in the same direction until he hits one end of the room, and then turn around and bounce to the other side. This makes him very easy to predict, but the problem is that he is extremely difficult to avoid. There are only so many platforms that you can stand on, and Hewdraw doesn't always jump over them cleanly. The Centurions can help you out immensely since their arrows will travel across the whole screen. Hewdraw is likely to take out the lower two Centurions easily, but it's possible to keep the highest one alive if you move correctly. Consistently attack the head to defeat him as quickly as possible.

