Air Section[edit]

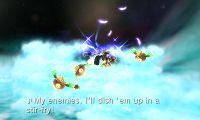
The level opens with a few waves of the Forces of Nature. There are no Underworld troops to distract them this time around, so don't lose track of them. When the Lunar Sanctum, a space station disguised as the moon, appears, don't worry about its massive laser attacks; they always fire off-screen. You may not even need the Recovery Orbs you come across.
Continue your usual shooting and dodging routine as your boss for this level, Arlon the Serene, introduces himself. When you enter the corridor, be sure to avoid hitting the lasers. Also, beware of a new enemy type: the FLage. These enemies turn invisible before closing in to attack. Fortunately, they are still vulnerable to attacks when invisible, so just fire where you expect them to be at any time.
When the gates appear, shoot at the squares in them and fly through those in order to avoid taking damage. You should have enough time to shoot enemies along the way before a new gate appears. Afterwards, there are only a few enemies to slay before landing.
Ground Section[edit]
Grab the nearby food and go forward. You'll soon see a flickering light-blue enemy. Ignore it; these kinds of enemies are mere illusions, created to distract you. Some of the walls are also illusions. Fortunately, you can tell when a wall is fake by the arrows pointing through them. You'll find a river of sand nearby. Proceed down it, avoiding the mines along the way. One of the walls on the right will be fake again, so go in it to grab a treasure.
Next up is a grind rail with a number of switches. These switches need to be certain colors in order to progress. The first three need to be blue in order to progress, so only shoot the purple ones. After defeating the platform of enemies, go on the grind rail, hop to the one on the left, and be sure to hit just the first switch you come across. As always, destroy enemies along the way.
After clearing a room of old faces, you'll reach an apparent dead end. Use the mirror to locate where the hidden passageway is. Do the same thing in the next room to find the hidden switch. The third room is harder because the floor is mostly invisible, making it seemingly impossible to tell where pits are. Use the mirror to navigate to the switch and then to the door on the other side of the room. Be sure not to dash and to keep an eye on both the visible platforms and the mirror in order to keep one's bearings.
Miniboss: Dark Pit[edit]
In the next room, you have to fight an old enemy again: Dark Pit! He's essentially the same bow wielding boss you fought earlier, minus his ultimate "Storm of Arrows" attack and the ability to fly around, thanks to the enclosed area. He'll also be accompanied by the core of the room, which shoots the occasional projectile.
Dark Pit has two main weaknesses in this fight. The first is that his ranged shots have limited homing. Therefore, it is possible to pick him off from a distance, walking about in order to avoid his attacks. Alternatively, your balanced and melee-oriented weapons such as Claws and Clubs give you a major advantage in hand to hand combat, despite Dark Pit's own decent combo.
The chief difficulty in this fight comes from the lack of any healing items such as Food immediately before hand. If you didn't fall much in the prior rooms, this should be a relatively simple fight. Just be sure to remember that you're also dealing with the core, and it also has to be dodged and defeated.
Grab the nearby Drink of the Gods and go up the elevator. The next room is actually outdoors, but other than the impressive scenery, it isn't that special. Just walk along the pathways and feel free to grab the food at the back right section. Next up is an Exo Tank section. Drive through the waves of enemies and through the doors. In the second area, use the boost function to launch of the ramp and grab the treasure. Be careful not to fall in any pits, or you'll lose your vehicle. Defeat the third area's enemies in order to summon a jump pad. You will land in a hot spring, so use it to recover after defeating the nearby vine.
The next couple of rooms will be straightforward and feature familiar enemies. After another simple room atop an elevator, there will be a room with two powerful Clobblers on a spinning platform. Lure them into the explosives without getting too close. Also, try to deal with only one at a time. Be sure to grab the treasure after beating them. Clear out the last chamber of foes and be sure to grab the Drink of the Gods before going into the doorway.
Boss: Arlon the Serene[edit]

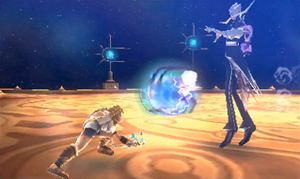
Early in the fight, Arlon will cover the field with darkness, making everything more than a few feet away hard to see. From the darkness, he will shoot a variety of projectiles, and will drop a few mines if Pit gets close. He also sports a powerful laser attack. Occasionally, the darkness will temporarily be lifted, leaving him vulnerable.
Arlon's greatest weakness is homing attacks, which can be used to find him even in the darkness. Even without these though, the fact that his projectiles are visible makes it possible to figure out where to attack. Furthermore, Arlon is lacking in the melee department, making him visible to close combat during the enlightened portions of the fight.
