Shortcuts[edit]
Major[edit]
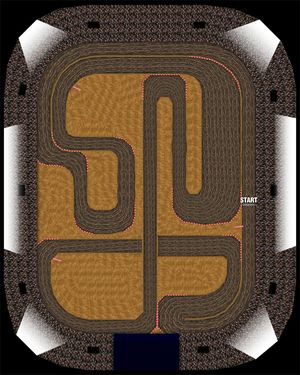
The Wario Stadium is notorious for this shortcut, probably for how it's so advantageous for the player and how easy it is to execute; note that if you do this with people who don't know the shortcut, you're going to cause trouble. Start the race, with or without the boost (with it makes it harder to hit the shortcut), jump when you are getting really close to the left side wall and are at the peak of one of the bumps. You may want to angle out (move to the right side of the track) and then back in to make it easier. If done correctly you will simply hop over the edge, note that if you're jump isn't high enough (due to the location of the jump, or angle) you may crash while hopping the wall (you will bounce and lose all acceleration).
As soon as you land, use a mushroom and head into the right side wall. Start a left facing slide (this is the harder part), hop once if necessary to hit the wall near the top of the little hill (in the middle or a little after it). Before jumping let the slide go like a kart-length before hitting the wall, jump when you get close to it just like you did on lap 1. Repeat for laps 2 and 3 to get a time easily under 30 seconds and possibly under 15.
Minor[edit]
After the huge jump near the end of the track, the course turns to the right. At that wall there is a line of red arrows pointing right. You can jump this wall and turn to the left by using a starman or mushroom (preferably a Super Mushroom) and jumping into it as you turn.
The resulting crash will boost you over the wall, but remove your acceleration. If your item is still available or if the Starman is still active, you should be able to outrun anyone power sliding around the two turns. This shortcut is much more difficult to take than the super shortcut because of the height of the wall.