Items to collect[edit]
Elves to obtain (4):
Other items:
Mission requirements[edit]
- Mission Notes: Protect Ciel (-2 pts for each hit Ciel takes, instant failure after 10 hits)
- Clear Time Limit: 6:40
- Enemies Killed: 110
EX Skill walkthrough[edit]
The mission starts off with the Resistance shuttle Zero boarded already flying over the incoming Neo Arcadian forces. After Zero requests to fly lower, the pilot warns him they can't go any lower, or they'll be detected by the enemy's radar. Ciel tells Zero to let her know when to transfer over to the bombardment aircraft by activating a portable Trans-server when he reaches the bomb. Zero, already on top of the shuttle, makes a leap of faith into the clouds and lands on one of the attack ships below. From here, the mission begins.
This mission is, by far, the absolute worst in the game in terms of difficulty. There are countless places to mess up, cheap shots from the enemies, and an enormous amount of dangers that can easily destroy a good ranking. With risks galore, to get through this mission with 100 points is a total nightmare.
Unlike other missions that have been strategically planned to hit up fixed locations and strongholds, this one was out of the blue and completely unexpected, forcing you to fly by the seat of your pants. It also takes place in a mobile location instead of an actual landmark. The aerial segment before reaching the aircraft is simply a warm-up segment before the real stage, the aircraft itself. If you are able to bring down the aircraft successfully, you will not see it again for a while. Your ability to reach it later in the game will depend on whether or not you have located the crash site of the craft within another geographical area.
Boarding the aircraft: a madman's gamble[edit]
As soon as the mission officially commences, you're already in the maw of danger. Below is a drop of doom, and you'll have to dash-jump across many Tentolancers, the ladybug airship squadron approaching the Resistance Base, to move onward. They weave back and forth, so you may be stuck waiting for them to get close enough to make your jumps count, but that isn't the real problem. Each one has plasma guns on their sides that fire intermittently, and they are positioned in just a way that can make it impossible to avoid damage. Trying to wall-jump up their back or frontsides is also a nasty risk.
Worse, Pantheon Guardians await on several Tentolancers further ahead in the fleet to take cheap shots at you, and you need to quickly destroy them with charged Buster shots before they open fire. There is a very good chance of being in the wrong place at the wrong time. Unless you decide to use Cyber-Elf Fubuffa, the knockback effect has sinister consequences in mid-air, namely, cheap death.
As you cross Tentolancers, you can get lucky and land on some below to avoid losing a life, but it's still equally troublesome getting further ahead.
Eventually, the Tentolancers will catch up with the bombardment aircraft, and then you'll be able to jump onto reliable ground without the risk of dying. Waiting for them to catch up may hurt the time constraint of the Mission Report, so it's imperative to keep moving. If you landed a little ways below on the wings of the ship, you can find some Life Energy before wall-jumping up and advancing ahead. There won't be any enemies in your way... yet...
Sure enough, the lack of enemies was just a front to get you caught in a trap. Zero was expected by Neo Arcadia to come after the attack force, and now a customized red Tentolancer has arrived to attack him back!
Sub Boss: Tentolancer[edit]

Unlike the other green Tentolancers, this one is specially designed to act as the leader of the fleet. It is much more merciless towards enemies, and has a few additional weapons in its arsenal. This one wasn't programmed with the objective of attacking the base, but the personal destruction of Zero.
Right away, the Tentolancer will unload two seeker missiles at you. You need to be precise to either dodge or destroy them, as they hurt you a lot. You can destroy them quickly with Charge shots or the Shield Boomerang if thrown accurately.
After shooting its missiles, the Tentolancer will fly offscreen and then sweep over above, dropping explosive charges nearly everywhere. You need to dash right to the edge of the screen where the Tentolancer was to dodge them all. The Tentolancer will reappear on the other side of the screen afterward, and will keep going back and forth as it attacks with missiles. Being mostly an electronic weapon, it's weak to the Ice Chip, and simply hitting any piece of the machine will damage it. Fortunately, it takes only a few charged attacks from any weapon to send this Tentolancer out of the sky in a smoldering heap. As a final insult, you get no Cyber-Elf.
Entering the aircraft[edit]
Once the Tentolancer is defeated, it's just a quick dash past a few Pantheon Guardians, made easy with the Buster. You'll soon reach the other side of the bombardment aircraft, and the hatch that leads down inside. Climb down the ladder to find some helpful items, but then you'll encounter some not-so-helpful obstacles...
Static barriers[edit]
The bombardment aircraft is heavily protected from the inside by electric barricades, each of which will do serious damage if you touch them even once (possibly fatal with the Proto Form). The only way around these is to knock out their power generator grid through one generator (the electrified metal cylinders). Since it's a series circuit, all you have to do is attack one enough to temporarily make it shut off to prevent a surge. However, it will turn back on after recovering from your assault, causing the barriers to reactivate. You can buy more time to get past the barriers with the Ice Chip, which freezes them and gives a slight delay before it destroys them, which you can exploit to run further ahead. As usual, many items are in places that tempt you into danger.
Getting past the barriers[edit]
After blasting the first generator, you should have enough time to get through over to the next generator in line and keep moving.
You'll also be greeted by several Signaloids, positioned to trip you up every few inches. No matter what attacks they use, dodging isn't easy. Switching elements will stop them from switching attacks (see Enemy Roster for an explanation).
As you head past the second generator, a few Panel Cannons await, but can't do much damage if you dash quickly.
Lower path[edit]
You can chose to dash down to the lower path of the room, or you can go up instead. If you want to take the upper path, skip to #Cyber-elves walkthrough, but you will lose time and energy, thus risking to lower your Rank. There will be another opportunity to enter this aircraft and collect the elves if you complete a specific upcoming mission.
Going the normal route will lead to a Signaloid that will attack right away. Destroy it, and climb slowly down the ladder. You'll have to knock out a generator to get a pair of barriers out of your way, and then drop down the ladder.
Heavily-guarded strech[edit]
The area ahead is filled to the brim with Signaloids, electric barriers, and even Pantheon Hammers that require delicate trickery (or the Laser Shot) to destroy without taking damage.
The first part requires some coordination. You need to eliminate the Signaloid, then climb up the ladder and knock out the generator. Lure the Pantheon Hammer into an attack to safely dash-jump over it and its mace, and quickly cross over to the other area below, where another Signaloid and generator are. Do not have the Ice Chip equipped, because the Signaloid can corner you with its snowflake blasts. With luck, you'll avoid the barriers and be able to shut off the next generator and continue further.
The second part gets a lot more frustrating, and needs careful timing. Try not to waste time on the Signaloid and get through the first two barriers and where a Pantheon Hammer is in between the gates. Just as he attacks with his mace, wall-jump up above him and nail him with the Z-Saber. The barriers will most likely reactivate before you can get past the Pantheon, but there's another generator just out of sight. Creep up to the barrier on the right to see it, and you can shoot it. Now, simply race through the final three and down to the end of the room before the last one clips you.
Once you're below the barriers, you can snatch a Life Energy Capsule to refill HP or a Sub Tank before you drop through the shutter.
From here, go straight to the door on the right; the left door is currently locked tight.
Ninety seconds of brutality[edit]
Zero will rush into the cockpit of the aircraft, the room containing the bomb, and will send Ciel to the aircraft with the portable Trans-Server. Ciel warns Zero she needs ninety seconds to figure out how to defuse it through the controls of the cockpit, and needs him to cover her...


The next 90 seconds are clinically insane. You will be attacked by a multitude of Pantheon Hoppers creeping up to leap at Ciel, and Pluggers, plug Mechaniloids that will constantly warp into the room and rotate, firing bullets absolutely everywhere. Needless to say, this part requires ample use of the Shield Boomerang to counter all the bullets. Unequip the Erase Form if you were using it. Pluggers are also cunning. After one shoots for a few seconds, it will charge to attack Ciel. You can destroy these faster by making direct contact with the shield, not throwing it, at close range to the Pluggers to counter the bullets much faster and destroy them before they unleash a torrent of attacks, which will allow you to protect Ciel far more effectively. For the record, Pluggers only appear during this point of the game, and hold no Cyber-Elves.
Above all, you must not let Ciel get hit, not even once. Every time she's injured, you'll lose 2 points for the Mission Objective, and if she gets hit 10 times, it will do her in, and you'll have to redo this part of the mission at the cost of a life. Avoiding damage to either yourself or to Ciel can be considerably hard to do, as you have to keep stopping Pluggers from attacking, and ward off the slowly-approaching Pantheon Hoppers, which are too low to hit with Buster Shots until they attack, and are only thrown back by reflected bullets. At times, you might be forced to switch to the Z-Saber to forcibly eliminate as much as a whole pack at once. Another tactic is to set your weapons to the Shield Boomerang and Buster. Hold the Boomerang out and watch the left side of the screen closely. If you see a Hopper come into frame, pause and switch the two weapons (it's important to do this and not just charge both slots at once so that you don't waste time throwing the Shield Boomerang and waiting for it to come back), then dash and fire. As soon as you shoot, switch them back to where they were (or just use the Boomerang in its new slot if you can keep up with alternating). Even if you switch them back as long as the buster is always equipped the shot won't disappear, and dashing will get a charged shot low enough to blast the Hopper. They may jump at you, which will require you to deal with them either with a slash or a well aimed shot, but doing this should keep them off you reasonably well. Being pinned down isn't the least bit fun; it's like fighting a miniature war!
Ciel will occasionally inform you of how much progress she's made defusing the bomb, but you're still in hot water until the 90 seconds are up. When that time expires, she'll have successfully defused the bomb, confirmed by the operators. At that point, the enemies will quit spawning, but you'll have to destroy whichever are still left in the room.
After doing so, an operator will confirm the position is secure, and commence a transfer. Zero has Ciel go on ahead, but before he can, the ship suddenly lurches into high gear and starts plummeting out of the sky! The air turbulence interferes with Zero's transfer and keeps it from working. Ciel tells him the storage has a broken area where he can escape.
The storage deck[edit]
Now, you must go back and go through the now-open left shutter door (Note: after leaving the cockpit room, it will be closed off for the rest of the game). This will take you to storage, filled with crates and Pantheon Hammers, blocking your exit. Destroying any of the crates will supply you with a plethora of items.
The lower part of the storage leads to the broken section of the ship where you can escape (and where you transfer out if you return to the aircraft). Ciel will tell Zero their aircraft is waiting for him down below, and it's safe to jump. Go ahead and do so.
Boss: Kuwagust Anchus[edit]
As you drop from the falling aircraft, charge up your weapon. You'll land on top of the shuttle Zero took to get to the aircraft before, but someone else arrives, ready to fight him. It's the late Herculious Anchortus's younger brother, Kuwagust Anchus, hungry for revenge, having looked up to his sibling. He knows the bomb was disarmed, but says he can complete his own mission if he turns the aircraft into a "flaming arrow" and crashes it into the Resistance Base, having a stubborn righteousness to Harpuia.
With his devious martyrdom motive out of the way, it's time to fight!

This boss fight will take place on top of the shuttle. Just like his brother, Kuwagust Anchus is a Thunder-Element boss, but unlike him, his lightning is purple, not aqua. He has a strategy of drawing in his opponents and coming in for a kill, and at times he can be extremely dangerous. Equip the Ice Chip, bewaring his wrath. Like Herculious, Kuwagust shares some of the devilish abilities of his sibling, having been created from the same technology as him.
Kuwagust makes use of his back thrusters for a fierce ram attack. If you get hit, Kuwagust will catch you with his pincers and create an explosion that rips out a chunk of your HP. You'll need to dash under him as he approaches to avoid him. You can still hit him if you're good with your weapons.
Kuwagust also makes use of his four attack claws as lasers. He will spread thim out in a random formation, then fire all of them at once, leaving a small gap you can dash-jump through to avoid the shots. Depending on how he fires, the gap can also be below the lasers, requiring a solid dash underneath to dodge.
Kuwagust's main weapon, his giant pincers, and primary method of attack, is much more malicious, using them for his harshest onslaughts. He will spin them around and create a vortex that will draw you over to him. If you get caught, he will snare you with his pincers and bite you over and over, requiring button-mashing to get out. You can either repeatedly dash-jump out of the vortex to avoid the pull of it, or shoot him in the face with an Ice-element Charge Shot to stop his attack.
EX Skill: Spinning Blade[edit]
Kuwagust Anchus has a menacing EX Skill, provided you keep your rank up. For this attack, Kuwagust will spin his pincers in reverse, making a vortex that actually pushes you away, and then dive in for a brutal attack, leaving a trail of sparks behind. There is absolutely no way to dodge it, but you can deflect the attack with quickly-fired Buster Shots and make him pull up at the last second. If you don't, expect a dosage of voltage in your future.
Kuwagust is obviously quite a contender in battle, and this is only worsened by the Proto Form. You can beat him if you take your time and keep hitting him. At last, this overpowered stag beetle will be beaten... for now.
When finally defeated, Kuwagust will apologize to his brother for not being able to avenge him, then joins him in death.
If you've kept A or S rank this long, you'll get the EX Skill ![]() Sengatostsu, translated as Spinning Fang Thrust. If you use the Z-Saber while dashing, Zero thrusts its forward, spearing any enemy in reach if they have no shield. If the Thunder chip is equipped, the attack becomes a Thunder element and turns into a sharper, electrified blade. However, activating Sengatotsu disables the rolling slash of the Active Form. Still, to get the Active Form the best setup is exactly equipping the Sengatotsu, the Thunder Chip and the Power Form (a form with four-star power).
Sengatostsu, translated as Spinning Fang Thrust. If you use the Z-Saber while dashing, Zero thrusts its forward, spearing any enemy in reach if they have no shield. If the Thunder chip is equipped, the attack becomes a Thunder element and turns into a sharper, electrified blade. However, activating Sengatotsu disables the rolling slash of the Active Form. Still, to get the Active Form the best setup is exactly equipping the Sengatotsu, the Thunder Chip and the Power Form (a form with four-star power).
Also, since the bomb-disarming segment of this mission requires so much use of the Shield Boomerang, it's almost a given you'll deflect at least 30 bullets with it, and inadvertently gain the ![]() Erase Form as a bonus perk for downing the Bombardment Aircraft, if you didn't get it already in Phoenix Magnion's stage.
Erase Form as a bonus perk for downing the Bombardment Aircraft, if you didn't get it already in Phoenix Magnion's stage.
Cyber-elves walkthrough[edit]
This area cannot be re-accessed until Harpuia's Crystal Cave stage is cleared, but before accessing that stage it would be useful to get the Active Form, that can more easily be awakened using the Segatotsu obtained right now.
- Right before the ladder at the end of the first static barriers area is a small area with a Cyber-Elf Box containing
 Cyber-Elf Stockel. Getting it might mean going back to hit the generator, and if you took the upper path, ignore it for now, unless you're willing to take a hit from the barrier.
 - Right before you drop past the last barrier, you can jump up the side of wall and aim several Buster Shots to the other end of the room and follow them, hoping they hit a generator by a Cyber-Elf Box above. Wall-jump up here, or just clip the Cyber-Elf Box and wait for it to come down. to get
 Cyber-Elf Reloppe. If the barrier reactivate before you get past it, you can hit this last generator by the Elf to buy extra time to get down safely.
 - If you take the upper path at the end of the static barriers are, you can get to a box containing
 Cyber-Elf Peatan.
 - Heading left down the upper floor of the storage, past some Pantheon Hammers, will eventually lead to a Cyber-Elf Box on top of a crate in the upper-left corner of the room, with
 Cyber-Elf Aterner inside, one of the four Cyber-Elves that can boost your rank to A.
Optional upper path[edit]
You can chose to dash down to the lower path of the room, or you can go up instead. If you don't want to take the upper path, skip to Lower Path.
Going up requires shooting the second generator to knock out the barriers (preferably with the Ice Chip), then dashing up to the other side of the room and wall-jumping to an opening above before the barriers turn back on. You don't have to, but this area won't be available for a while after this mission (until the Crystal Cave is completed). Up above is an Z-Panel, and in the next room is a sub-boss.
Optional sub boss: Golem Type E[edit]
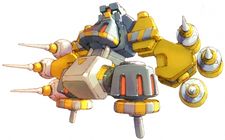
By now, this enemy should be a piece of cake and requires no explanation. Just beat it with Ice-element attacks. The only difference is it's on the left side of the room this time, so its attack patterns are swapped. Dash left for the right arm, and dash right for the left arm.
Cyber-Elf Sub Tank n.2[edit]
The next room will reward you with a Cyber-Elf box that holds ![]() Cyber-Elf Peatan. This is one of two Cyber-Elves that will transform into a
Cyber-Elf Peatan. This is one of two Cyber-Elves that will transform into a ![]() Sub Tank upon use. Surprisingly, it's found in the location right after the Residential Area, where the other Sub Tank Elf, Estan, resides.
Sub Tank upon use. Surprisingly, it's found in the location right after the Residential Area, where the other Sub Tank Elf, Estan, resides.
If you drop down the shaft in this room, there will be several Tentolancers docked in waiting, shooting anyway, that can serve as platforms (Note: they aren't present after the aircraft crashes).
The shutter out of this room is located to the far, lower-right edge, which is where you should control your fall to land at so you don't die. You'll get free health, and end up right where the lower path ends.
A Failure's Farewell[edit]
After returning back to base, Jaune expresses her thanks towards Zero and Ciel for stopping the aircraft. However, Ciel immediately notices the absence of Elpizo, and questions his whereabouts.
Jaune responds with discouraging news: Elpizo has assigned Ciel back to her old position as commander of the Resistance and left for work in the field. Nobody knows where he went off to, but he left a message before his departure, which Rouge plays.
The message shows a forlorn and disenheartened Elpizo blaming himself for his mission's failure, calling himself a fool. He was once a mere errand boy for the Neo Arcadian Bureau of Administrative Services before becoming a commander, someone who never had the proper tutelage to be a real leader. Ashamed that he marched so many soldiers to their deaths, he thinks he has failed everyone for not having enough power to lead his comrades to victory. He now has a burning desire for more power, to the point he wants to be all-powerful, so he can destroy all of Neo Arcadia uncontested, but that isn't enough for the embittered Reploid. He also wants to slay the humans living there who have spurned Reploids so pitilessly, thinking it will make him a true hero to his kind.
Humans once feared Reploids because they would willingly attack people, and a great war broke out over the conflict. Today, humans still show scorn for Reploids because the memories of that war have left deep scars, even though most of them are sentient. However, Elpizo has harbored a grudge toward humanity all this time, and this defeat has transformed his grudge into full-on hatred. He has given up on humankind and couldn't care less about who gets hurt, even if they didn't do anything wrong. To him, they are all part of the same scum. These startling proclamations he has made leave everyone at the Resistance Base worried that Elpizo is going of the deep end and about to do something unforgivable.
Elpizo has gone rouge, but he's still actively using the base's Trans-Server system to travel into enemy territory. Every time someone uses the Trans-Server, it logs a data file to keep tabs on who used it and where, just in case somebody might be using the transport system without permission or possibly hacking into it. Jaune states that she and Rouge can try to track Elpizo's movements through his use of the Trans-Server by checking the log history for any recent activity. They discover the data files recently left in the log and identify four locations he has traveled to. Rouge knows he must be in one of the locations, and requests that Zero follow, locate, and bring back Elpizo.
With the action segment of the game now behind you, you finally have a chance to take a breather, so you should save your data. Ciel will now be in the command center until the end of the game. The information on Ciel's computer also will change.
You are given four new missions to chose from, all of which are for the sake of rescuing Elpizo. The first area, the Forest of Notus, is protected by another Mutos Reploid, Burble Hekelot. The rest are even more heavily-guarded areas protected by the remaining Four Guardians: Fairy Leviatan at the Roof of the Computer Facility, Sage Harpuia at the Crystal Cave, and Fighting Fefnir at the Shuttle Factory. For some reason, these areas are linked to the most well-kept and forbidden secret of Neo Arcadia. Elpizo is targeting them to find the
Just like with Hyleg Ourobockle, Burble Hekelot's contains another Hidden Sub Tank, so the best mission to take on first is his area, the Forest of Notus. In terms of difficulty, Leviathan's mission is slightly harder to complete than Hekelot's. Harpuia's mission poses an even bigger challenge, and Fefnir's mission could very well be the most antagonistic of the four. For the Sub Tank alone, Burble Hekelot's mission should be handled first.
