After leaving the castle, the first pipe will contain a star.
3-N
Shoot out the end of the wall (these blocks can only be broken with the Magic Wand.) The blocks in the wall to the left of the platforms are hiding a Magic Lamp. Collect it for temporary invincibility. You can use the ice blocks to leap over the skulls, but it's faster just to jump over them.
3-O
Jump up to the high platform, and triangle jump against the bounce blocks if you need to, in order to proceed right. The first and third pipes after the bounce blocks have stars. Before you leap over the bottomless pool of water, double back along the floor and shoot out the blocks to the left to reveal an SOS. Leap over the water to the first cloud.
3-P
Carefully time your jump from the first cloud to the second cloud. You can shoot out the blocks to the right, but it's better to leave them alone and jump on top of them. Jump over to the small blocks, and then on to the vertically moving cloud. Carefully time your jump from this cloud to the diagonally moving cloud, then on to the floor.
3-Q
Collect the sign post. From the third column, jump up to the cloud, and then immediately jump on or over the block that prevents you from moving with the cloud. Leap over the water, and down to the floor below.
3-R
Jump up and over the bounce wall. Then navigate your way through the tunnel to the floor below.
Jump through the ceiling to find a moon above.
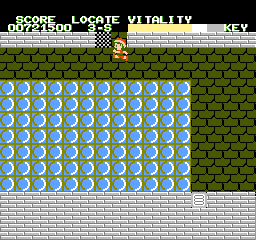
3-S
The second pipe after the town has a star. Use the last trampoline before the large set of blocks and the passage with skulls on the ground, to shoot out a new passage through the middle, thereby avoiding the skulls entirely. Then use the trampoline beyond that to scale the next wall. As you walk across the wall, you will see a Wizard Hat in the ceiling. Jump up to break the wall and the hat will drop down.
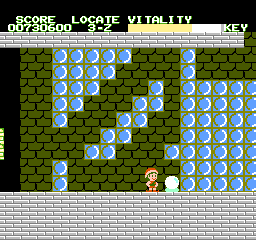
(2-S, 2-T)
Now, jump up into the gap and leap higher, and you will be transported to 2-S, where you will be able to collect the moon that you could see, but could not collect. If you continue in this world to the right, you will pass two pipes and eventually reach a small set of stairs with a pool to the left. If you shoot out all of the blocks, you can collect a 10,000 point broom, but if you leave the last column standing and walk up to it, you will kick the broom instead. If the broom hits the water, the water will disappear, providing you with a shortcut back to the third world.
3-T
If you don't take the above mentioned shortcut, after you fall down from the wall, jump from the small block to the top of the bounce wall. Then fall down to the cloud. From the cloud, jump up once when the cloud is on the left, move right with the cloud, and jump again to bounce higher off the cloud and against the right bounce wall. When you hit the bounce wall, bounce off of it and to the right to get above it. Then jump down to the small block below and continue right. Shoot out the blocks along the bottom of the wall to proceed, and pass through the tunnel ahead.
3-U
Collect the sign post at the end of the tunnel. The first pipe has a star. Leap from the pipe to the column before the water, and then again to the top of the staircase. After some platforms, use the trampoline block to bounce to the ceiling, and shoot out the top of the wall to your right. Then carefully use the trampoline to launch up to the space you clear out beyond the water. Continue shooting the wall to proceed to the right.
3-V
Shoot the Scorpions and Snakes as you run through the tunnel. Hit the trampoline and shoot the air high above the water to make a block materialize in two hits. Then use the trampoline to launch up to that block. Then jump down to the next trampoline block below. You'll need to repeat this process two more times to continue to the end of this section. Watch out for the Dragonfly after the third and final block.
3-W
The first pipe within this section (the second pipe you see) has a star. Then proceed from the bottom of the S tunnel to the top and down the stairs.
Break the walls beyond the last castle to find the most powerful magic.
3-X
The first pipe within this section (the second pipe you see) has a star. You'll need to take the middle path over the water, but in order to clear the gap you must be moving fast, and not jump to high so that you don't hit your head. Then jump up to the top level before the second gap. Hit the trampoline to bounce up to the wall.
3-Y
Drop down to the floor, and then up the steps to proceed. Carefully jump on to the small platforms over the water.
3-Z
All four pipes contain a star. Collect the sign post, but do not immediately enter the castle. Instead, run to the right until you reach the wall. Begin shooting out the middle section of the wall. You must use all of your wall breaking techniques, including the Power Helmet and Power Boots, to break a path through the wall, up and to the right, and then down and to the left, and finally to the right, in order to collect the most powerful magic item, the Crystal of Magic. This will enhance your magic to the most powerful stage. Once you collect it, return left and enter the castle.
From the start, hit the small block on the floor while running, and immediately jump off of it to hit the middle level. If you haven't collect four Hao Doll health meter extensions, you'll find an easy one right here. From there, although it's difficult, you can shortcut your way to the top level by leaping from the very left edge of the small block below the top level and moving back to the right. Otherwise, you will need to leap off the next block on the floor and proceed all the way to the right, and then climb the steps and back to the left to reach the first door.
Collect the Super Mantle to preserve your health.
Back layer of door 1
You may already have a key from the previous castle, in which case you will not encounter a mini-boss here. Run right along the top, and then drop down at the end. If you don't have a key, you will face the mini-boss of this castle, a winged demon who changes platforms. If you want to collect a moon, you can by dropping to the lowest level and shooting out the walls that occur between spikes in order to make your way to the moon. Collect it and immediately return right, and jump up to the middle level. Build up speed to make it across the two gaps as you run to the left. (If you fall down, you'll have to shoot out the walls to the right anyway to return.) Once you make it across, head down to the floor. You will see a trampoline block. The blocks above and to the left can be broken with the Power Helmet, so jump up and hit them to break a hole in the floor below the Super Mantle. Use the trampoline block to make your way up there (the column of blocks to the left can make this difficult), and collect the Mantle to stop the gradual health drain for the rest of the game. Then run left and down the steps to the exit door below.
Front layer to door 2
When you arrive, shoot out the blocks to the left, jump up to the middle level, and shoot the blocks in the ceiling. A Double Score icon will appear. Collect it and return to the door to proceed to the right. Jump over the spikes along the top and drop down to the middle level above the trampoline block. Remove the blocks above the trampoline with the Power Boots, and then use the trampoline to return to the top level. Ideally, you should use the next trampoline block to access the middle level, but it's tricky. It's faster to jump up to the top and simply leap over the spikes to reach the second door.
Back layer of door 2
First head right and fight the mini-boss for possession of the key. Then return to the door you arrived from and shoot out the left wall to reveal a moon. Collect it and return right. Drop down to the middle level. Once again, you must build Hao up to full speed as you run to the left. You must endure running along the spikes and jump over all of the gaps on your way to the left. If you fall, you will have to run back to the right as you leap over pools of water in order to try again. Once you make it across the gaps, head through the door.
Shoot the blocks below the moon to make it fall.
Front layer to door 3
Once you arrive, head right. You can shortcut all the way to the top level by hitting the blocks above the flower mantles that you see, and then jumping on the mantles to access the levels above. Do this twice to reach the highest level, thereby avoiding the spikes. Jump down to the small platform in the middle with the trampoline block. You do not need the trampoline to collect the moon above. Simply shoot the platform from the floor beneath and the moon will fall down to you. Collect it and speed along to the right. Jump up the stairs to the third door.
Back layer of door 3
From here, you can shortcut a lot of this section through the top floor, but before you do, you may wish to run to the right side in order to collect a key from the mini-boss, a moon, and an SOS. After you get the key from the mini-boss, drop down to the middle level, and jump on the floor to the left of the flower to create a hole. Fall down to the lower level and shoot up at the blocks above. Eventually, you will wear away at the floor above the moon, and you can leap over the column to collect it. Then shoot out the walls to the left until you find an SOS. If you don't want to do the entire gap leaping sequence, you can run back to the left along the top level and break a hole in the floor above the first middle platform on the left to drop down and simply make one leap over the gap. If you fail to make the last jump, you can also shoot out part of the left wall before the bed of spikes. If you avoid shooting the lowest row of blocks, you can leap up and around the middle level above. Pass through the door to the left.
The Symbol of Peace
From your arrival, jump up to the middle level and take the second door. In the back layer, run to the left, up the stairs, and back to the right. Shoot out the right wall to collect the key, but ignore the top door and return through the door you arrive in. Then return to the first door, drop down to the bottom floor, and pass through the bottom door. Run along the bottom, leap over the pool of water, and enter the next door. Run to the right, up the steps, and back to the left. Ignore the first two doors on the middle level and take the third. Jump up above the flower mantle to break the bricks with your Power Helmet, and jump up to the top level via the mantle. Pass through the door there, and break the blocks just to the left of the door in the back layer to create a hole to the key below. Collect it and climb back up by jumping on the mantle and continue left. Unlock the door at the top. In the front layer, jump on the blocks below the ceiling fan to create a hole to the symbol below. Collect the Symbol of Peace and enter the door nearby. From here, you can easily access the final exit, and complete the game. Congratulations.