Plants and harmless creatures[edit]
Pellet Posy[edit]
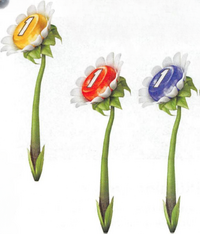
- Habitat: Various
- Carry Weight: (Various)
- Seeds Produced: (Various, drops a food pellet)
These resemble daisies except they have a small small food pellet at the center of the flower. In most cases the color of the pellet cycles through the three Pikmin colors, but single color specimens appear, most often when Olimar is carrying only one type of Pikmin. Pikmin will attack them on sight, even when it's just a flowerless stalk. It can take a Pikmin several seconds to chop down the flower, but if you throw a Pikmin so it lands on the flower itself the plant will be killed instantly. When removed from the plant, the pellet stops changing color, so timing is important if you're trying to grow Pikmin of a particular color.
Candypop Bud[edit]
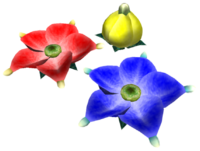
- Habitat: Various
- Carry Weight: (N/A)
- Seeds Produced: (N/A)
A large flower in one of the three Pikmin Colors. A Pikmin thrown into to bud will disappear to reemerge after a time as a seed matching the color of the bud. This allows you to change Pikmin colors at the cost of having them revert to leaf form. Note that a bud can be used to convert at most 50 Pikmin in one day, then it disappears.
Honeywisp[edit]
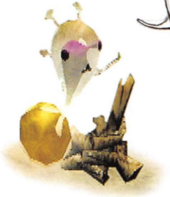
- Habitat: Various
- Carry Weight: (N/A)
- Seeds Produced: (N/A, drops a pool of honey)
A small floating insect that may appear when plants are disturbed. Pikmin can't reach them on their own but with some skill and luck you may be able to knock one down by throwing Pikmin at them. Instead of a corpse, a pool of golden honey is left behind; leaf and bud Pikmin which drink this will instantly mature to flower stage.
Iridescent Flint Beetle[edit]
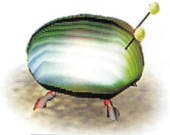
- Habitat: Various
- Carry Weight: (N/A)
- Seeds Produced: (N/A, can't be defeated)
A metallic blue beetle that may appear then plants are disturbed. Through Pikmin attack it on sight, there's nothing they can do on their own to affect it. But if you're able to throw a Pikmin to land on top of one it will drop something, either a pellet or a pool of honey, before moving on. This is actually quite a feat since they move quickly and changes direction often. Nothing you can do will actually harm it though and it will eventually find its way into its burrow and disappear.
Wogpole[edit]
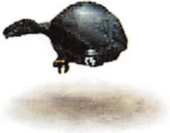
- Habitat: The Forest of Hope, The Distant Spring
- Carry Weight: 1
- Seeds Produced: 1
A tadpole which makes its home in shallow water. Unlike the Water Dumple, this creature is extremely skittish and will swim away from Olimar and Pikmin as fast as it can. This means the most difficult part of killing one is catching up to it. The 1 seed reward is not worth the effort it takes, but if you want to anyway then take a large number of Blues, flowers preferred, and try to chase one into a corner. Now swarm as it tries to escape. If you're low on flowers, then you might try scattering Blues around the water and chasing the wogpoles around with Olimar. The wogpoles don't avoid Pikmin if they're idle so you may get the wogpole to collide with the Pikmin by pure chance.
Female Sheargrub[edit]
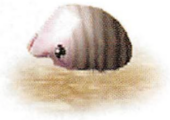
- Habitat: Various
- Carry Weight: 1 to 2
- Seeds Produced: 2
These small, pill-like insects come in swarms, usually near bridges which they chew apart if left alone. The females are non-violent while their male counterparts will try to ingest any pikmen they come across. As with the dwarf bulborbs, they can be killed in one hit by throwing a Pikmin directly on top, but they are constantly moving so this can be difficult to do. To fight a swarm, repeatedly try to throw Pikmin on top of them since even if you miss them the Pikmin will chase them and attack.
Enemies[edit]
Dwarf Bulborb[edit]
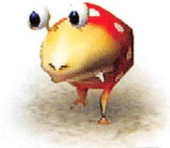
- Habitat: The Forest of Hope
- Carry Weight: 3 to 6
- Seeds Produced: 4
These are small, bright red predators with a bulbous body and eyes on stalks. They can be killed in one hit by throwing a Pikmin directly on top; this is much easier to do if you catch them unaware. Otherwise simply swarm them if you have a reasonable amount of Pikmin.
Dwarf Bulbear[edit]
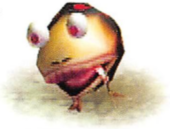
- Habitat: The Distant Spring
- Carry Weight: 3 to 6
- Seeds Produced: 5
Similar to the Dwarf Bulborb but tougher and dark brown instead of red. Fighting tactics are the same.
Spotty Bulborb[edit]
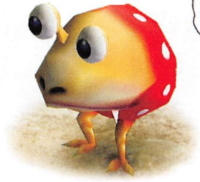
- Habitat: The Forest of Hope
- Carry Weight: 10 to 20
- Seeds Produced: 12
These enemies are found sleeping, unlike the active dwarf bulborbs. They can eat around 5 Pikmin with a single attack, and follow you for longer than dwarf bulborbs. Also, if you don't kill a dwarf bulborb fast enough, it will shriek and wake up a full-sized one if it's nearby. (The dying shriek does not have this effect). One way to defeat one is to approach from behind while it's sleeping then quickly throw a barrage of Pikmin on top of it. Alternatively, if you have at least 40 Reds or 55 total if there are others in the mix, just swarm them from behind. Avoid having Pikmin in front of it so they don't get eaten.
Spotty Bulbear[edit]
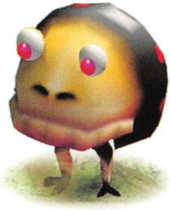
- Habitat: The Distant Spring
- Carry Weight: 10 to 20
- Seeds Produced: 15
Similar to the spotty bulborb, only tougher and brown in color. Use the same strategy to defeat, but come prepared with more Pikmin.
Male Sheargrub[edit]

- Habitat: Various
- Carry Weight: 1 to 2
- Seeds Produced: 3
Same as their female counterparts, only purple and with large mandibles. They can only eat one Pikmin at a time, but once they have one in their jaws, they become immune to damage. Apply the same tactics to defeat them as with the females.
Shearwig[edit]
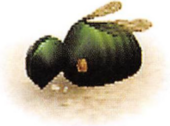
- Habitat: Various
- Carry Weight: 1 to 2
- Seeds Produced: 4
These are similar in size to the sheargrubs and they swarm and tear apart bridges the same way, but they are green, resemble beetles, and can fly. (As with sheargrubs, there are both males and females, but the females remain underground and don't appear in the game.) Use the same strategy to defeat a swarm as with sheargrubs. They take off when wounded, but they can still be taken out with one Pikmin knocking them down. They gradually regain health while flying, except they lose heath if flying over water.
Puffmin/Mushroom Pikmin[edit]
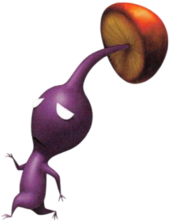
- Habitat: The Forest Navel
- Carry Weight: (N/A)
- Seeds Produced: (N/A)
Pikmin that have been infected by the spores of the Puffstool. They possess the same traits and attack power as their unconverted forms. Under its control, they will attack Olimar incessantly until they are destroyed either by Olimar's punches or the Pikmin themselves. If Olimar moves out of their range, they will dance around the Puffstool. They can be easily shaken off, during which they'll revert back to their original form-however, unaffected Pikmin will attempt to attack them unless Olimar calls them off; only then can they cure the Mushroom Pikmin of their afflicted state.
Breadbug[edit]
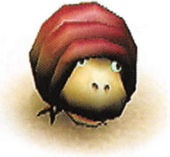
- Habitat: The Forest Navel
- Carry Weight: 3 to 6
- Seeds Produced: 3
A rare enemy that resembles a bread roll. Their tough skin makes it nearly impossible to damage them, and in turn they do not damage Pikmin directly, but attempt to steal pellets instead. If it does get hold of a pellet it will hang on to it at all costs, and two Pikmin are enough to overpower it in a pellet tug of war if both are pulling against the breadbug. If this happens the Pikmin will drag the pellet and the bug to an onion where bug will get sucked up into the onion along with the pellet. This does almost, but not quite, enough damage to kill the bug so that one hit with a Pikmin, or even by Olimar, is enough to finish it off. (Of course doing the tug of war trick a second time will work too, though it's time consuming.) Note that one Pikmin is not enough to win the tug of war and if left alone the bug will carry both to its hole where they will be lost. There is only one breadbug in the game, and it holds the Space Float, an optional ship part.
Swooping Snitchbug[edit]
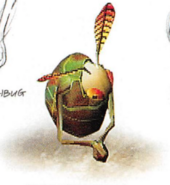
- Habitat: The Distant Spring, The Forest of Hope (starting on day 16)
- Carry Weight: 3 to 6
- Seeds Produced: 4
A large, flying, green insect. It swoops down to grab Pikmin and if it gets any it will plant them back into the ground turning them back into sprouts. This doesn't kill them but they revert to leaf form and it's annoying to have to locate and pluck them again. Throw Pikmin at it to force it to land, then swarm while it's on the ground.
Water Dumple[edit]

- Habitat: The Distant Spring
- Carry Weight: 5 to 10
- Seeds Produced: 5
A fish-like creature at home in shallow water. Unlike the Wogpole (see above), it is aggressive and attacks any Pikmin it sees. Swarm, using only Blues of course, to defeat.
Wollywog[edit]
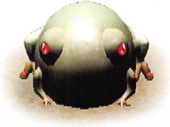
- Habitat: The Forest Navel
- Carry Weight: 7 to 14
- Seeds Produced: 8
A greenish grey frog that attacks by leaping and landing on nearby Pikmin to crush them. The simplest way to defeat them is to watch the shadow to avoid being crushed, then quickly swarming. If you have enough Pikmin in the swarm it will be too much for the frog to jump again and its fate will be sealed. Otherwise you will have to call the Pikmin back quickly to save them. A safer, though slower alternative is to throw Pikmin on top of the frog. They will be shaken off the next time the frog lands but will be unharmed. Aim carefully though to make sure the Pikmin land on top of the frog.
Yellow Wollywog[edit]
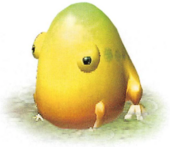
- Habitat: The Distant Spring
- Carry Weight: 7-14
- Seeds Produced: 8
A golden yellow version of the Wollywog. Tactics are the same, though it has more health.
Fiery Blowhog[edit]
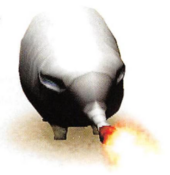
- Habitat: The Forest Navel
- Carry Weight: 7 to 15
- Seeds Produced: 8
These enemies are grey with fat bodies and mouths that resemble bottles and out of which they shoot jets of fire. Use Reds to attack since the fire won't hurt them and the other colors will be quickly wiped out. The only danger to the Reds is that they may be thrown or blown into water. Swarm or throw Reds at one to reduce its health. It may respond by throwing them off or blowing on them, but Pikmin are persistent and will maintain the attack.
Puffy Blowhog[edit]
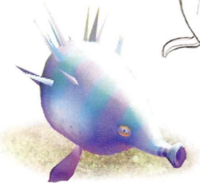
- Habitat: The Distant Spring
- Carry Weight: (N/A)
- Seeds Produced: (N/A, drops pellets)
A floating bag of gas that resembles a blimp more than its fiery cousin. They don't directly kill Pikmin, but the blasts of air they fire at them will stun them, knock off their petals, and possibly expose them to some other danger such as water, fire, or another enemy. When a Pikmin looses it's petals it reverts to leaf form. If they are close enough to the ground you can throw a Pikmin to land on them. The added weight will cause them to sink still lower so you can throw more Pikmin on them. Eventually they will be forced to the ground where a quick swarm will defeat them.
Bosses[edit]
Armored Cannon Beetle[edit]
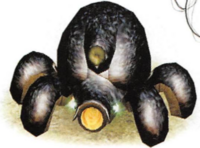
- Habitat: The Forest of Hope, The Distant Spring
- Carry Weight: 30 to 50
- Seeds Produced: 50
This resembles a giant black tarantula only with four legs. It attacks by sucking in a vast amount of air, then using the pressure to expel a boulder which mows down anything in its path. Its iron hard shell makes it invulnerable to attack most of the time. To fight it, throw Pikmin at its face while it's inhaling; if your aim is good one of them will get stuck in its mouth and the creature, with no other way to cool itself, is forced to open its wings until it's no longer overheated. Take the opportunity to come around behind it and throw Pikmin at its soft, glowing body. When the monster cools down it will shake off the Pikmin, so collect them and start the process over again. Repeat until the monster is defeated.
Burrowing Snagret[edit]
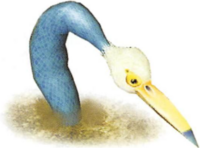
- Habitat: The Forest of Hope
- Carry Weight: (N/A)
- Seeds Produced: (N/A, drops pellets)
These look like long-necked birds except their bodies are always hidden underground. They periodically poke their heads up where they will happily munch on any Pikmin that happen to be within reach. To defeat one, start by swarming its neck, then start throwing Pikmin at its head which is its most vulnerable area. Eventually it will shake the Pikmin off and dive back underground; use this time to marshal your forces and prepare for the next attack. Occasionally the snagret just pokes its beak out before coming out all the way; if you can swarm it in this position you get a large number of attackers on its head and do big damage. Try to keep your forces behind it as much as possible and avoid areas where two snagrets' territories overlap as one is certainly bad enough.
Goolix[edit]
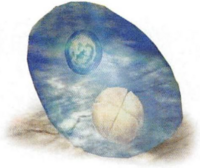
- Habitat: Impact Site (only appears on odd-numbered days after the Blue Onion has been activated.)
- Carry Weight: (N/A)
- Seeds Produced: (N/A, drops pellets)
This is a giant amoeba-like creature with two nuclei. It will instantly kill Red and Yellows but Blues are immune to it. To defeat it, just toss some Blues at it and they will automatically go for it's vulnerable nucleus. It's remarkably tough, so it may take a while for the Blues to chip its health away to zero.
Mamuta[edit]
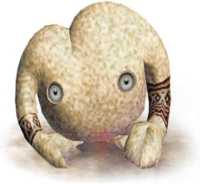
- Habitat: Impact Site (only appears on even-numbered days after the Blue Onion has been activated.)
- Carry Weight: 8 to 20
- Seeds Produced: 15
A grey, ape-like animal with long arms. It uses its arms to swat Pikmin into the ground, in effect turning them back into sprouts. You don't actually lose any Pikmin this way but it is inconvenient to have to re-pluck them. Throw Pikmin at it to defeat it.
Pearly Clamclamp[edit]
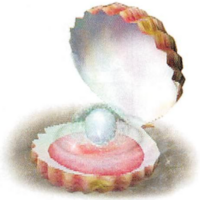
- Habitat: Impact Site
- Carry Weight (pearl): 3 to 6
- Seeds Produced (pearl): 50
A giant clam with a pearl inside. You can't actually defeat the clam but you can knock the pearl out of its shell. To do this, quickly throw some Pikmin into the shell where they will start work on the pearl. The clam will respond by opening its shell wider and wider until it suddenly snaps shut, trapping any Pikmin still inside to be eaten. The trick is to call the Pikmin out just before the shell snaps and save them, then throw them back in on the next cycle. This is time consuming, but the 50 seed reward may make it worth while.
Puffstool[edit]
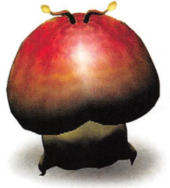
- Habitat: The Forest Navel
- Carry Weight: 10 to 20
- Seeds Produced: 30
A large reddish-brown mushroom which can walk. It doesn't attack directly but emits a cloud of poison gas. Pikmin affected by the gas will start attacking you. To defeat it, swarm its base until it falls over. Then start throwing Pikmin to the underside of its cap. When the mushroom starts to recover, call the Pikmin back out of range of the gas attack, then repeat the cycle.
Beady Long Legs[edit]
- Habitat: The Forest Navel
- Carry Weight: (N/A)
- Seeds Produced: (N/A, drops pellets)
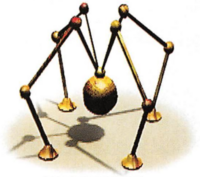
This resembles a giant gold daddy longlegs with four legs and plate-like feet. It attacks by stomping with its big flat feet. Pikmin will try to attack its feet, but not only is this harmless for the monster, it makes it easier for it to crush the Pikmin. Its only vulnerable part is its spherical head, which it will sometime lower far enough so you can throw Pikmin on it. This is one of the few times when the Yellow Pikmin shine in battle since they can be thrown high enough to reach the head most of the time.
Smokey Progg[edit]
- Habitat: The Distant Spring (only appears on or before day 15)
- Carry Weight: 3 to 6
- Seeds Produced: 100
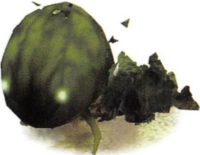
A sickly looking creature that leaves a trail of toxic smoke whereever it goes. Killing it is a purely optional since if you don't disturb its egg it will remain dormant. It is extremely difficult to deal with, though, so it should thought of as a challenge for advanced players.
Emperor Bulblax[edit]
- Habitat: The Final Trial
- Carry Weight: (N/A)
- Seeds Produced: (N/A, drops pellets)
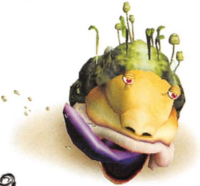
This monster is the granddaddy of all bulborbs and bulbears, and is the final boss of the game. It's found buried in the ground in an arena at the far end of The Final Trial; touching its green feelers will cause it to come up and attack.
Information on fighting this enemy can be found in the Walkthough, see The Final Trial.
