
Chapter Goal: Lady Dahlia's cat has escaped! Search St. Mystere for the runaway feline.
Along with the start of Chapter 2 comes the Journal Entry ![]() "Chasing Claudia" and the new mystery "Noise at the Manor."
"Chasing Claudia" and the new mystery "Noise at the Manor."
Manor Foyer[edit]
Head downstairs and talk to Matthew. He asks you to check the town for Claudia while he explores the Manor.
Head Outside.
Reinhold Manor[edit]

Sitting in front of the Manor is Claudia! Tap her with the stylus. Much to Layton and Luke's disappointment, this causes her to run off.
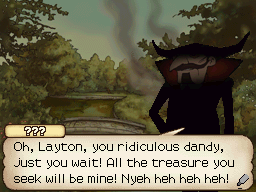
A cinema scene occurs featuring "???" What does this shady figure have to do with Professor Layton?
Head towards town to continue the search for Claudia.
Manor Border[edit]
Tap the boat to trigger Puzzle 013.
Head south to Manor Road.
Manor Road[edit]
Take a detour into the General Store. To enter, tap the Blue Door on the Left of the screen.
General Store[edit]
A tap on the chairs will trigger Puzzle 014. Solving this puzzle rewards you with a ![]() painting scrap!
painting scrap!
The candle holds a puzzle as well. Tap it to find Puzzle 015.
Head outside and to the left to get back to the Plaza.
Plaza[edit]

Franco will immediately hail the Professor. Apparently, Franco never put the drawbridge back up after Layton's arrival. While Franco was taking a food break, someone entered the village, stole Franco's drawbridge crank, and raised the drawbridge. Without the crank, everyone is stuck inside the village!
Professor Layton and Luke have encountered yet another mystery in St. Mystere. This one is called "The Vanishing Crank."
Before leaving, Franco gives Professor Layton a ![]() gizmo that was left at the scene of the crime. Professor Layton and Luke will now start receiving gizmos with the completion of certain puzzles.
gizmo that was left at the scene of the crime. Professor Layton and Luke will now start receiving gizmos with the completion of certain puzzles.
Ignore Claudia for now and try to go west. Professor Layton suggests they find lodgings for the night. The Journal entry ![]() "Looking for the Inn" appears. Tap on the Blue Door of the right-most building to enter Town Hall.
"Looking for the Inn" appears. Tap on the Blue Door of the right-most building to enter Town Hall.
Town Hall[edit]
Talk to Rodney (the guy with the long nose). He will strongly advise you to solve Puzzle 016. As a reward for solving this puzzle, you will get a ![]() gizmo!
gizmo!
Tap the bottom ledge of the bedside-window to find Puzzle 118.
Head back outside and tap on Claudia. Luke tries to catch her, but Claudia refuses to be caught. She runs off again. Talk to Deke (the tall guy) to learn that Claudia ran westward.
Head south twice to the Drawbridge Section.
Drawbridge[edit]
Tap on the Laytonmobile to trigger Puzzle 019. Solving this puzzle rewards you with a ![]() gizmo!
gizmo!
Entrance[edit]
Go back to the Entrance and talk to Stachen. He will give you Puzzle 017 to solve. Solving this puzzle rewards you with a ![]() painting scrap!
painting scrap!
It's now time to find those accommodations. Tap the Inn door.
Inn[edit]
Talk to Beatrice (the heavy-set woman). Unfortunately, the inn has no rooms available except for two empty attic rooms. Professor Layton has no choice but to accept the rooms. To make up for the lack of furniture, Beatrice gives the pair a ![]() Lacquered Stool. Give it to
Lacquered Stool. Give it to ![]() Layton.
Layton.
The Inn section has now been added to the Menu. Occasionally, Layton and Luke will receive furniture for solving a puzzle. The Inn section gives them a place to store their furniture.
Talk to Beatrice again and she'll present Puzzle 018. Solving this puzzle rewards you with a ![]() Handmade Rug! Give it to
Handmade Rug! Give it to ![]() Layton.
Layton.
Tap the Painting above Beatrice's head to find Puzzle 112.
Head back to the Plaza. The Journal entry ![]() "Back to Chasing Claudia" appears after exiting the Inn.
"Back to Chasing Claudia" appears after exiting the Inn.
Go left onto Park Road.
Park Road[edit]
Talk to Pauly twice to trigger Puzzle 020 and Puzzle 021. Both puzzles reward you with two ![]()
![]() gizmos!
gizmos!
Talk to Agnes. She's seen Claudia down by the Park Gate. She'll also offer to give you some ![]() Fish Bones to help catch her...if you can solve Puzzle 022.
Fish Bones to help catch her...if you can solve Puzzle 022.
Tap the sign by the Restaurant (the blue door) to trigger Puzzle 111.
Enter the Restaurant.
Restaurant[edit]
Crouton (the one with the apron) has lost his measuring cups and needs your puzzle expertise. Talk to him to solve Puzzle 023. Solving this puzzle rewards you with a ![]() gizmo!
gizmo!
Talk to the orange-haired Flick for Puzzle 025. Solving this puzzle also rewards you with a ![]() gizmo.
gizmo.
Head back outside and North to the Park Gate.
Park Gate[edit]

You see Claudia, but don't tap on her just yet. First, tap the leftmost piece of junk in the bottom-left corner to find Puzzle 026. Solving this puzzle rewards you with a ![]() painting scrap!
painting scrap!
Now tap on Claudia. With the help of Agnes' fish bones, you've caught her! Chapter 2 is solved. The Journal entry ![]() "Claudia Found!" appears and you get an explanation of the House of Puzzles. Any missed puzzles will be sent there for you to solve at your leisure.
"Claudia Found!" appears and you get an explanation of the House of Puzzles. Any missed puzzles will be sent there for you to solve at your leisure.
This Concludes Chapter 2.
Manor Foyer[edit]
Layton and Luke automatically return to the Manor Foyer where Matthew anxiously awaits your return. Something terrible has happened! Matthew rushes you upstairs.
Manor Parlor[edit]
Upon entering the Parlor, you are immediately confronted by Inspector Chelmey. He insists that he is the inspector of this case, and informs Layton that he is a suspect along with all the other Manor Residents. Thinking that Claudia's disappearance is the case Chelmey is talking about, Layton presents the cat. Lady Dahlia is thrilled, but Chelmey is not. He informs you that there has been a murder at the mansion. Simon was the unfortunate victim. All details are classified.
While Layton waits to be questioned by Chelmey, he questions the others to find out the details of the case.
Talk to Gordon. He's upset, but he is able to set aside his worry long enough to give you Puzzle 027. He also hints that Simon and Baron Reinhold didn't always get along. Solving Gordon's puzzle rewards you with a ![]() gizmo.
gizmo.

Talk to Matthew. Matthew did not see any strange figures around the mansion, but he did find an important clue. He shows you a tiny cog found near Simon's body. The cog has a hammer and wrench insignia on it. The mystery of the "Cog Discovery" is added to your list of Mysteries. Matthew also gives you Puzzle 028 to solve. You receive a ![]() gizmo upon completion.
gizmo upon completion.
After talking with Matthew, Chelmey comes back in the room. Talk to him to find out that Ramon is missing. Has he been abducted, or did he flee the scene of the crime?
Talk to Matthew again in order to gain access to Lady Dahlia's Room.
Dahlia's Room[edit]
Talk to Lady Dahlia. Layton thinks that this murder and the Golden Apple case are connected. Lady Dahlia asks him to quickly find Ramon so the two cases can be settled. Layton agrees.
Chapter 3 begins.