| Map Name | Initial Coordinates |
|---|---|
| boss2 | (696 -963 -109) : 0° (facing north) |
Level Objective[edit]
The objective for this level is to eliminate The Makron, the Strogg leader, then locate an open escape pod and leave before the asteroid blows up. This ends the game.
Strategy / Walkthrough[edit]
The matter transporter takes you from the Inner Chamber to the Makron's secret hideaway built into an asteroid orbiting Stroggos. You cannot go back. You must face him and destroy him using whatever Armor, Weapons, etc. that you brought with you and what you can find here. The Makron has a BFG10K which he can fire whether he is in his armored exoskeleton or not. If you get hit with this, things go downhill rapidly so save the game whenever you are in a good position.
From the matter transporter at which you arrive, a hallway goes to the right and to the left, turning to enclose three sides of the arena above. There are Health packs, Rockets, Grenades, Cells, Slugs and a few Armor Shards to pick up. At the end of each arm of the hallway is an elevator to the arena. Just before the elevators there are banks of escape pods, three each side, all closed. When the Makron is defeated, the middle pod of each bank will open, so you will need to drop down an elevator (it doesn't matter which one) to escape.

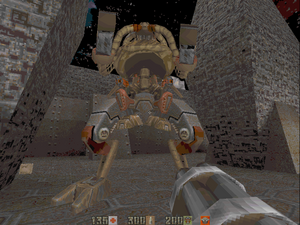
Ride either of the two elevators up to the main station platform / arena. The Makron is waiting in an armored exoskeleton with twin Chain Guns, one on each arm. Exit the elevator carefully and you will see him before he sees you. You will also see two large pillars, which will be your main cover for the fight. You can get out and behind the closest one, again without the Makron seeing you (what is wrong with him?). Now you can take full stock of the situation. Littered around the arena are Shotgun Shells, Bullets, a small number of Rockets and a few Health packs. In addition to the pillars, there is a flying buttress opposite the Makron and, close to the side wall, a floor button paired with a recessed panel. There is a similar panel on the other side. The buttons cause the panels to slide back, revealing ramps down to an area below, but each button opens the panel on the opposite side of the arena. The panels close again after a short time. Below you will find Combat Armor, Cells, Health packs and a place to hide. From down there you will be able to see the Makron through narrow transparent strips of the arena floor, so as to plan when and which side to come up again, but when under them you are vulnerable to the BFG10K. The wall button causes both floor panels to open and then close again after a short time.

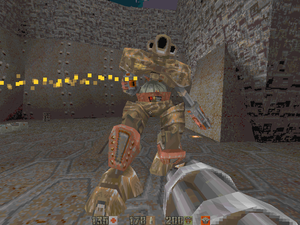
So, decide what you're going to do or follow one of the two strategies described below. By keeping moving it's not hard to avoid the Chain Guns, but sooner or later you're going to take a hit from the BFG10K. Therefore, taking cover is important and the two pillars are the best choice. The armored exoskeleton takes a lot of damage, but ultimately it will start to sway and then collapse in a heap. The Makron will clamber out of the wreckage. As well as the BFG10K, he has a Blaster, which he fans from side to side, and a Rail Gun where most people have a head. If your preference is to run, dodge and shoot, OK, go ahead and try it, but save your game and be prepared to snipe from cover as an alternative. The Makron takes slightly less damage than the exoskeleton before he breaks into quivering chunks of machinery with a brain on top. After a few seconds, the station shakes violently for a while. This is your cue to get back to an elevator (either one), drop down and climb into an escape pod (but first, see Secrets, below). The pod will launch automatically and in a final cinematic sequence you will watch as the escape pod ejects from the side of the station and the asteroid explodes. You find yourself back on the surface of Stroggos. Mission accomplished!
Strategy for Sissies[edit]
If you just want to get this over with and you've had the good sense to keep at least one Invulnerability and one Quad Damage in reserve, you can destroy the Makron almost as easily as shooting a Light Guard with the Rail Gun. Equip the Hyper-Blaster (assuming you have full ammunition for it), activate the Invulnerability, walk right up to the Makron, activating the Quad Damage, and just unload everything in the Hyper-Blaster at him. Other weapons, except for the Blaster and basic Shotgun, will also work. For example, with the BFG10K, two hits to the armed walker, wait until it falls over and the Makron pops out, and then two more hits, will do the job with ten or more seconds of Invulnerability / Quad Damage remaining. There is no challenge in this and, frankly, the Makron boss-battle is a bit of an anti-climax if done this way.
Strategy for Skilled Players[edit]
Actually, if you're nimble you can quite easily take the Makron down with just a full load of grenades without using an Invulnerability or a Quad Damage, even on "Hard" difficulty. It's a good idea to be well armored, however, in case you take any hits. The idea, of course, is to use the big pillars in the arena for cover and hit the Makron repeatedly without being hit yourself. The grenade launcher is ideal for this.
While the Makron is in his slow-moving armed walker, hide behind a pillar and wait until his pursuit of you reveals a foot. Place a grenade on the foot and move around the pillar so that you are hidden again. Repeat until you have used up about 50 grenades (43 hits are needed at hard difficulty). You should be able to do this without him hitting you even once.
The smaller Makron is best dealt with in a slightly different way, as he is faster moving and more compact. As soon as you see him come around the pillar after you, dodge away and keep going around the pillar until you come up to his back. He will turn around, but not fast enough to avoid you landing a grenade on him and running around the pillar in the other direction. You could use rockets or the rail gun instead of grenades. Keep going around one way and then the other, finding him facing away from you and hitting him as he turns. Most of the time, he will not be fast enough to hit you back. If you don't get the dance quite right, he may get a shot off and do you damage, but that's why you have the armor. It will take less damage than the armed walker to bring him down (31 grenade hits at hard difficulty).
Secrets[edit]
This level has one (1) secret, plus a bonus:
- After the Makron has been destroyed, go down into the area under the arena floor (stand on a floor button to open the panel on the other side). A corridor branches off at right angles to the main area. At the end there is a crack in the wall that is emitting sparks. Blast it open and step through to collect the secret. Enjoy a gallery of pictures of Id Software contributors to the Quake II project. Don't be concerned about the imminent destruction of the asteroid; although it feels as if you should be running for the escape pod, you can actually hang out here for many minutes. To open the panels to get back up to the arena, press the wall button.
- Bonus — At the end of the picture gallery there is a hole in the floor with a ladder leading to a special area. Climb down to see what Strogg commanders do in their leisure time. Remember the cryptic sequence of characters that was revealed in the bonus for the Research Lab (A.H.D.S.S.I.B.H. bjjc)? It purportedly stands for "A Hall Displays Secret Snapshots In Boss's House — Brandon James & John Carmack", an early hint of the bonus in the Final Showdown.