| Map Name | Initial Coordinates |
|---|---|
| jail1 | (-31 -3495 110) : -180° (facing south) |
Armament[edit]
Starting the Jail Area unit, you should have the Blaster, Shotgun, Machine Gun, a bunch of Grenades (but not the Grenade Launcher), the Super Shotgun and the Chain Gun. In this unit you will add the Grenade Launcher and the Hyper-Blaster to your collection of weapons.
Unit objective[edit]

The primary objective for the Jail Area unit is to destroy the security grid protecting the Strogg industrial region. However, you achieve this as your final act in the final level of the unit, so you can forget about this and just work your way through the secondary objectives level-by-level.
Level objective[edit]
The objective for this level is to penetrate the outer jail defenses. In practical terms, that means fighting your way to the next level.
Strategy[edit]
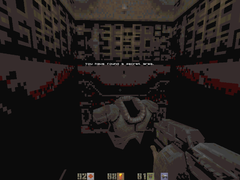
This is a peculiar level and one for which many players will need some kind of help. The route to the exit that seems most obvious includes a trick which is very hard to figure out, in part because it appears that there is no trick, just some really tedious jumping over deadly lasers. This can lead to considerable frustration. There is another, almost completely separate, route, which you may discover after giving up on the obvious route. This gets you to the exit after passing through only a small fraction of the level and with as few as four out of the 41 possible enemy kills. Whichever route you take, no particular strategy is needed, just the usual caution, and, except for the trick, the level is enjoyable. You meet "crushers" for the first time in the game. If you take the "obvious" route, you will also meet your first Gladiator and you will need to figure out how best to fight him.

There are four Flak Jackets in the level, but no Combat Suits. So, to avoid a drop in your armor level, don't let your armor points fall to zero.
Walkthrough[edit]
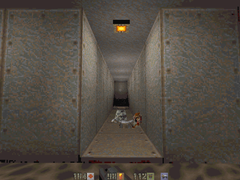
You arrive at the Main Gate of the Jail Area via a conveyor belt from the Warehouse in the Bunker Area. You have dropped down from the conveyor belt, which you can see overhead, and you are in a small room. There are two Enforcers in this room, but they will not emerge until you start to explore. Kill them, but be careful not to explode the barrel if you want the Armor on top of the crate. There is no way to get it other than climbing onto the barrel (unless you want to Grenade jump). A closed door is the only way out of the room.
If you just want to get through this level to the next one, follow the Swimming Directly For The Exit sub-section, below. If you want to explore fully, find the secrets or score all the enemy kills, instead skip to the The "Obvious" Route sub-section.
Swimming Directly For The Exit[edit]
Equip the Machine Gun, go up to the door so that it opens and run straight out, dropping off the walkway into water below. Swim directly ahead through a pipe. At the end, you need to go to the left, however, there are three Flyers here. You could just keep swimming, diving down and dodging as best you can to take as little damage as possible. To fight the Flyers, turn instead to the right and swim around the other side of the small island that you will see just ahead when you emerge from the pipe. Get out of the water onto the island and use the rock wall as cover while you pick off the Flyers. Then, get back into the water and swim to the other end of the area. Enter another pipe, take a right turn, then a left turn and come out in a circular room. Get out of the water onto a small platform that you will see to your right. Immediately open fire on the Gunner on the other side of the bars, trying not to let him reach the flashing alarm button on the far wall. If he does, you'll have to deal with another Gunner emerging from the wall on your left as well as the first, who will turn and attack you.

Use your Blaster to shoot the glowing red bar that you can see to the right of the alarm button. This is a fuse and destroying it, which results in a disproportionately large explosion, stops a turbine in the water below. Drop back in, dive and turn to find the now stationary turbine. Swim between the blades (which would have killed you before you shot out the fuse) and continue along and up into the room behind the bars. Replenish your Machine Gun ammunition and, taking any of the three openings, follow some narrow passages to a room with exploding barrels and Armor Shards. Go past these to a ladder, shoot out the grating at the top and climb up to emerge behind a Gunner, who will be most surprised by two point-blank blasts from your Super Shotgun.
The Gunner was standing near a lift platform. Move quickly to the middle of the platform, or you may get damage when it rises up and you hit your head. At the top, take one step off the platform towards a floor button that you will see there. Directly beyond the button, you will see a closed door in a large, brownish surround. Don't be distracted by the smaller open doorway slightly to the right. Run across the button, dropping down into the courtyard below, and make for the door, which is now opening. You will sustain fall damage of about five health and six armor, but this is actually the only way down from the floor button that opens the door to the exit. Press the button at the rear of the elevator platform inside the door and you're off to the next level having killed only seven of the 41 Strogg arrayed against you here (four if you didn't fight the Flyers). Weird, huh?
The "Obvious" Route[edit]
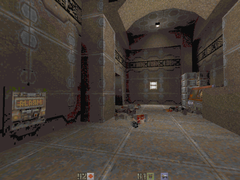
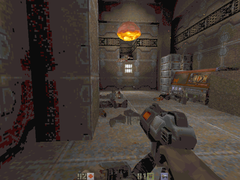
Leave the starting room and follow the only available path that does not involve going into the water. You will meet a large number of Gunners, Enforcers and Berserkers and also Flyers in groups, usually in outdoor areas but in one case in a building (but see Secrets, below, as they may not come out on their own). The best weapon to have in hand at the very start is probably the Chain Gun. To pass the crushers, simply get close, wait until they close and then press forward against them. When they open, pass through at once. To deal with Strogg that insist on lurking on the far side of crushers, crouch and shoot at their legs with your Blaster or Machine Gun. Pass all the way through the first building and over a bridge to the second. Here, don't progress too far down the steps to the right, just kill the enemies that attack and explore over to the left.
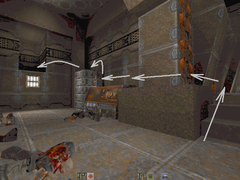
You will find two windows that overlook the next area. Through the left-hand window, you see the exit from that area, which is a doorway with some kind of scanning device moving up and down. There are laser nozzles on the sides of an archway that divides the room. Finally, you can hear a Beserker's characteristic scraping sound and if you jump and look down and to the right you will see where he is hiding. So, go back around and down the steps that were to your right when you entered the building. Dispose of any enemies, including the Berserker, and enter the room for a closer look. Save the game. Below are four suggestions for how to proceed from here.

Suggestion One — Push the barrel until it blocks the lowest laser nozzle in the archway. Then, step into the exit doorway and watch the grid of lasers on the floor of the next room turn on. They are instant death, so turn around, go back, crouching under the lasers that have also come on in the archway, jump in the water and follow the route described in Swimming Directly For The Exit. The barrel will block the bottom laser for just fifteen seconds and then it will explode.
Suggestion Two — After the lasers are on, jump very carefully between them to reach the steps on the far side of the room. A problem with this is that two Berserkers will come around the corner at the top of the steps and, with the lasers behind you, you have very limited space to maneuver while you kill them. If you're not so confident with the jumping, it will seem attractive to jump up onto the low platforms that came up out of the floor. This, however, causes additional problems, but you can cope with this if you're prepared.
Suggestion Three — Instead of standing there like a dummy while the lasers turn on, run through the doorway, jump, jump again and run across the room to the steps. You need to time the jumps so that the first is off the second raised threshold across the doorway and clears the first two lasers and the second jump is at the instant you land from the first and this clears the diagonal lasers. You may not get it right first time. You will also face the Berserkers with the lasers behind you.
Suggestion Four — The "trick" to getting through this room easily is more difficult to find than many secrets in the game, so, if you like discovering those yourself, don't read the rest of this paragraph. Instead, search as if you were looking for a secret. If you keep reading here, it will be a total spoiler. Are you ready? OK. Look carefully just to the sides of the steps on the far side of the room. On the left, you can easily see two boxes of shotgun shells (drop down here to get out of the way of the two Berserkers). On the right, when the lasers are triggered, a wall panel draws back to expose a button in a tiny alcove. If you can get to this and press it, the lasers turn off. Permanently. Take any of the above three suggestions to get to the button. The first is to be recommended because it doesn't involve jumping over deadly lasers.
(Review and Remove)[edit]

Stay dry[edit]

On the south side of the jail yard there is a guard tower and a howitzer. The shells from the howitzer are deadly, but taking out the gunner is possible. Before going into the open, scoot to the left side of the doorway, go forward a step or two and crouch down up against the door frame. It turns out that the howitzer can't be aimed that low and any shots fired at you will pass harmlessly over you. Aim your Blaster at the small space just below the gun barrel and keep shooting at the gunner's exposed legs until he splashes. Once the howitzer has been silenced, run across the yard and duck into the guard tower. Your run across the yard will lure out a Gladiator armed with a rail gun and a couple of waves of Flyers. Pick them off from within the relative safety of the tower. Once the coast is clear, step on the lift and ride to the top of the tower. Step onto the blue-pulsating tri-lobe foot switch to open the main gate to the Detention Center. The lift is one-way only, so to get down from the tower you'll need to jump and take some damage; stay close to the jail wall to keep damage to a minimum. (If you're very quick about it, you can dart out from the lift platform, press the switch, then back up quickly and ride the lift to the ground. It will continue to oscillate up and down as long as you stay on the platform, giving you a chance to grab items from the top floor of the tower with short excursions.)
In the rear corner of the ground floor of the guard tower find a cracked floor grate. Hit it with the Blaster until it shatters and climb down the ladder. Collect the items you find there and follow the passageway. When you come to the next room, you'll see a Gunner; take him down. You'll notice a pool of turbid, brown water. and further progress is barred. If you happened to catch the Gunner off-guard, he won't have had a chance to trigger the alarm system; press the yellow ALARM button in the southeast corner of the room to trigger an explosion that releases another Gunner just beyond the barrier. Collect a Chain Gun and Flak Jacket nearby. Also notice the red vertical light bar on the wall. It is the power conduit for ventilation fans above and a large propeller in the tunnel below the floor. Shoot it to break it. Jump into the water, swim past the stopped propeller blades and pop up in the pool beyond the barrier. Collect several items, including a Super Shotgun, Silencer and First Aid Kit. Jump back into the water and swim north into the watery tunnel. Follow the tunnels until you find your way back to the secret near the start of the level and ride the lift up to the starting point under the conveyor belt. Retrace your steps from the start to the main gate, picking up any items you can as you proceed. Go inside, step on the lift platform and press the button to proceed to the Detention Center.
Finishing Up[edit]
To the left at the top of the steps from the room with the laser floor is an L-shaped room with a doorway that leads to an outdoor courtyard. The large closed door on the right here leads to the exit elevator. The roofed building in the far left corner has, on the upper floor, the button that opens the door. This is where you end up by following the Swimming ... route, so coming from that direction, the L-shaped room leading to the room with the laser floor is through the small open doorway to the right. There are quite a few enemies to fight in this area. Skip the rest of this paragraph if you want to discover them yourself. An Enforcer operates a rocket gun in the courtyard. He can't turn the gun very fast, so it's quite easy to get behind him and kill him. Two waves of three Flyers each will come over the building roof to the left of the small open doorway. Through that doorway will come your first Gladiator. He is fast moving and his Rail Gun can inflict a lot of damage for each shot, therefore either take cover or keep moving sideways around him except just after he fires when it is safe to change direction while he reloads. On the plus side, it does not take a lot of damage to kill him, so use the Machine Gun from a distance or the Super Shotgun if you get close in. Inside the L-shaped room there is a Gunner and also the two Berserkers that would give you so much trouble coming up the stairs with the lasers behind you.
If you don't want to fully explore the level, you have found both secrets or don't care about them and you don't want to score all the enemy kills, refer to the last paragraph of the Swimming ... section. By running and dodging over to the roofed building you can avoid combat with many of the Strogg in the courtyard. Otherwise, you will probably have more work to do at this point. If you came around the Swimming ... route, once you have cleared away the enemies, you can get to the top of the steps in the room with the laser floor. If you took this route from the start and have not followed the Obvious route, the lasers will be off. Otherwise, refer to Suggestion Four, above, for what to do at this time. Alternatively, just cross the room and trigger the lasers when you go out on the other side. You will now have to play the Obvious route backwards, which presents no particular problems. Read Suggestion One, above, if you can't figure out how to pass the lasers in the archway. If you don't like the look of the two Gunners beyond the crushers, backtrack, drop into the water from the bridge between the two buildings and use the first secret to get back to your starting point.
You may have difficulty making all the 41 enemy kills. See Secrets, below, to make sure that you have flushed out the two Flyers inside the second building. Go to the room with the laser floor and stand on either of the low platforms that house the laser nozzles. If nothing happens, you're done here. Go back to the courtyard, into the roofed building, down the ladder and along the narrow passages to the room with the electrical fuse. If the alarm button has not been pressed, equip the Chain Gun and do it now. If none of this gets you 41 kills, it's most likely Flyers that are missing. Explore the outdoor areas again, but it's possible for them to get lodged in some spot where you can't see them and they can't see you and you will eventually have to give up. If you save and reload the game, it seems that enemies sometimes lose track of you.
The four pieces of Jacket Armor in this level are located 1) in the starting room (don't explode the barrel and you can climb up on it to get the Armor from the crate), 2) in the second Secret area, 3) in the room with the electrical fuse and 4) in the alcove from which the Gladiator emerged in the L-shaped room just off the courtyard near the exit.
Secrets[edit]
This level has two (2) secrets:
- Just outside the starting room, jump off the walkway into the water. Swim to the right and curve back towards the building. There is an opening just above the water level. Enter the passageway to get a Rebreather and a First Aid Kit. A lift platform at the far end of the passageway returns you to the starting point.
- Inside the Main Gate building there is a yellow ALARM button on the wall. If one of the Enforcers has triggered the alarm by pressing the button, when you return to this room an explosion opens a secret alcove high in the wall to the right, releasing a couple of Flyers. By hopping onto the ledge by the stairs, walking across a computer cabinet and jumping up onto a tall electronics rack you can, with a little difficulty, make a running jump into the alcove and collect Jacket Armor. If you were quick and killed both of the Enforcers in the entrance area of this room before they could trigger the alarm, you can push the button yourself to reveal the secret alcove.
- Gallery : Secrets in the Main Gate.
-
Rebreather in the passage under the starting room.
-
Press the alarm button (if it isn't already pressed).
-
Two Flyers emerge from the alcove, so watch out!
-
Clamber and jump over the equipment to the alcove.
-
Your reward at the back of the alcove is Jacket Armor.


