| Map Name | hangar1 |
|---|---|
| Initial Coordinates | (-1087 -535 1454) : 0° (facing north) |
Armament[edit]
By this point in the game, you should have collected all the available Weapons and have plenty of ammunition, although there is no shortage of ammo to be picked up in this level. You should also be bringing Armor from the previous level.
Unit objective[edit]
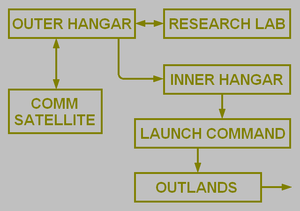
The primary objectives for the City unit are to close the main hangar bay door and destroy the blackhole generator. You achieve these one after the other, the first in the Inner Hangar and the second in Launch Command.
Level objective[edit]
The objective for this level is to find a way into the main hangar bay installation.
Strategy[edit]
This is a small level and easy for this point in the game. The Strogg pose no real challenge and can be taken out from cover or by rushing in with a powerful weapon. Keep the usual lookout for enemies approaching from above and, at one point, depending on the route you take, from behind. Most of the level does not need to be explored to reach the objective, so don't be surprised if you can't find a purpose for everything you see. If you want to find the secrets, make all the kills or generally get the most for your money, then backtrack as necessary before you leave for the Inner Hangar. Or, come back later.
Walkthrough[edit]
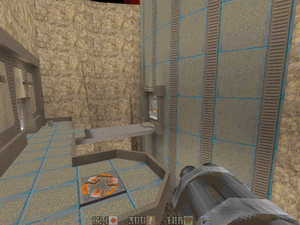
At the start of this level, and the City unit, the vehicle in which you escaped the destruction of the Big Gun has brought you to a room with a door on one side and an elevator shaft on the other. Ignore the elevator shaft and go to the door. Deal with the Gunner just outside and the two Icarus in the air, probably over to the right. When the Icarus are both gone, a Flyer will come over the mountain to the right and when you take that out a second Flyer will appear from the same place. Then, you have some peace to look around and take stock. You are on a balcony overlooking a lake. A building in the side of a mountain is across the lake. Step on a floor button to extend a bridge over to the building.
Straight to the Objective[edit]
If you're not interested in secrets or completely exploring the level, go across the bridge and through the door into the building. A hallway curves away to your left. Take down the Enforcers stationed at intervals along here. When the last one (the fifth at hard difficulty) goes down, turn around and face the medic that will then come out of an alcove to the right of the door where you came in. Half way around the curve of the hallway an opening leads to a room on the left. Fight the Tank patrolling there.
Time for a Swim[edit]
If you want to completely explore this level, and this includes finding any or all of its secrets, then go jump in the lake. There are Barracuda Sharks down there, so some planning beforehand may be in order. You can try picking them off from the balcony or the bridge. Otherwise, try drawing them over to one end of the lake and then run and drop down to the other, swimming quickly to some piece of dry ground and climbing out before they can bite you. From the lake shore, it is a simple matter to kill them with the Super Shotgun or any other low-end weapon. Swim around a bit to find any that were hiding.
Under the high balcony, there is a ledge with a door into the lower part of the building in which you started the level. In the room behind the door, you will have to fight a Gunner and three Enforcers. This is worth doing, however, because in there you will find some useful things, such as a rebreather, in case you need to swim any distance under water, and a backpack of ammunition. (See also Secrets, below.) The elevator at the back of this room would take you back up to where you started the level, but unless you left any goodies behind, just go back out to the lake.
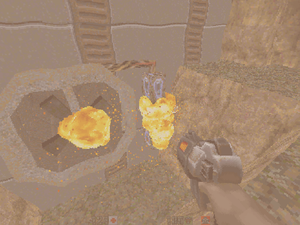
Over to the right are two small islands, one of which has a pool on it. Dive down by the one with the pool and you will see a turbine blade spinning. To the right of the turbine is the electrical supply, including a fuse. Shoot the fuse to stop the turbine spinning. Come up, get onto the island and drop into the pool. A long underwater tunnel leads away from the pool. You would not be able to swim along this if the turbine was running, but you can now. Use the rebreather that you found a moment ago if you want to, but you can make it without. A Super Shotgun is good for the Barracuda Sharks at the other end. (See also Secrets, below.)
Climb out of the water and deal with the two Icarus floating around. Keep your eye on the opening in the part of the building that emerges from the cliff face here; there is a Tank inside. If he sees you, he may attack. Otherwise, go in and kill him, perhaps taking cover behind the circular structure around which he is walking. (See Secrets, below, at this point.) There is a ladder going up the cliff side. Climb up to a small room with some scraps of health and ammo but, surprisingly, no enemies. Shoot the wall in the corner opposite where you came in (next to the flashing light in the floor) and a hidden panel slides down. Beyond it, a hallway curves away to the left. Take down the Enforcers stationed at intervals along here. The first one will be turned away, expecting you to come from the other direction, but when they hear your shots the others will turn towards you (this might be a fun time to try out the Silencer). When the last one goes down, a medic will come out of an alcove at the far end of the hallway. Half way around the hallway an opening leads to a room on the outside of the curve. Fight the Tank patrolling there.
The Commander's Head[edit]
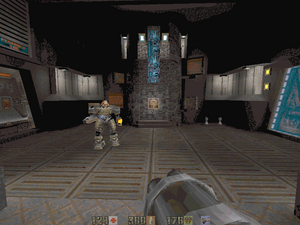
Whether you came here directly or went for a swim on the way, you need to get to the room off the long, curved hallway and kill the patrolling Tank. Looking across the room, there is a working door on the left side, a door on the right side that is blocked by a blue-tinted force field and some kind of symbol on the wall ahead of you. Go up to the symbol and press it (it turns out to be a wall button) to receive the message "You need the Commander's Head". You will find this item in the Research Lab, which is conveniently through the working door on the left of the room.
On Returning from the Research Lab[edit]
When you have the Commander's Head, press the symbol / wall button again. The force field blocking the door to the right will disappear and the door will open. Go through the short passage beyond the door, around a corner to the right, and into a room with stacked crates. There are two Enforcers around behind the crates guarding the only door out of the room. Fight them and proceed to the Inner Hangar. To fully explore the level if you have not done so, take the curved hallway back to the bridge over the lake and the room that you started in.
Secrets[edit]
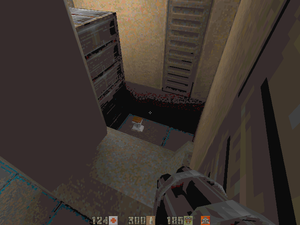
This level has three (3) secrets:
- In the room below the one in which you start the level, to the right of the door through which you enter from the lake shore, there is a pipe that comes in from outside and goes up. Jump over the horizontal part to find an Adrenaline and receive the message "You have found a secret".
- During the full exploration of the level, when you swim through the long underwater tunnel you receive the message "You found a secret area!" when you get to the other end.
- In the secret area, the circular structure around which the Tank is walking turns out to be a matter transporter that will take you to a secret level, the Comm Satellite. Go around the back to use it. On completing that level, you will be returned to the same place. Your field computer will say "Resume previous mission".
- For those playing the 2022 remaster, in the same secret area, a small outcrop sticks out from the back wall, quite high up. Shoot this, and a fun little reveal occurs, triggering the fourth secret.