| Map Name | Initial Coordinates |
|---|---|
| strike | (-3823 1408 174) : 0° (facing north) |
Level objective[edit]
The objective for this level is to retrieve the air strike marker and place it in the receptacle beside the fuel pod to call in a bomb run on a Strogg fuel pipeline.
Strategy[edit]
This quick and easy level provides a short break in between the more challenging levels of the City and Palace Area units. No particular strategy is needed to succeed; just try not to get so shot up that you begin the Palace Area short on health, ammunition or armor. There are a large number of enemies, 56 at hard difficulty, but they are of the weak sort encountered early in the game. Sometimes you meet them in groups, but often you can just pick them off one by one. Don't get too excited about watching your close air support buddies pound Strogg military infrastructure into dust; the air strike itself is a massive letdown.

Walkthrough[edit]
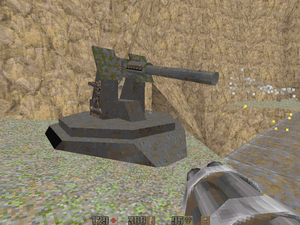
You enter this level in a narrow passage that leads down a long flight of steps to an outdoor area. There are Guards at the bottom of the steps and they will attack as soon as they see or hear you. Watch out for one hidden in an alcove to the left. Keeping a lookout for Guards close by, take a careful look around and notice the gun emplacement at some distance. An Enforcer at the controls is shooting Rockets at you, but they take so long to arrive that they are easy to avoid. Don't stand with your back to a wall where you will take splash damage. Kill the Enforcer with a suitable long-range weapon. The Rail Gun works well and you will be able to pick up more Slugs later in the level. Guards will approach over a bridge from the direction of the gun and will need to be dealt with. As you explore, don't be taken by surprise by the Guards in the cave on the far side of the bridge.
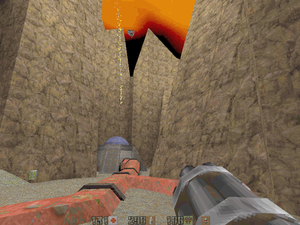
You are in a steep-sided valley in a mountainous area. The bridge crosses over a deep canyon. A river in the canyon goes into a cave on your right. On your left, the canyon and river dead-end. There are Barracuda Sharks in the river but the water looks clean and otherwise harmless. Your field computer reads "Primary unit objectives complete" and "Retrieve the airstrike marker".
The Air Strike Marker[edit]
The obvious way forward is to cross over the bridge. The less obvious way is to jump in the river, but this walkthrough assumes that you don't do that. Go into the cave on the other side and note the tunnel leading to the right towards the rear. You might want to quicksave at this point and try the next battle in various ways. As you approach the mouth of the tunnel, four Flyers will come over the top of the mountain back out in the open area. But you could also have attracted the attention of one or more Guards at the other end of the tunnel. It will take a while for the Flyers to catch up with you, so one strategy is to charge through the tunnel and take down the Guards first. Watch out for the one standing in a very dark area to the left of the tunnel as you emerge. Then go back for the Flyers. There are Enforcers beyond the tunnel as well as the Guards, so be quick and continue to watch your rear.

Alternatively, shoot any Guards that rush at you from the tunnel but don't go in, instead race back across the bridge to take cover where you started the level. Now you can face all the enemies and don't need to worry about attacks from behind.
With all four Flyers down, continue through the tunnel and beyond. You will pass over two cracks in the ground through which you can see the river flowing underneath and then the river canyon will be on your right. Just follow the rifts and ledges, taking out the Guards and Enforcers as you meet them. Soon the bank drops close to the water level and the end of the river appears ahead. Guards are grouped here, both in plain view and in a dark area to the left. To the right, the Marine who was originally tasked with the placement of the marker sits having lost his head (unless you've gibbed him in the fighting). Next to him is the air strike marker, which looks rather like a 1960's portable TV set. Grab it; maybe Hogan's Heroes is on! Your field computer will read "Place airstrike marker in the receptacle beside the fuel pod".
If you want to score all the enemy kills, this is a good time to think about the Barracuda Sharks in the river. See the section The River, below. Otherwise, just press on. You can come back at any time.

The Fuel Pipeline[edit]
Take the air strike marker to the left. At first you will be in a cave, but then you will come out into a narrow rift that leads down into a wider valley. In the valley, you can see the fuel pipeline. There are small buildings set into the mountain wall both to the right and the left. There are Gunners waiting just outside the doors of both buildings, four Flyers up and around to the left and a stray Guard roaming the valley floor. After clearing away these enemies, if you try to enter either of the buildings you will receive the message "This door is locked from the inside". All the way to the left from where you came down into the valley, there is some kind of storage tank or machinery in the pipeline, this is the "pod" you're looking for. Around the back, there is an opening. Go up to it and put the marker in.

After a few seconds, you will receive the message "Airstrike incoming in: 10" and the number will count down. To keep busy, go to the other end of the valley and explore the building over there, in which you will find assorted useful stuff. This also keeps you out of the way of the bombs, such as they are. The door to the building will open and out will come three Guards and an Enforcer. When they are down, turn around and watch an aircraft fly overhead and three bombs come down. One scores a direct hit on the fuel pod. Your field computer now reads "Target destroyed. Proceed to exit". Go back to the pod end of the pipeline where the air strike has broken down the door to the other building. Deal with the Gunner in there and make your way inside and to the back, through a door and press the button marked EXIT. The ground shakes and the level, and the unit, ends.
The River[edit]
You can ignore the river unless a) you want to score all enemy kills or b) you fall in. In either case, try to kill the Barracuda Sharks before they bite you. There are a total of fourteen. If you swim from the air strike marker, you will find eight in the part of the river that runs below the ledge on which you walked to get there and then forks right to go through a pipe and end. Most of these you could shoot from the ledge, but you may have to swim for one or two. If you swim and take the left fork, the river goes to the canyon under the bridge where you arrived in the level. The other six Barracuda Sharks are distributed along here. If you went back to the bridge, you could shoot a couple from the banks there, but you will have to swim for the others. Disappointingly, there is nothing really worth seeing or collecting on the river bed.
Secrets[edit]
This level has no secrets.