| Map Name | Initial Coordinates |
|---|---|
| lab | (64 504 38) : 90° (facing west) |
Level objective[edit]
The objective for this level is to locate the Repair Facility, steal the Commander's Head, then retrace your steps and return to the Outer Hangar. The Repair Facility is a room within this level.
Strategy[edit]
This level has a straightforward objective and a single entrance / exit through which you both enter and leave. If you find your way blocked, then you have missed something that you need to do, such as deploying a bridge or shutting off force fields. However, it is rather maze-like, having a lot of similar-looking passages connecting the various laboratories and other rooms and it is easy to lose track of where you are, where you've already been and where you need to go next. On the plus side, the twists and turns in the passages give you plenty of cover from behind which to shoot at the enemies, who, for the most part, are quickly dispatched.

Wounded comrades abound and, for their own sakes as well as yours, should be put out of their misery and cleared out of your gosh-darned way. Some of them may give you any ammunition they happen to be carrying. There are a lot of Parasites, usually in twos or threes (hard difficulty). There are also Medics, so watch out for their ability to revive defeated Strogg that you have neglected to gib. Gib all your enemy kills in this level, just to be on the safe side, unless you want to fight them twice. Areas that you've already visited and cleared of enemies are not necessarily still clear when you return to them so don't assume this. Be prepared for enemies to appear suddenly, rising from the floor or dropping from the ceiling or even, in one case, emerging from a hidden alcove just behind you.
Walkthrough[edit]
To the Blue Key[edit]
The level begins with an anteroom from which you must gain access to the Research Lab itself. On the left is a holding cell where several of your comrades wait to be the subjects of Strogg experiments. The windows are spattered with blood (see Secret and Easter Egg, below). The locked door to the Lab is opposite to you and a computer console is down a few steps to the right. Press back the keyboard of the computer and receive the message "Access granted to Research Lab". As soon as the door opens you will be set upon by three Parasites (hard difficulty), so equip a weapon suitable for dispatching them. Follow the passage beyond the door around two bends and turn back to deal with three more Parasites (hard difficulty) that emerge from a hidden alcove. There is Combat Armor in the alcove, but remember that you'll be coming back so you can safely leave it to pick up later when, just possibly, you'll need it more than you do now. Continuing around another corner, you'll see an elevator shaft blocked by a pale-yellow force field. At hard difficulty, there will be two Iron Maidens standing here. Turning left at the elevator, you will approach a tee intersection and two Iron Maidens will slip out, one from each side, to do battle.

If you go to the right at the tee, you will not get far before you come to a door that needs the Blue Key to open. Therefore, go to the left at the tee and through the door. There is some nasty research going on in here and you can help out, if you like, by pushing back the computer keyboards, but what will be most nasty for you are the two Iron Maidens who rise on elevators from below the floor. A U-turn in this room brings you to another door, through which two more Parasites will rush when you open it. Turn left, through a door and right into another laboratory with more gruesome experiments. Kill the Brains and push back the keyboard on the computer with three displays to make the Blue Key rise from beneath the floor. Take it and retrace your steps as far as the tee intersection. A Medic has appeared in the first laboratory and, at the intersection, the ceiling will explode and another two Parasites will drop down.
The Maintenance Bridge[edit]
Go straight ahead to take the other door at the tee. After a turn to the right, you will have to fight another Medic and two more Parasites. Continue around two left-hand corners to an area with a glass panel in the floor. In the far corner is the door that requires the Blue Key to open. Beyond it is a short passage that turns to the left and then an elevator. Numbers show that you are presently on level 1. Step in and push the button to go down to level 2. When you step out and follow the passages, you will meet a Brain and then come to an area on your left guarded by two Parasites and accessed by two openings with a pillar in between. All the way back in there is a computer console. Press back the keyboard to receive the message "Maintenance bridge activated". Note that close to the computer console there is a section of floor that is slightly recessed. On your way out of this area, turn and back away from it. It will open and a Medic will come up. Deal with him and continue out to the passage. Note that the pillar between the two openings has some kind of computer display on it and there is a door opposite. Remember this. Call it the "pillar door". If you go through now, you won't get far because of a force field.
From facing the "pillar door", go to the left, where you have not yet explored. Look around the next corner to the right and you will see three Brains (hard difficulty). Either take them down from a distance or wait until they come closer, but don't advance down the next section of the passage until they are dealt with. Now turn to look back the way you have come, past the "pillar door". Edge to the left and into the passage where the Brains were and you will see a panel in the ceiling over the door explode and two Parasites drop down. You can, of course, just press on past the Brains, but the Parasites will be at your back. If you outrun them now, you'll still have to fight them when you return.

From where you saw the Brains, a turn to the left and through a door brings you to the room with the Maintenance Bridge in it. The bridge is made of a translucent material and below it is some kind of liquid that it would presumably be unpleasant to fall into. To the left, as you go down the slight incline, are three sort-of barrel-shaped structures and in between them are two wall buttons. You need to jump across to these from the bridge, press them and jump back. To reduce the chance of falling, run and jump to the buttons from the high side of the bridge and run and jump back towards the low side, but, in any case, save the game. On pressing the first button, you will receive the message "1 more to go..." and on pressing the second the messages "Sequence completed!" and, after a few seconds, "Forcefields deactivated". The force fields that you have deactivated are the one that blocked the first elevator that you encountered (on level 1) and the one that would have blocked your progress on the other side of the "pillar door", if you'd gone that way. (See Secret and Easter Egg, below, before leaving the bridge area.)
If you're not interested in completely exploring the level or scoring all the enemy kills, you do not need to visit the area on the other side of the bridge, so skip this paragraph. Otherwise, cross to the lower side of the bridge, turn right, go out of the door, turn left twice and through a door into another laboratory. Again, you can help out with the experiments by pushing back the keyboard on the computer and watching the effect on the Marines in the cylinders. When you're done, continue to the other door and go out into yet another passage where you will be set upon by even more Parasites. Around another right-hand turn you will arrive at a second elevator, with a number confirming that you are still on level 2. If you step in and press the button, you'll go back up to level 1. The opening was blocked by a force field until you deactivated it. Now you can step out, but there's nothing useful you can do up there and this walkthrough assumes that you ignore this elevator. Retrace your steps to the Maintenance Bridge. When you get there, you will have to fight three more Parasites (hard difficulty) that have appeared out of nowhere.

The Repair Facility and the Commander's Head[edit]
From the Maintenance Bridge room, whether you explored the other side or not, go back to the "pillar door" and through. A left turn in the passage will bring you to an elevator on which the floor number is not marked. Lights around the opening show where it was blocked by a force field until you deactivated it. Step in, press the button and go up. At the top, the passage will lead around two bends to the Repair Facility where a head-less Tank Commander lies on an operating table with robotic arms to the right and left. His head is on a small round dais to the left. Grab the head and watch him sit up and struggle as the table rises. Retrace your steps to the unmarked elevator and the "pillar door".
Through the door, turn left and retrace your steps to the elevator that brought you down. Take it up and make your way back to the entrance / exit. In the area with the glass floor, you will find a Medic (and any Strogg you failed to gib that it has revived). When you reach the tee intersection and turn left, the floor in front of you will explode and an Iron Maiden with rise up on a platform. While you're handling that, be aware than another one has come up in the same manner behind you. If you can get past the one ahead, perhaps with a Super Shotgun blast in the face to distract her, you can reach cover around the corner and take them out easily. The last two enemies are Iron Maidens waiting in the anteroom. Go back out to the Outer Hangar
Secret and Easter Egg[edit]
This level has one (1) secret and an easter egg:
- Along the side of the Maintenance Bridge opposite to the buttons are tiny cells in which marines are being held captive. Two of the Marines are alive, although obviously not too happy about that, but in the cell nearest to the upper end of the bridge the Marine is dead and one of the cell bars is broken. Shoot away the broken bar to receive the message "You have found a secret". The rear wall of the cell also breaks away to reveal a Quad Damage and some Slugs. Jump in to get them. If you kill the Parasites on the bridge with a weapon that has splash damage (Rockets or Grenades), then the bars may be broken and you will score the secret even though you did not get the goodies.
After completing the objective, you leave the level through the anteroom in which you started. If the left-hand window to the holding cell has the words "KILL ME" smeared on it in blood, you have triggered the easter egg. Shoot the window to break it and jump through. Crouch and go through the low tunnel on the left to another holding cell and you will receive the cryptic messages "A.H.D.S.S.I.B.H." and "bjjc". Numerous sources state that A.H.D.S.S.I.B.H. stands for A Hall Displays Secret Snapshots In Boss's House and that the initials are those of Brandon James and John Carmak. The snapshots appear in an easter egg in the last level, Final Showdown, after you have defeated The Makron. Crawl back through the tunnel and jump back out of the window to exit the level.
To trigger this easter egg, you need to kill all the Marines in this level that are accessible to your fire. Some you can kill by activating experimental apparatus, the rest you will have to shoot. Obviously, you will have to completely explore the level. Two Marines are easy to overlook; you need to kill them all. It is not necessary to make all the enemy kills, find the secret or even take the Commander's head to trigger the easter egg.
- Gallery : The Secret and the Easter Egg in the Research Lab
-
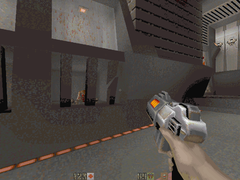
The cell with the broken bar.
-
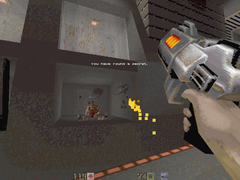
Shooting the bars away.
-
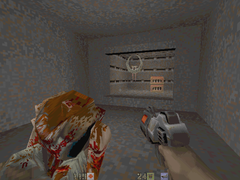
The alcove behind the cell.
-

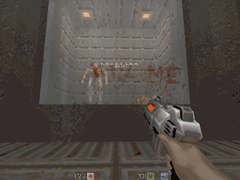
The easter egg is triggered.
-
The easter egg itself.


