The Den[edit]

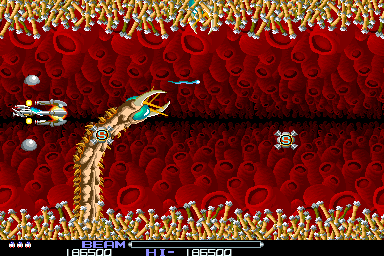
The predominant enemy throughout the fifth stage are giant serpent-like creatures who fly around the screen. They are multi-segmented, and they have two different responses to getting shot. If the head is destroyed, the entire body will explode outward, send segments flying in an expanding circle. If a middle segment is destroyed, the serpent divides in two, with the second section moving on its own accord from the head. The sides of this stage can be flown through. Additionally, the Reflection Laser will not bounces against the sides, nor will the Counter Ground Laser coast along the edges of the screen, making the Anti-Air Laser the most effective weapon for this stage. Two serpents will attack before the first power-up transport appears, which contains a speed-up. After another serpent, a second transport will appear, but what it contains can differ. Sometimes it has a speed-up, while other times it contains Reflection Lasers.

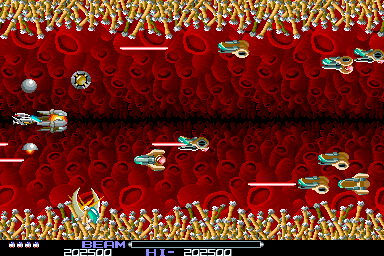
Remember not to overdose on speed, or the R-9a will become too hard to control with accuracy. After this second transport appears, assault ships will join the serpents, who continue to appear from the edges of the screen. The ships start out very sparse, and increase in frequency as you progress through the stage. A third power-up transport will appear, containing a Counter Ground Laser, which you should avoid collecting. After one alien mech appears, a set of ships fly from right to left, firing powerful red lasers which will pass through your Force and destroy the R-9a. Do not try to block these lasers with the Force, avoid them entirely. Try to use the Force or the Bits to take them out from the middle of the screen to the edges.

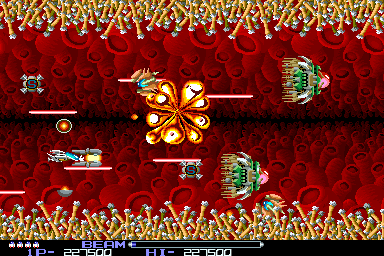
A few more ships and serpents will appear before another new enemy arrives. Large slow moving craft appear from the right and float to the left. They have a battery of guns which can shoot more red lasers at you. You must be very careful when facing these ships. Attack the highest or lowest of them, and do not get caught in the middle. Alternatively, you can enter the top or bottom edges of the screen and avoid facing them entirely. Two will appear on the bottom, followed much later by a third on top. In between, a transport will appear and provide Missiles. After the third ship, two more transports will offer speed. Another trio of ships will appear, starting with the middle, followed by the bottom and then the top. Finally, one last trio appear from top to bottom, while more serpents appear from the edges of the screen. A final transport appears, offering a Counter-Ground Laser, before the boss appear.
Boss: Bellmite[edit]

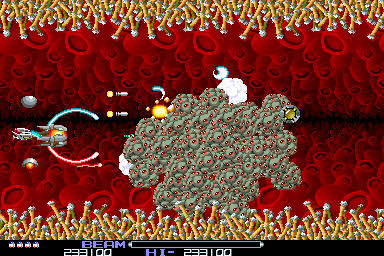
This boss resembles a collection of pods stuck to a central object. It will take some time and effort to clear away those pods until you can identify the object in the middle. In the meantime, many of the pods will occasionally rocket off from the main body and attack you, and then slowly regroup with the rest. You’ll have to shoot the pods and pick them off as they mass approaches the left side of the screen before floating back to the right. Don’t sit still, keep moving so that the pods never have the chance to hit you. Once the pods are thinned out, you will begin to make out an mechanical object in the middle. When it’s exposed to your lasers, shoot at it until it explodes.
Bellmite is the only boss in the game with a pseudo-random nature and as a result it can make or break the rest of your game. There is no set pattern to its movements like all the other bosses, you have to get used to how it moves - sometimes it will move slowly round the screen, other times it is very aggressive and will charge you. If it moves toward or away from you slowly when it first appears, this is a good indication that it will let you defeat it without too much trouble. Stay as far away as you can and just keep hammering it with shots. The air laser works best here, especially if you have both bits attached for maximum firepower.
When moving around Bellmite, don't rush round, move in small 'jerks' and time those movements as well as you can with the moment it launches a pod at you. This way it will usually fire a pod 'behind' your last position.
This boss takes a lot of practice but you will eventually get a feel for how it moves and how it fires at you.
If you don't have the air laser, the best tactic is to keep firing beams at it.
Demo defeating Bellmite without power ups
Loop 2[edit]
Enemy move faster and fire more. Bellmite is more aggressive and takes more shots to destroy the pods.