Rygar is an extremely linear game. The only goal is to run from the beginning of each round on the left side of the stage to the end of the round on the right side of the stage. Some stages may require that you climb up or down a rope in between before continuing on to the end. There are 27 stages in all, with a boss fight at the end of the very last stage before the game is completed, at which point the ending is shown and the player's game ends.
What follows are some brief explanations of each round, what to search for, and what to watch out for.
Round 1[edit]
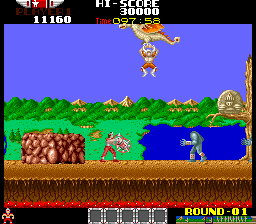
Naturally, a very simple level, it will introduce you to the game mechanics and the basic enemies that you will continue to face throughout the game. There is a crash icon that appears early on in the level every time you play. Maximize your score by attacking the dragons, but don't put yourself in danger to do so; attack the enemies on the ground first.
Round 2[edit]
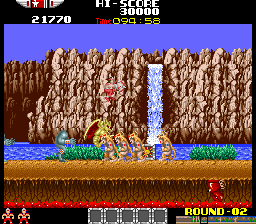
This second round can be quite a challenge for beginners. You will start facing the dive bombing griffins and the tower stacking mutant tribesmen. The Sun Power can be especially useful for fighting against both of them. With the Sun Power, you can walk very close to the tribesmen tower and fire a single shot upwards, killing all of them at once and earning a 10,000 point bonus. A hidden crash icon can only be obtained if you jump from the small space between a single block and a tree, after the second tribesmen tower.
Round 3[edit]
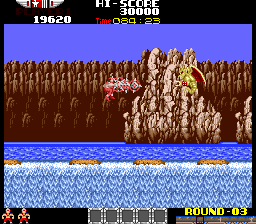
In this round, your only nemesis will be griffins. They will try to attack you as you leap over stones across a waterfall. Do your best to eliminate them by jumping up and attacking them as soon as they take flight. Jumping on griffins will not stun them, but you can use that fact as a trick to ride them across the entire level if they are flying to the right.
Round 4[edit]
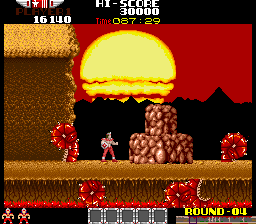
This round is comparatively easy. Giant Worms are the enemy which attack you in the greatest quantities, followed by lavamen. They come up through the ground with great frequency, but you can use this to your advantage because they are vulnerable to attack as they do so. You might discover a 1-up icon in one of the early stones of this level, but not always. You will benefit greatly if you've acquired the Crown Power by this time, and if you have not, you should attempt to remain in the round for as long as possible in order to do so. Approach the end of the stage cautiously and don't rush in when you see the Giant Demon. Let him leap towards you and attack him when he is close. If you have the Tiger Power and manage to jump on the Giant Demon, you get 50000 points.
Round 5[edit]
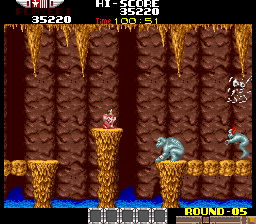
Blue Monkeys will make a nuisance out of themselves throughout this round, as will the Cave Bat once you get closer to the rope. Take the monkeys out as quickly as possible, or jump on top of them if you have the Tiger Power, while watching out for the Griffins which appear. When you get close to the rope, take out the Cave Bat periodically. Even though he will instantly reappear, it will prevent him from bombing you. Time your climb up the rope to avoid the Cave Lizard's tongues.
Round 6[edit]
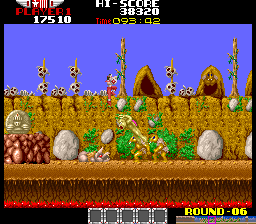
There is a lot to watch out for on this round, so it's best to advance slowly and clear the area out as you proceed. The obvious threat is the mutant villagers who pour out of the caves above and leap down to attack you. If you stop as soon as you see them and back up a bit, you will make it difficult for them to surround you. Less noticeable, but no less deadly are the mutant frogs who can really surprise you by leaping at you if you don't take them out quickly enough. As usual, don't underestimate the small rhinos, which you must kneel down to attack. There are two icons that can be found in stones that only appear when you jump in the right location below the caves, but they are difficult to find when you are focusing on the enemies.
Round 7[edit]
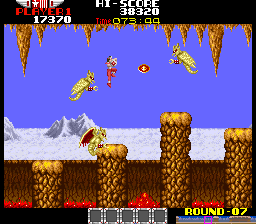
The start of this round will consist of jumping from various platforms while dodging attacks from Griffins. Depending on the level of difficulty, they may even start shooting projectiles at you. Watch out for the flames that shoot out from the lava, and don't get distracted by the measly 200 point bonuses that appear sporadically. Near the end, you will start facing blue monkeys. If you've played well, one of the stones inside this tunnel will contain the Cross Power up. As soon as you grab it, a force field will surround you for 30 seconds. You can transfer this power along to the next round. If you have died before, or don't have all of the powers yet, may Cross Power will appear sooner.
Round 8[edit]
An abundance of lavamen will attack you throughout this round, in addition to giant worms and small rhinos. A few crash icons are hidden in stones that are revealed by jumping in the right place. The occasional flying squirrel attack from up above shouldn't pose too much of a threat. The greater danger is getting squeezed from either side by the flames that the lavamen will spit. This is especially true near the end of the stage when you are forced to deal with a Giant Demon as well. Try to take out the lavamen that surround you before focusing on the Giant Demon, and let the demon jump towards you in order to fight it safely.
Round 9[edit]
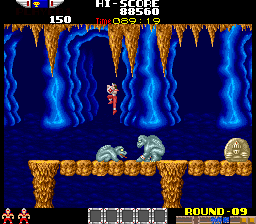
This round will feel like the reverse of the fifth round. You start out by almost immediately reaching a rope which you must climb down while a Cave Bat flies overhead, and Cave Lizards try to lick you as you descend. Take your time and deal with the Cave Bat every now and then so that it doesn't bomb you. When you reach the bottom, you only have a few short platforms to deal with while Blue Monkeys appear until you reach the temple. A Crown Power is hidden in a stone that will appear if you jump on the beginning of the first bridge after the rope.
Round 10[edit]
This round will unquestionably test the number of enemies that you can handle at one time. Small rhinos are on the attack constantly, forcing you to stop your progress and crouch down in order to remove them. Meanwhile, dragons fly by dropping off dragon riders who will rush you from either direction. Add to that some Apes and Flying Squirrels in the trees, Mutant Frogs in the distance, and Lavamen coming up from underground, and you have a messy situation. A Sun Power can be found if you jump under the branch of the first tree with the Ape in it. Two more stones can be found by jumping in the space between the blocks later on in the stage.
Round 11[edit]
A short but challenging stage, you will begin by dealing with a Cave Bat and Cave Lizards while you climb up a rope. This is no different than any of the previous rope sections you've faced. However, when you reach the top, you will be primarily concerned with Blue Monkeys, Lavamen, and a brand new enemy, the Tentacle Mutants. These mutants walk up to you from either side and lash out at you with their tentacle-like arms. They don't need to be very close in order to hit you, and if you don't have the Star Power, you may find dueling with them a bit difficult. Strike early in order to be sure that you hit them before they hit you.
Round 12[edit]
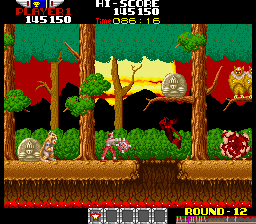
In this round, you will find that an old enemy has learned a new trick. Mutant Tribesmen pour on to the screen from every direction throughout this round, typically in two groups of four. They are no longer interested in gathering in a tower, and would instead prefer to simply charge in your direction. They will leap over gaps and bricks. Be on guard at all times, as greed is more likely to do you in than anything else. An extra life can be found in a stone on the branch just before two flying squirrels. The easiest way to collect it is to use the squirrels as trampolines to the branch and then break the stone. A crash icon can be found by jumping below the branch that the second ape is found in. Watch out for snakes in the rocks where the Tribesmen do actually gather in towers. If that weren't enough, there's a Giant Demon waiting for you at the end of the round, preceded by three small crabs.
Round 13[edit]
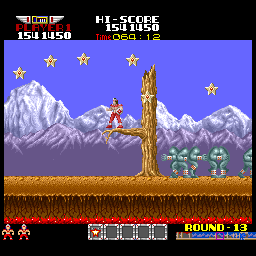
This round probably contains the most secrets of any round. You will start off by facing your old pal, the drones again. Don't breathe a sigh of relief as they are significantly faster than they were when you previously saw them. Rhinos will also appear, including a few that contain ax-throwing dragon riders on their back. More dragon riders will be brought in by dragon. By the middle of the stage, you will encounter a tree with a stone on it. This stone, and many invisible points around the tree can be hit with your diskarmor to make stars appear. You get credit for finding them in addition to collecting them, so it's possible to earn a big bonus just by making them appear. See the Bonuses section for more information about a secret you can find on this round that's worth a whopping one million points. Don't get lured into staying too long and causing Death to appear.
Round 14[edit]
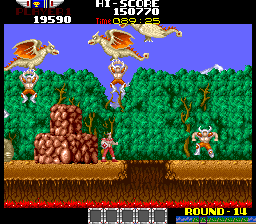
Compared to previous rounds, this one is fairly straightforward. The primary enemy is dragon riders brought in by dragon. This actually gives you a valuable scoring opportunity since dragons are worth quite a lot of points. The biggest threat to your survival in the beginning are the Mutant Tribesmen who play leap frog off the back of their leader. When you see them, you may want to retreat a few steps before turning around to fight them. Mystery icons tend to crop up a lot on this stage. If you see one, make sure that you hit it with your diskarmor until it becomes the Cross Power. Watch out for the crabs on the floor.
Round 15[edit]
Take this round fairly cautiously. The enemies that occupy the area, primarily blue monkeys and small rhinos, aren't dangerous by themselves, but when faced as a group, it can be easy to get surrounded or overwhelmed. Watch out for the snakes in the small hillsides, and be especially aware of dragon rider rhinos and the axes they throw at you. If your fully powered up and take the time to clear out the area ahead of you, you should have no difficulty finishing the round. If you don't have many power ups at this time, you may find it tough, but try to collect any power ups that get left behind for you.
Round 16[edit]
Altogether, this round is another fairly relaxed round, as long as you at least have the Star Power. The primary threat of this round are the Tentacle Mutants with their long reach. A number of small rhinos and griffins round out the area giving you enough to keep you on your toes. Be patient when leaping over the fireball sections. Since this is a fourth round, you will face a Giant Demon at the end. Since the threat level is fairly low, try to jump on its head for the 50,000 point bonus if you have the Tiger Power. Otherwise, lure it in at a safe distance and wail away.
Round 17[edit]
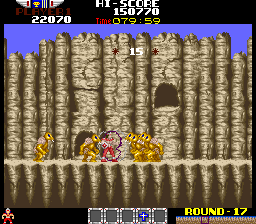
As the temple before the start of this round indicates, you will be able to find the Cross Power in here. This is a level you can actually take some time to enjoy. Mutant Villagers will pour out of several caves, and you should make sure to stop and clear them out before you advance any further. Mutant Tribesmen will form numerous stacks for you to knock down and earn 10,000 point bonuses. Just be sure that the area around you is clear of enemies before you focus on the towers. Otherwise, take them out from a safe distance along with all the other enemies. Once you grab the Cross Power, you can charge through to the end of the stage, but you likely will not end with enough to bring over to the next round.
Round 18[edit]
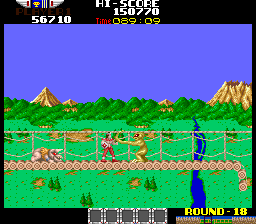
You will primarily face Tentacle Mutants and Mutant Villagers in this area, along with some small rhinos. An extra life will appear from a stone that rises out of the ground when you walk over the area, slightly before the bridge. You will face two groups of Mutant Tribesmen early on in the bridge. The first group will leapfrog over the leader, while the second group will form a tower. Be sure jump over the gaps in the bridge while you fight more Tentacle Mutants. More of the first section of the round follows after the bridge. This is a long stage, and time is not on your side. Unless you luck out and find a lot of time icons, be judicious about what you double back for. Little red bonus items aren't worth the trouble of having to avoid Death if time runs out.
Round 19[edit]
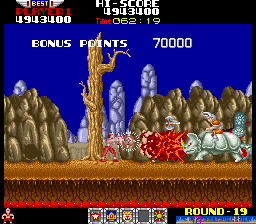
This round consists of a large quantity of rhinos, some with ax-throwing dragon riders, and some without. It's also a very long stage, so time is of the essence. If you have the Tiger Power, and haven't frequently used it to jump on enemies in order to destroy them, you're going to want to adopt that strategy for this stage, or you're going to find it difficult to get all the way through without running out of time. In addition to the rhinos, you also have to deal with giant worms, small rhinos, and snakes. If you do jump on the backs of the rhinos, take care to note where smaller enemies are when you land back on the ground.
Round 20[edit]
Constant attacks by griffins is the theme of this round. As you proceed through the level, jumping from platform to platform, griffins will spawn on either side of you at all times. There can be upwards of five or six on the screen at one time. You should be judicious in which ones you interact with and which ones you ignore; many who fly away from you and in front of you will not harm you, and are likely to keep other griffins at bay. Lavamen are the other threat throughout this round until you reach the end where you are forced to face a Giant Demon. Although this round is long, time items seem to be in great abundance here.
Round 21[edit]
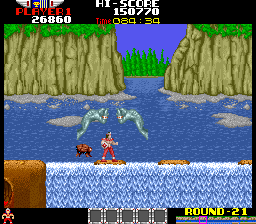
Griffins are back again, only not in nearly as large numbers as the previous round. You will primarily face Blue Monkeys in this round, but you will also face a brand new enemy: the Giant Flying Fish. These fish will leap out of the water and over the small islands that you must hop over as you cross the waterfall. Pay attention to the water on either side of the island you are standing on, or about to jump to. If it appears to ripple, a fish is about to jump out. You can either squat down on the center of the island to avoid getting hurt, or leap out of harms way.
Round 22[edit]
This round appears very much like the last one, only you will immediately notice the addition of dragons and dragon riders. You will have to jump over islands in a waterfall early on while avoiding both the descending dragon riders and the Giant Flying Fish that hop out of the water. Eventually, you will end up back on land, in front of a long building. Dragon riders will continue to drop from the sky while Blue Monkeys advance on you. At various intervals, Mutant Tribesmen will show up to stop you. Most of them will form towers, but a few will leapfrog instead. Don't get too greedy and try for the bonus if there are too many other enemies nearby.
Round 23[edit]
In comparison to previous stages, this one is rather low key. It starts with a descent down a rope, so you must contend with a Cave Bat and Cave Lizards, but it is no more challenging than previous iterations. Then when you reach the bottom, a few griffins will spawn, but the platforms in the lava keep you low enough to avoid most of the threat they present when they dive down to attack you. Finally, Blue Monkeys will show up near the end of the round, but too late for them to spawn in significant numbers and gang up on you.
Round 24[edit]
Like the reverse of the previous round, you will begin the round by climbing up a rope back to the surface. Avoid the bat and lizards and make it safely to the top. Once there, you will face a number of Mutant Tribesmen. They will appear in very large numbers, and they won't form towers, but they also won't be running at their fastest speed, so they are actually quite manageable to deal with. If you are in a difficult position and can't attack them, find a safe spot, like right next to a block that they happen to be jumping over, until all of them pass. Watch out for the Giant Demon at the end of this level before you proceed to the finish.
Round 25[edit]
You are primarily up against small rhinos and mutant frogs in this level, but a few other enemies are sprinkled in. You are likely to find the Cross Power very early on in the level. However, this particular Cross Power will only last for 10 seconds. However short it may be, anything is better than nothing, so pick it up and use it to advance yourself as far as you can safely. When it wears off, be sure to pick off the mutant frogs at a distance (assuming you have the Star Power) as quickly as possible, or jump on them (assuming you have the Tiger Power) if they leap at you.
Round 26[edit]
This round, the second to last in the entire game, features an aggressive mix of enemies, including rhinos and dragon riders. Few of the rhinos will have dragon riders on top of them, but some will make an appearance. When in doubt, try to jump off of them as a quick method of clearing them out. Small rhinos abound on this stage too, and you must make sure that dragons aren't depositing more dragon riders ahead of you. A fairly easy to obtain extra life can be found not too long after this round begins.
Round 27[edit]
Regardless of how long it takes you to reach the end of this round, you will encounter a repeating pattern of enemies; a tower forming team of Mutant Tribemen, followed by leapfrog Tribesmen, two dragon rider rhinos, a set of griffins, a set of rhinos followed by a few smaller rhinos, and one last set of griffins before the series repeats. You will know that you are close to the end of the round when you encounter not one, but two Giant Demons. Beyond the two demons is the final chamber where you must fight again Ligar, a giant enemy who bounces back and forth in the room. When the computer takes over and advances you into the room, continue to push the joystick to the right, as Ligar is going to continue leaping towards you and the computer will place the player right in the path of Ligar's jump. If you keep running right, you should remain safe. All you must do is hit Ligar several times with the diskarmor. It does not matter where, as long as Ligar is not facing away from you as you hit him (or you will hear the distinctive ping sound). Stay near the center of the room and crouch when he leaps over you, and flail the diskarmor at him in between jumps. Stay focused and you will beat the game.