This is the final stage, where you make your approach to Zelos' fortress, breach it, and destroy the evil force threatening your home planet. It starts out with squadrons of Beruberumus attacking you. Unlike most stage beginnings, most of these enemies are gray and do not provide you with any power-ups. However, a few gold squads will be mixed in with the crowd, and the first set provides you with a Force Field. After the Beruberumus, Amukakemudomiras arrive, take their shots at you, and flee.
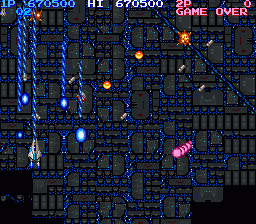
As the stage progresses, the terrain will scroll into view. You will see pink glowing bursts rise from the ground, and they are quite lethal. They must be avoided entirely. After the Amukakemudomiras stop appearing, the only other enemy you must worry about for a short while are the Crystal Bombs. They appear from various locations at the top of the screen, and generally streak toward you. They also fire projectiles at you quite aggressively. If you don't have sufficient fire power, the safest maneuver is to fly around the bottom in a sideways figure 8 (fly to a bottom corner, then about half way up the side, then to the opposite lower corner, up the opposite side, and so on.)
The Crystal Bombs will stop appearing when the music changes. If you are familiar with Gradius, then you may recognize it as the music which plays when you fight against the Big Cores at the end of each stage. The game has a little surprise for you: You are about to fight three Big Cores back to back. Other than the fact that you must fight them in a vertical orientation, they are identical to those found in the original game. In fact, there is a little cheat you can perform to take advantage of them. Your ship is entirely safe if you fly all the way up to the top of the screen. If you leave your Options behind you in tow, they will proceed to fight the Big Core for you while your ship remains safely out of harms way.
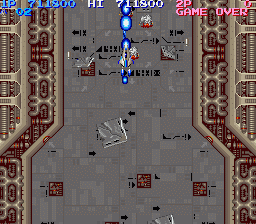
As soon as the third Big Core is destroyed, remember to fly quickly down to the bottom before the Kepittos show up and destroy you. After the three Big Cores, you will head deeper inside the fortress. As you do, you will pass through an entrance in the center. You will collide with the terrain on the sides if you are not careful. Once inside, you must be especially mindful of the tiles of floor that begin to rip and fly at your ship. They generally travel down and slightly to the right as they rise from the ground.
In addition to the floor tiles which fly up from the ground, cannons and other enemies are placed along the sides of the fortress. While your missiles will take them out when then eventually reach them, the are will be scrolling by quite quickly, and give them enough time to be a pain by firing upon you. A safe strategy is to stay low on the screen and fire up along one side. You will remove any threat on your side faster with regular shot and be far enough away from the opposite side, while still being able to adjust your ship when the passage narrows. Alternatively, you can push your ship to the top and take out many of the threats just as they arrive on the screen, but it's difficult to get past the early cannons with this method.
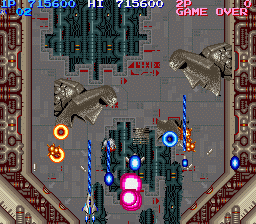
If the Big Cores weren't enough of a blast from the past, you're about to get another one: the Moais. The Easter Island statues make their appearance in every Gradius game and Salamander is no exception. They've even learned a new trick, as they can hop around a room while they fill it with flashing energy rings. The first few that you encounter may even jump off the screen as it scrolls by. However, by the time you reach the last two, the scrolling will have slowed down significantly, and you will have to fight the last two in earnest. All of the Moais can be destroyed by firing a few weapons into their open mouth. However it can be difficult to find a clear shot at two of them, let alone three, when they crowd the bottom of the screen. Lure them up to the top before you try to attack, or better yet, be prepared to take one side of them out before they even have a chance to leap off the wall. Keep in mind that the pink bursts will continue to arrive throughout these encounters, so be sure to avoid them.
Like Aircraft Carrier Death before it, Zelos will appear from behind you. It is quite wide and fits into a narrow passage, you need to wait for it to appear on either side of the screen. It will lock into place, and attempt to crush you. All that you must do to defeat it is shoot out the locks that hold it in place along the wall. If you have Missiles, you don't have to do anything beyond letting them do their work. If you don't have Missiles, you'll have to carefully line up with both sides of the passage and shoot out the locks yourself. That will cause Zelos to fall and crash through the floor below.
Don't be surprised by the lack of difficulty of this battle, the hard part is just beginning. Now that Zelos has been destroyed, the fortress will engage in an effort to lock itself down before it self destructs. As a result, you will be forced to fly through a variety of barriers that extend from the walls on either side. The pace of the scroll is extremely fast, and you really won't have a lot of time to react to the appearance of the barriers. Even flying all the way to the top of the screen will result in you dying at least two times. This strategy is fine if you've managed to store up a couple of lives, but since that isn't likely the case, you'll need to try to develop a strategy to escape unharmed. The first barrier closes off completely, but it extends longer from the right than from the left so fly high and stay to the left. After that, the gaps zig zag back and forth, and you should have enough time to react to them if you settle back down to the bottom of the screen. When the passage narrows, the barriers will actually close off completely. At this point, fly up to the top and in the center of the screen. Two more barriers will leave gaps in the middle, one large and one small, and then you will be free to watch the ending and the credits. After the credits conclude, you will begin back at Stage 1 again at a higher level of difficulty.