Before you reach the A, you will first encounter a group of flying enemies, followed by some cannons on the floor and ceiling, and enemy chutes which will release two clutches of enemies. The pod before the section end has a bonus.
Section B
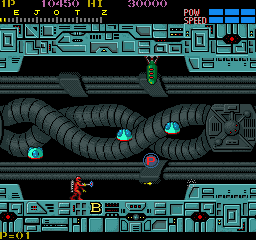
The tall green canister on the floor contains gas. The first shot will release deadly clouds of gas from the cannister, while the next shot will destroy it. The first pod on the ceiling contains a Speed Up. Two more pods appear on the floor. The first one has a Spinner, and the next one contains an alien. The section ends with enemies flying in from either direction.
Section C
The first Power Up pod is on the floor below the green cannister on the ceiling. Don't miss it. Focus your attack on the hatches that release enemies as you fly by them.
Section D
The pod on the ceiling before the C has a spinner, while the pod on the floor after the C has an alien. Pay attention to the cannon shots here, and watch out for the enemies which fly in from the left. Another pod on the floor has a bonus.
Section E
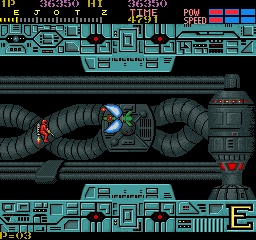
A second Power-Up can be found in the pod right after this section begins. Don't try to shoot the high cannons on the ceiling from the left if the ceiling before it is low. Watch out for the bullets of the enemies which fly in from left. The boss is shaped kind of like an arrow. It will attack you from either direction, so always turn to face it. The head will open up to reveal a cannon which will shoot at you. You must time your shots to hit the cannon when the head is open.
You'll have to carefully weave your way through the field of bullets that get created by the cannons attached to either wall. Focus on staying alive while shooting at the walls so as to remove the cannons when you get a chance.
Section G
Wall mounted enemies will appear from the top and travel up and down while they remain on the screen. Whenever they line up with you horizontally, they will shoot a laser at you. Stay in the center of the screen, and try to remove them one at a time. Their appearance will alternate between the left and right sides of the screen.
Section H
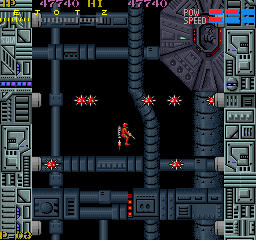
This section features tubes which shoot large numbers of spiked balls straight across the screen in both directions. You have to time your progress between the tubes so as to avoid getting hit by the balls. While you can shoot at the balls, it's not a recommended strategy since they will appear on both sides quicker than you can react to them.
Section I
Large clusters of cannons appear throughout this section. Many appear in alcoves which diminishes the effectiveness of your grenades. At the very end of this section, a large horizontal beam travels down the screen. An opening appears in the middle which you must fly through in order to survive.
Section J
A Power-Up and Speed-Up pod appears near the beginning of this section, along with an enemy hatch. For the remainder of the section, enemies will fly around the screen until you reach the boss. The boss is a segmented snake which moves around the screen shooting at you. Once you hit it in the head enough time, the body will break apart, and the segments will fly around and attack you independently. The segments are easy to destroy.
You will now be flying to the left. Immediately, there is a pod that contains a Spinner. If you've managed to hold on to your fire power, you should have little problem getting it to 10,000 points, but don't allow it to distract you from the cannon fire which quickly follows. Before this section ends, you will see a new threat, the laser pods. Try to shoot the control mechanism just beyond the top laser pod to disable the laser it emits.
Section L
There are a number of threats to be aware of in this sections, including laser pods, green gas cannisters, and flying aliens. In addition, there will be several pods which contain enhancements, but they can be difficult to get to without putting yourself in a lot of danger.
Section M
This section is predominantly like the previous section. Two more pods can be found which contain Bonuses. Stay focused on the immediate danger around you, and destroy the control mechanisms to disable the laser pods.
Section N
The two major threats you face in this section are the cannon clusters, and the wall mounted walking cannons. Many of the cannon clusters can be instantly deactivated by shooting a control mechanism somewhere on the middle platform where the cannons are located. The walking cannons will appear on both the floor and ceiling, and must be dealt with independently. Two wall mounted laser shooters will also appear.
Section O
This section is the oddly-themed pinball section. Loads of indestructible "pinballs" will bounce around the screen. Your only objective is to avoid getting hit by them and stay alive. While they can be destroyed with bombs, it's difficult to do intentionally. After the pinball section, you will face the boss. You start out by facing four machines which light up on the top of bottom depending on their relative position to you. They will only be vulnerable on the side in which they are lit up. After the first four are destroyed, a large machine will appear. This one will emit green suited jet pack soldiers to fight against you. Other than that, it behaves very much like the previous machines, but it takes many more hits to destroy.
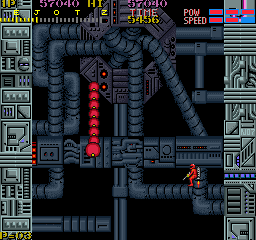
The first section of this vertical stretch is a series of corridors that you must zig zag through. Cannons wait on either end of the tunnels that you must traverse. Use your bombs to destroy what you can, and be very careful about attacking the rest with your lasers. Waves of enemies will approach you from either direction. Near the end, you must destroy doors that try to lock you in, while a large rolling enemy rolls down the shaft. Get out of its way.
Section Q
As soon as you get through the corridors, a large number of hopping enemies will spring towards you. Be very careful not to fly into the middle of them. After you get through that room, the shaft will divide into three sections. Enemies will fly up from the bottom and bounce between the walls that break up the shaft. Dedicate yourself to one shaft and very carefully avoid the enemies.
Section R
This section contains cannon clusters just like section N. But you will also have to deal with rather large fly-like insects that buzz onto the screen. Part of the way through four pods will appear, each of which contain a different item. The flies and the cannon clusters will continue. Just before the end, two more pods will appear.
Section S
Once again, a variety of enemies will confront you. Flying aliens will zoom around the screen. Cannons will appear on the left and right walls, and laser cannons will move up and down firing at you when they are at the same level as you. It will end with three sets of tubes that shoot the same spiked balls as from section H.
Section T
The section will begin with a few wall mounted laser cannons. After you destroy them, the remainder of the level will be a series of floating enemies which appear from the top and bottom and shoot at you. Keep moving in order to dodge their fire. When you reach the end, the boss will appear. The boss has a clock like appearance, with red squares at 12, 3, 6, and 9. As you fire at the boss, the red squares will turn black in counter-clockwise order. After the final square at 3 turns black, the boss will be defeated.
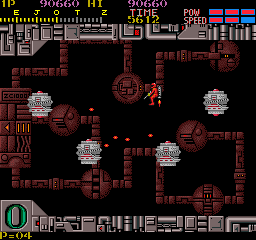
The section starts with a few cannon, and a Power-Up pod. Immediately after, a small shaft will be full of purple mounts, from which heads rise up and shoot at you. You can destroy the heads, but they're small and a bit hard to hit. Beyond that, some cannons surround an enemy hatch.
Section V
A protected hatch fires balls into the middle of the corridor. These balls will continue to appear long after the hatch has scrolled off the screen. Each ball will independently choose a path that lies either through the middle, or along the top and bottom of the small platforms that line the section. They will fire bullets at you, so you'll need to keep moving as you shoot at them.
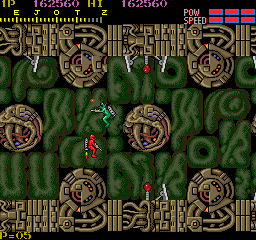
Section W
This section contains shield electric conductors which fire beams from one another. Your bombs have a decent chance of hitting the ones at the bottom, so focus your lasers on the ones at the top. Stay alert for the bugs that also fly around the section.
Section X
Beams fly out between the covered hatches that line top and bottom layers of section. They can be destroyed, but only when the covers are open. It's best to simply time your flight between the thinner portions of the section. Before you reach the end, you will have to fly between walls mounted with cannons.
Section Y
A series of pods can be found along the floor, but every single one of them contains a baby alien which you can shoot for a 1000 point bonus. After that, cannons surround a set of hatches which will release enemies.
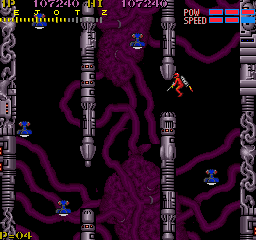
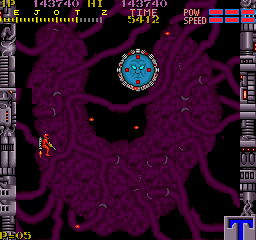
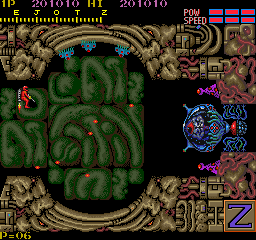
Section Z
As you near the end of the game, purple organic mounds dot the surface of the section. On these mounds, blue cannon like enemies appear which are far easier to destroy with bombs than with lasers. Between the mounds, regular cannons will also fire at you. You will reach a circular section at the end, with the infamous L-Brain against the far wall. Avoid the cannon shots, and shoot the L-Brain right in the middle where its eye is located. After enough hits, it will be destroyed. You will then start over from Section A again at a higher degree of difficulty.