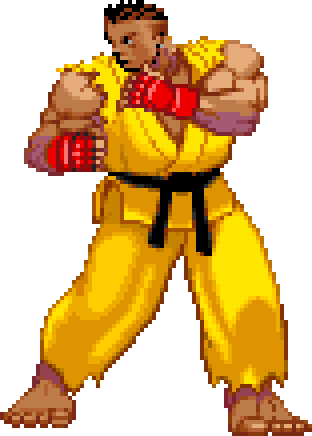
When Sean went to the US Martial Arts Tournament and saw Ken in action, he was determined to become his pupil. Ken rejected many of Sean's requests until he heard Sean was planning on entering the third World Warrior tournament. Over the course of a single year, Sean had been training under Ken for this tournament. When the tournament began, Sean had high hopes of winning, however he was beaten by Ken himself. Although skilled in his fighting style, Sean lacked the discipline and experience to make it too far as a fighter in the U.S. championship tournament. He was knocked out in the preliminaries. Despite this, he kept his big dreams of one day winning a tournament of his own, even turning down Ken's offer of the U.S. trophy, claiming he wanted to earn his own one day.
Despite the loss at the tournament, Sean continues to train with Ken, and it's possible he's also training alongside Ken's son, Mel. It is likely Sean is familiar with Ken's son, as well as his wife Eliza, and could very well be staying at their home for training purposes. Sean wears a yellow gi, similar to Ryu and Ken's with the sleeves removed at the shoulders. He fights barefooted and dons a black belt. He wears dreadlocks with the sides shaved off leaving only the top. He is an avid basketball fan.
Sean is often referred to as the "Dan Hibiki" of Street Fighter III since they both use modified versions of Ryu & Ken's traditional Special Moves. However, this comparison is questionable, as Dan is an intentionally ineffective joke character, whereas Sean is considered difficult to use, but still an effective character.
In 2nd Impact, Sean can link/combo his 3rd Super Art after some of his special moves. Though the super will do less damage, it will add a small amount of Stun to the opponent's Stun gauge. In 3rd Strike some of his moves, most notably his anti-air uppercut (Dragon Smash), were toned down in effectiveness. His overhead heel kick (Ryubi Kyaku) no longer paused before execution though, making it much more useful. Also in this third iteration, Sean was given many new standard attacks and two of his special moves were changed to feature all-new animation frames.
Personal Action[edit]
When you perform Sean's personal action (![]() +
+![]() ), all of his attacks do more stun damage. You can taunt more than once to increase the amount of stun damage you do (after three taunts, you won't earn any more damage). His personal action can hit somebody (you can even use it to start combos), but if you try to throw another basketball after the first one was thrown, Sean will jump up and panic when no basketball comes down.
), all of his attacks do more stun damage. You can taunt more than once to increase the amount of stun damage you do (after three taunts, you won't earn any more damage). His personal action can hit somebody (you can even use it to start combos), but if you try to throw another basketball after the first one was thrown, Sean will jump up and panic when no basketball comes down.
Moves[edit]
Street Fighter III[edit]

Street Fighter III: 2nd Impact[edit]

Street Fighter III: 3rd Strike[edit]

| Target Combos |
|---|
| (close) |
| (close) |